
What’s inside this Blog:
Table of Contents
How to Make Greek Yogurt at Home (The Real, No-Nonsense Way)
Let’s be honest — homemade Greek yogurt sounds like something only health bloggers or off-grid foodies would bother with. But here’s the surprise: it’s easier, cleaner, and often better-tasting than store-bought. No mystery thickeners. No plastic tubs. Just creamy, tangy, protein-packed yogurt… made in your kitchen.
In this guide, you’ll learn exactly how to make Homemade Greek Yogurt — whether you’ve got a stovetop, an Instant Pot, or just a warm oven. We’ll cover everything from the best milk to use to how to get that thick, silky texture (without fancy gear). And if you’re wondering about cost? Yep — it’s cheaper too.
By the end of this, you’ll know exactly how to make your own Homemade Greek Yogurt — tangy, thick, fridge-ready — and feel weirdly proud every time you open the lid.
Why Make Homemade Greek Yogurt? (Hint: It’s Not Just About the Savings)
You’ve probably walked past the wall of Greek yogurt at the grocery store — rows of tiny tubs promising “extra protein” and “zero fat,” priced like they contain gold. So why make it yourself?
Turns out, homemade Greek yogurt gives you three big wins:
1. Full Ingredient Control
Store-bought yogurt often sneaks in stabilizers, added sugars, or even powdered milk. At home, it’s just milk and culture — that’s it. You control the fat level, the thickness, even the tanginess.
2. Serious Cost Savings
A half-gallon of milk can yield nearly 2 cups of thick Greek yogurt — usually at a fraction of the cost. Over time, this adds up, especially if your household goes through yogurt like water.
3. Customization + Kitchen Confidence
Want ultra-thick yogurt for breakfast bowls? Done. Prefer something softer for smoothies? You got it. Making your own turns a passive grocery habit into an empowering ritual. It also feels oddly satisfying to transform basic milk into something gourmet.
And if you’re someone who values less waste — no more plastic tubs, no more spoon-scraping guilt — homemade just makes sense.
Quick Bonus — Is Homemade Healthier?
Yes, and here’s why: Homemade Greek Yogurt has no preservatives, lets you choose your milk source (organic, grass-fed, raw, lactose-free), and retains the live active cultures that aid digestion and gut health.
Ingredients: What You Actually Need to Make Homemade Greek Yogurt
At its core, Greek yogurt is simple — you only need two ingredients. But, like with sourdough or coffee, small choices make a big difference in flavor, texture, and consistency.
Base Ingredients
- Milk – 1 quart (4 cups)
- Best options: Whole milk for creamy richness, 2% for balance, skim for lighter texture.
- Optional but helpful: Use high-quality, organic, or grass-fed milk for better taste.
- Yogurt starter – 2 tablespoons of plain yogurt with live active cultures
- You can use store-bought plain Greek yogurt (unsweetened, no additives).
- Once you’ve made your first batch, you can use a spoonful of your own yogurt as the starter for the next one.
Optional Extras (Not Required, But Handy)
- Milk powder – 1–2 tablespoons (boosts protein + thickens)
- Thermometer – helps track heating and culturing temps accurately
- Cheesecloth or nut milk bag – for straining the yogurt to make it “Greek”
- Colander + large bowl – for draining and collecting whey
- Lid or plastic wrap – to cover during fermentation
What is the best milk for homemade Greek yogurt?
Whole milk produces the creamiest, richest Greek yogurt. But you can absolutely use 2% or skim — just expect a slightly thinner base that may need more straining. For best results, use milk that hasn’t been ultra-pasteurized (UP or UHT), since high-heat processing can affect culturing.
Appliance Options: How to Make Homemade Greek Yogurt with What You Have
You don’t need fancy tools to make Greek yogurt — but the method you choose can affect your workflow, timing, and cleanup. Here’s how to do it with whatever you’ve got on hand.
Stovetop Method (The Classic Way)
This is the most old-school, reliable method — no special appliances needed.
How it works:
- Heat milk in a saucepan to 180°F (to kill competing bacteria).
- Cool it down to 110°F.
- Whisk in your starter yogurt.
- Pour into a container, cover, and incubate in a warm place (oven with light on, yogurt warmer, or wrapped in a towel).
- Let sit 6–12 hours, depending on how tangy you want it.
Instant Pot Method (The Lazy-But-Precise Way)
If you have an Instant Pot with a Yogurt function, you’re in luck.
Steps:
- Pour milk into Instant Pot and hit “Yogurt > Boil”.
- Cool to 110°F.
- Stir in starter yogurt.
- Press “Yogurt” again and set the time (8–10 hours).
- Chill, then strain.
Slow Cooker Method (Hands-Off, But Longer)
This takes a bit longer, but works beautifully if you’re patient.
Steps:
- Heat milk in slow cooker to 180°F (on high, then turn off).
- Cool to 110°F.
- Add starter, stir, cover.
- Wrap the slow cooker in towels and let sit overnight (6–12 hours).
Other Options (If You’re Improvising)
- Oven with light on: Pre-warm oven briefly, turn off heat, leave light on. Place yogurt inside and wrap in towel.
- Dehydrator: Set to 110°F and let it sit.
- Heating pad: Wrap around your container for consistent warmth.
Step-by-Step Guide: Making Homemade Greek Yogurt from Scratch
Let’s break it down into a rhythm — heat, cool, culture, strain. Whether you’re using a stovetop or Instant Pot, the basic process doesn’t change much.
Step 1: Heat the Milk
- Pour 1 quart of milk into a saucepan or appliance.
- Slowly heat to 180°F (use a thermometer if possible).
- Why? This step denatures the milk proteins so your yogurt thickens properly.
- Stir occasionally to prevent a skin from forming.
Shortcut: In an Instant Pot, just hit “Yogurt > Boil” and let it run the cycle.
Step 2: Cool It Down
- Remove from heat and let the milk cool to around 110°F.
- If you don’t have a thermometer: the milk should feel warm but not hot when you dip a clean finger in.
Step 3: Add the Starter
- In a small bowl, mix 2 tablespoons of plain yogurt with some of the warm milk.
- Stir gently to blend — then return the mixture to the pot and stir it in evenly.
Note: Avoid aggressive whisking. You want to gently blend, not froth.
Step 4: Let It Culture
- Transfer the mixture to a clean container or keep it in your appliance.
- Maintain warmth around 110°F for 6–12 hours.
- Less time = milder flavor.
- More time = tangier, thicker yogurt.
Tips: Use your oven light, wrap it in towels, or use a yogurt setting if your appliance has one.
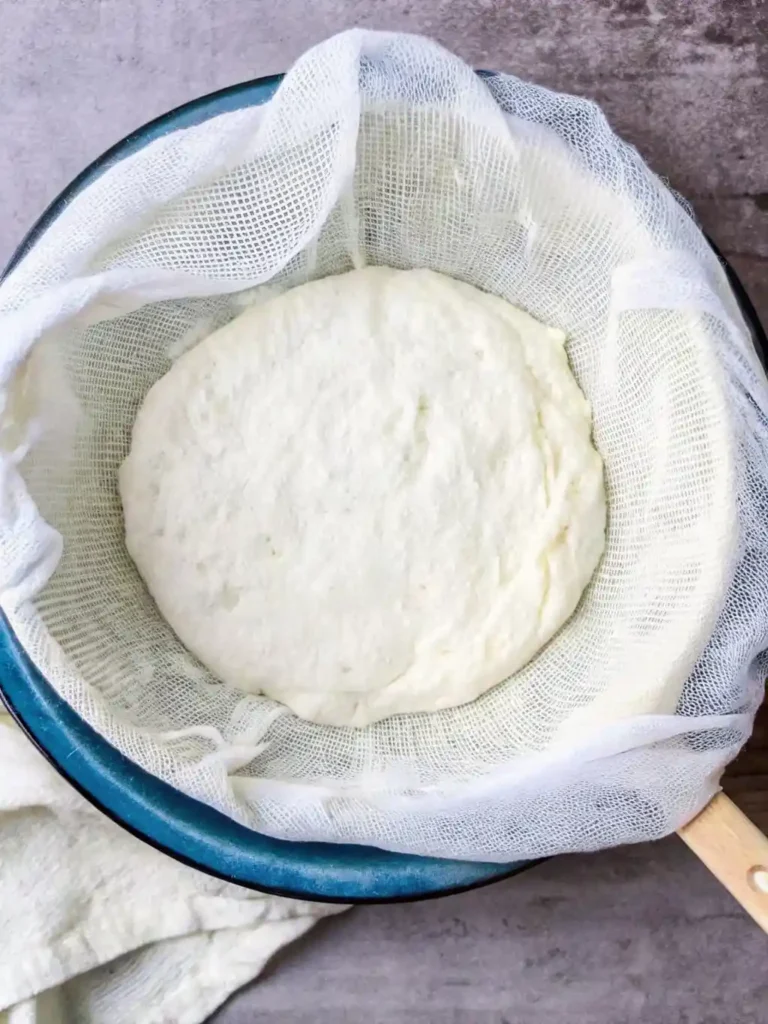
Step 5: Strain (To Make It “Greek”)
- Once set, scoop the yogurt into a strainer lined with cheesecloth or a nut milk bag.
- Set the strainer over a large bowl and refrigerate.
- Let it strain for 2–4 hours until it reaches your preferred thickness.
Bonus: Save the liquid whey! It’s rich in protein and can be used in smoothies, baking, or even watering plants.
Step 6: Chill & Store
- Transfer your thickened yogurt to an airtight container.
- Refrigerate for up to 10 days.
- It may thicken more as it chills.
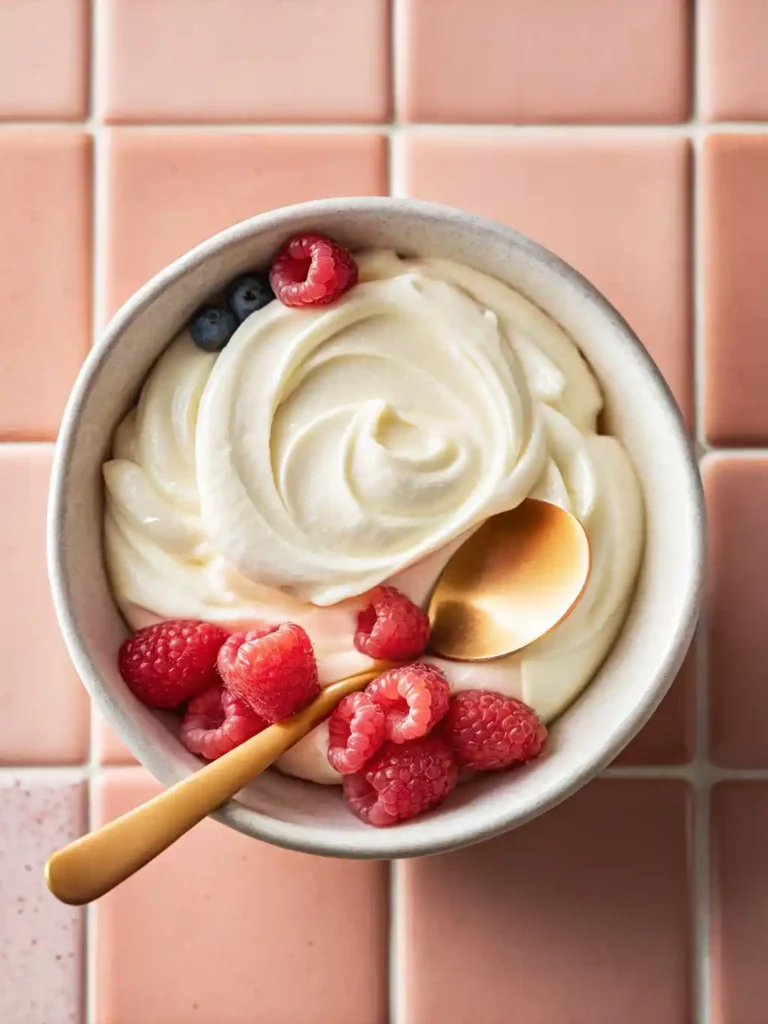
If you love pairing creamy textures with fresh fruit, you’ll also enjoy our Chantilly Berry Cake recipe—a light, fluffy dessert layered with whipped cream and juicy berries. It’s the perfect sweet complement to a bowl of homemade Greek yogurt!
Straining & Texture: How to Nail That Creamy Greek Consistency
Homemade Greek Yogurt isn’t a different recipe — it’s just regular yogurt that’s been strained to remove extra whey. That’s what gives it that luscious, velvety body and higher protein content. But here’s where things get real: how much you strain (and how) changes everything.
What to Strain With (and Why It Matters)
- Cheesecloth (2–3 layers): Classic choice, but needs wringing or frequent adjusting.
- Nut milk bag: Durable, easy to clean, and less messy.
- Clean dish towel or coffee filter: Works in a pinch, but slower draining.
Pro tip: Set your strainer over a deep bowl so the whey doesn’t touch the bottom of the yogurt as it drains. That’ll keep things creamy, not soggy.
How Long to Strain?
- 1 hour → Slightly thicker yogurt, almost custard-like.
- 2–3 hours → Classic Greek-style texture.
- 4+ hours or overnight → Extra thick, spoon-stands-up-on-its-own labneh texture.
Just keep checking it — and remember, you can always stop earlier if it reaches your “perfect scoop.”
Stirring = Smoother Texture
Once strained, your yogurt might look a bit grainy or curdled. No panic. Just whisk it gently until smooth. A few seconds of stirring transforms it from lumpy to luxurious.
FAQs About Homemade Greek Yogurt
Let’s hit the common roadblocks, myths, and what-if moments — including your custom questions.
Is it worth it to make your own Greek yogurt?
Yes — especially if you eat it regularly. Homemade Greek yogurt costs significantly less, skips unnecessary additives, and lets you customize everything from thickness to flavor. Plus, the satisfaction of scooping your own batch? Weirdly addictive.
What is the best milk for homemade Greek yogurt?
Whole milk makes the creamiest, richest yogurt — especially if you like that thick “yogurt-as-breakfast” vibe. But 2% also works great. Avoid ultra-pasteurized milk (look for “UHT” on the label) — it can be finicky during fermentation. For best flavor: organic or grass-fed milk levels up the taste noticeably.
How to make high protein Greek yogurt at home?
- Start with whole milk.
- Add 1–2 tablespoons of dry milk powder before heating — this boosts the natural protein.
- Strain longer to remove more whey — that’s where the water (and some protein loss) goes.
- For an extra bump, stir in a tablespoon of unsweetened whey protein after it’s chilled (optional, but useful for muscle recovery diets).
How to make Greek yogurt at home without starter?
If you’re out of yogurt, you can use:
- A freeze-dried starter culture (available online)
- Probiotic capsules (must contain L. bulgaricus and S. thermophilus)
- Or even a previous batch you made yourself
Important: You can’t just use any probiotic or flavored yogurt. Make sure it’s plain, unsweetened, and lists “live active cultures.”
Flavor Variations: Dress It Up or Keep It Classic
Greek yogurt is a blank canvas — and the beauty of homemade is that you decide what goes in. Whether you’re aiming for sweet breakfast bowls, savory dips, or dessert dupes, here’s how to flavor it without ruining its texture.
Sweet Variations
Add these after the yogurt has been strained and chilled (to preserve thickness):
- Vanilla Bean or Extract – Add ½ tsp per cup of yogurt for a smooth, mellow sweetness.
- Honey or Maple Syrup – Stir in 1–2 tsp for gentle sweetness — or swirl it on top.
- Fruit Purees – Blend berries, mango, or peaches with a touch of lemon juice and mix in.
- Cinnamon or Cardamom – A pinch turns it into a dessert-like snack.
- Jam or Compote – Spoon a layer at the bottom of jars for grab-and-go breakfasts.
Savory Variations
Great for dips, sauces, and spreads:
- Garlic + Cucumber + Dill – Hello, homemade tzatziki.
- Lemon + Chive – A refreshing spread for sandwiches.
- Za’atar + Olive Oil – Scoop with warm pita — no one will miss the sour cream.
Flavoring Tips
- Always start small — homemade yogurt is more delicate than commercial versions.
- Fold, don’t whip — overmixing can loosen the texture.
- Want it thicker after flavoring? Chill it again for 30 minutes uncovered.
Can I sweeten homemade Greek yogurt naturally?
Absolutely. Try:
- Mashed banana or applesauce
- Soaked raisins or dates, chopped finely
- Stevia or monk fruit (if you’re low-carb)
Just remember: natural sugars still affect tang — add them after fermentation, never before.
What To Do With Leftover Whey (Don’t Toss It!)
That golden liquid that drains off your yogurt? That’s whey — and no, it’s not waste. It’s actually full of protein, minerals, and lactic acid. Tossing it is like throwing out the bonus round. Here’s what you can do with it instead:
Smoothies & Shakes
Whey adds a light tang and a nice protein kick — especially in green smoothies or post-workout blends. Use it in place of water or milk.
Baking Liquid Swap
Use whey instead of water in:
- Bread, muffins, pancakes, or pizza dough
- Any recipe that calls for buttermilk or milk
It boosts flavor and improves browning in baked goods.
Water Your Plants (Yes, Really)
Dilute 1:1 with water and use it for acid-loving plants like tomatoes or blueberries. It’s full of trace minerals — nature’s electrolyte drink.
Make Ricotta (If You’re Feeling Extra)
If you heat your whey again to about 200°F and add a bit of acid (like lemon juice), you can coax out a little more curd. It’s not much — but it’s old-school and satisfying.
Soup Stock Base
Toss it into broth, rice, or soup instead of water. Adds a subtle depth — like the umami version of lemon.
Final Thoughts:
If you’ve made it this far, chances are you’re already halfway convinced — or at least yogurt-curious. And honestly? That’s all it takes. Because the beauty of homemade Greek yogurt isn’t just the creamy spoonfuls (though those help). It’s the quiet power of doing something simple, nourishing, and oddly satisfying with your own two hands.
You don’t need perfection. You don’t need fancy gear. You just need milk, time, and a little patience. The first batch might not be flawless — but it’ll still taste like a small win.
So next time you pass that $6 tub in the grocery aisle? Smile. You know how to make it better.
Here is @cookjoy.recipes