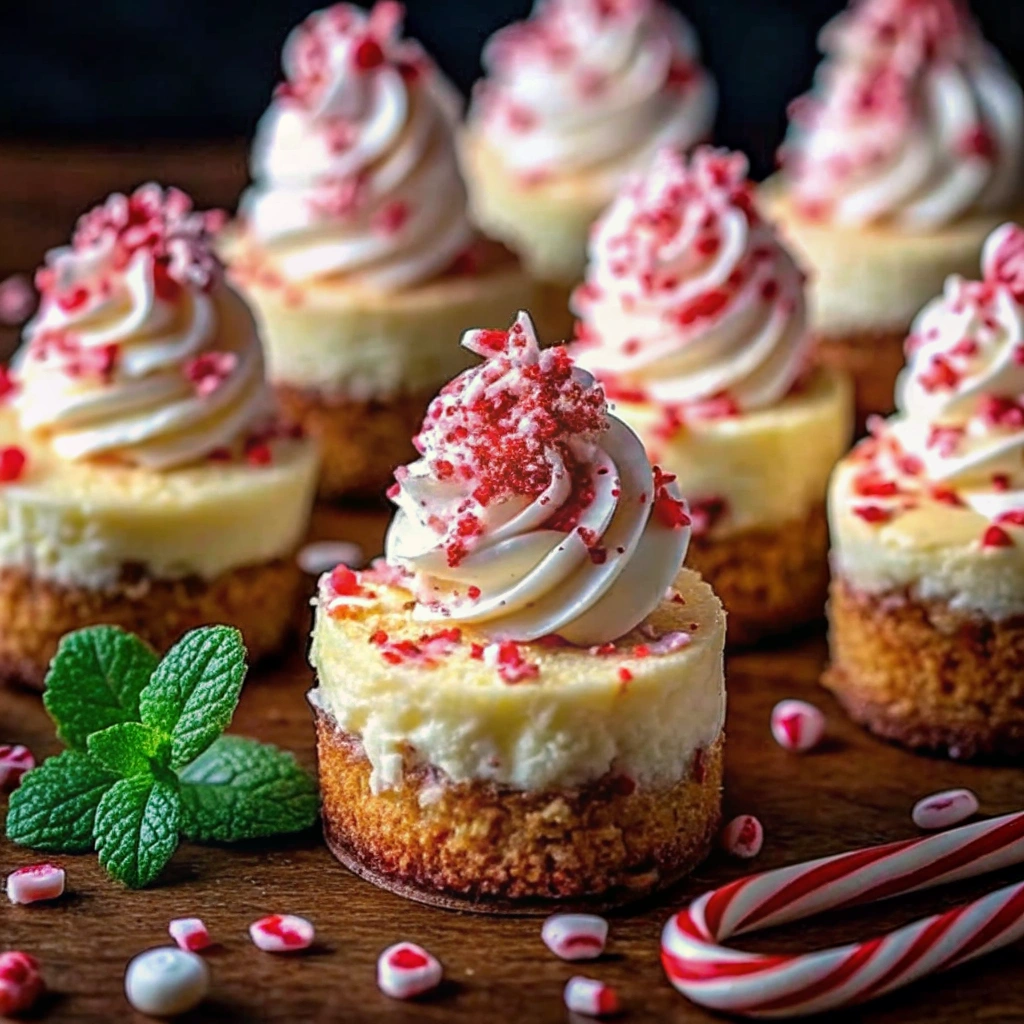
The holiday season is busy enough without spending hours fussing over complicated desserts. That’s where these incredible No-Bake Peppermint Cheesecake Bites come in! These irresistible little spheres of festive goodness deliver all the decadent flavor of a classic cheesecake—creamy, tangy, and rich—with the bright, cooling crunch of peppermint, all wrapped up in a perfect chocolate shell. Best of all? No oven required!
These bites start with a dark, buttery Oreo crust foundation, followed by a sweet, airy filling loaded with crushed peppermint candy canes. Once chilled and formed into balls, they take a quick dip in melted chocolate for a finish that is stunningly professional and completely addictive. They are simple to prepare, easy to freeze, and make the ultimate holiday party appetizer or edible gift.
If you need a show-stopping dessert that requires minimal stress and maximum “wow” factor, this No-Bake Peppermint Cheesecake Bites Recipe is your new holiday secret weapon. Get ready to bake (or rather, not bake) your way to the best holiday treat ever!
Why This Festive Dessert is a Pinterest Must-Have
This recipe is designed for maximum visual and functional appeal, which is why “no-bake” recipes and bite-sized desserts consistently trend high on Pinterest.
- No-Bake Convenience: The number one selling point. Holiday bakers are looking for ways to free up oven space and minimize stress. The simplicity of this recipe makes it highly shareable.
- Perfectly Portable: As a bite-sized dessert, these are ideal for cookie exchanges, holiday parties, and potlucks. They eliminate the need for utensils and plates, making them the ultimate party food.
- Festive Visuals: The contrast of the dark chocolate, white coating, and the vibrant red and white of the crushed candy canes is pure Christmas eye candy. The colors are instantly recognizable and highly clickable.
- Freezer-Friendly: The ability to make these weeks ahead of time solves a major holiday pain point for busy hosts, driving significant traffic to the post.
- Classic Flavor Combination: Peppermint and chocolate is an iconic duo that people actively search for during November and December.
Ingredients
Success with no-bake desserts relies on quality ingredients and proper ratios, especially the cream cheese and heavy cream for a stable filling.
For the Dark Oreo Crust
- 1 1/2 cups Oreo cookie crumbs (about 15-18 cookies, crushed finely, filling included)
- 4 tablespoons unsalted butter, melted
For the Peppermint Cheesecake Filling
- 8 ounces (1 block) full-fat cream cheese, softened to room temperature
- 1/2 cup powdered sugar, sifted
- 1 teaspoon pure vanilla extract
- 1/2 teaspoon peppermint extract (start with this amount; see Pro Tips)
- 1/2 cup heavy cream, cold
- 1/2 cup crushed candy canes (or peppermint candies), plus extra for garnish
For the Chocolate Coating and Garnish
- 12 ounces white chocolate baking bar or melting wafers (recommended over chips)
- 1 teaspoon coconut oil or shortening (optional, for thinning the coating)
- 1/4 cup crushed candy canes, reserved for garnish
Step-by-Step Instructions: Mix, Roll, and Dip
The secret to perfectly smooth, round bites is the initial freezing process. Do not rush the chill time!
Part 1: Preparing the Crust and Filling (20 Minutes)
- Prepare the Crust: In a medium bowl, combine the Oreo cookie crumbs and 4 tablespoons of melted butter. Stir until the mixture resembles wet sand.
- Make the Base Layer: Press about 1/2 teaspoon of the Oreo mixture into the bottom of a mini-muffin tin (if using for a clean base) or simply use it as a binder in the filling (see Pro Tip below for a simpler method). Simplest Method: For these bites, skip pressing a base and add the whole 11/2 cups of crust mix directly into the cream cheese mixture for a chocolatey filling.
- Whip the Cream: In a separate, small bowl, use a hand mixer or whisk to whip the 1/2 cup of cold heavy cream until stiff peaks form. Set aside.
- Cream the Cheese: In a large mixing bowl, beat the softened cream cheese until completely smooth and free of lumps. Add the sifted powdered sugar and beat until light and fluffy.
- Add Flavor: Beat in the vanilla extract and peppermint extract. Taste test here! Start small with the peppermint extract.
- Fold and Combine: Gently fold the whipped cream into the cream cheese mixture using a rubber spatula until just combined. Fold in the 1/2 cup of crushed candy canes and the Oreo crust mix (if using the simpler method).
Part 2: Shaping and Freezing (Minimum 3 Hours)
- Scoop the Filling: Line a baking sheet with parchment paper or a silicone mat. Use a small cookie scoop (about 1 tablespoon capacity) to scoop the filling onto the prepared sheet.
- Roll the Balls: Gently roll each scoop into a smooth ball shape using your palms.
- Freeze (Crucial Step): Place the baking sheet with the cheesecake balls into the freezer for a minimum of 3 hours, or until they are completely solid. Do not skip this step. Freezing is essential for easy dipping and preventing the chocolate from cracking.
Part 3: Coating and Finishing (20 Minutes)
- Melt the Chocolate: Place the white chocolate melting wafers or chopped bar into a microwave-safe bowl. Microwave in 30-second intervals, stirring well after each interval, until the chocolate is smooth. If the chocolate seems too thick, stir in 1/2 to 1 teaspoon of coconut oil or shortening to thin it out slightly.
- Dip the Bites: Insert a toothpick into one of the frozen cheesecake balls (or use a dipping fork). Dip the ball completely into the melted chocolate. Gently tap the fork or toothpick on the side of the bowl to let the excess chocolate drip off.
- Garnish: Place the coated bite back on the parchment-lined sheet. Immediately sprinkle the top with the reserved crushed candy canes before the chocolate sets.
- Set: Let the bites sit at room temperature for 10–15 minutes until the chocolate shell is firm.
- Store: Transfer the finished bites to an airtight container and store them in the refrigerator until ready to serve.
Pro Tips for Perfect, Crack-Free Cheesecake Bites
Dipping frozen treats in chocolate can be tricky. Follow these expert tips to achieve a professional, smooth finish every time.
- The Power of Peppermint Extract: Peppermint extract is potent! Start with 1/4 teaspoon and gradually increase it until you reach 1/2 teaspoon. If you add too much, the flavor can become overwhelmingly minty, distracting from the cheesecake flavor.
- The Chocolate Choice: Do not use standard white chocolate chips. They contain stabilizers that prevent them from melting into a smooth, dippable consistency. Use high-quality white chocolate baking bars (chopped finely) or, better yet, white chocolate melting wafers or almond bark.
- Keep the Filling Cold: This is the most crucial step for dipping success. The cheesecake balls must be rock solid and completely frozen. If they start to thaw, the warm chocolate will melt the outside, causing the ball to drop off the fork or the shell to crack as it tries to set.
- Dipping Temperature: Use a relatively deep, narrow bowl for the melted chocolate. The chocolate should be warm, but not hot. If the chocolate is too hot, it will melt the cheesecake surface. Keep the bowl slightly warm over a bowl of warm (not hot) water if you need to maintain consistency.
- Fixing a Cracked Shell: If you notice cracks forming after the chocolate sets, it usually means the cheesecake ball was slightly too cold compared to the chocolate. Dip a second time to smooth out the crack, or simply cover the surface with a generous layer of crushed candy canes!

Serving Suggestions and Creative Variations
These Peppermint Cheesecake Bites are versatile and perfect for customizing for any holiday theme.
Presentation and Serving Tips
- Party Platter: Serve the chilled bites in small, festive paper cupcake liners on a tiered platter. They look elegant and stay cold longer.
- Gifting: Place 6–8 bites into a small, decorative tin or clear cellophane bag tied with a ribbon for a thoughtful, homemade holiday gift.
- Serving Temperature: While they must be stored in the refrigerator, let them sit at room temperature for about 10–15 minutes before serving. This allows the creamy filling to soften slightly for the best texture.
- Holiday Dessert Board: Add them to a holiday-themed dessert board alongside Cranberry Pistachio Biscotti and Chocolate-Dipped Strawberries with Holiday Sprinkles.
Flavor and Coating Variations
- Dark Chocolate Dipped: Use semi-sweet or dark chocolate wafers instead of white chocolate for the coating. The richness of the dark chocolate beautifully balances the sweetness of the peppermint filling.
- Cream Cheese Base (No Crust): If you prefer a pure white filling, omit the Oreo crust crumbs from the filling entirely. Simply increase the powdered sugar to 3/4 cup for stability.
- Cookie Crumble Coating: Instead of candy canes, coat the bites in finely crushed vanilla wafers or leftover shortbread cookie crumbs for a delicious, crunchy alternative.
- Mint Extract vs. Oil: If using a high-quality peppermint oil (which is much stronger than extract), start with just 3-4 drops and taste test before adding more.
Frequently Asked Questions
- How far ahead can I make these No-Bake Peppermint Cheesecake Bites? This is an ideal make-ahead recipe! You can prepare the entire recipe (including dipping and decorating) up to 3 weeks in advance. Store the finished, fully set bites in an airtight container in the freezer. Thaw them overnight in the refrigerator before serving.
- How should I store leftover bites? Store leftovers in an airtight container in the refrigerator for up to 5 days. Since they are cheesecake, they must be kept chilled.
- My filling isn’t firm enough to roll. What went wrong? This usually means the cream cheese was too soft (too warm) or too much liquid was added. To fix it: add 1–2 tablespoons of dry powdered milk or cornstarch to the mixture. Beat briefly, and then refrigerate the entire bowl for 30 minutes. This will tighten the structure, making it much easier to roll.
- My chocolate coating is too thick. How do I thin it? If the melted chocolate is too viscous, stir in 1/2 teaspoon of coconut oil or vegetable shortening at a time until it reaches a thin, smooth, dippable consistency. Do not use water or milk, as this will cause the chocolate to seize and become hard and crumbly.
- Can I use light cream cheese? For the best, most stable, and creamiest results, we strongly recommend using full-fat cream cheese. Low-fat or neufchatel cheese contains more water, which can make the filling too loose to hold its shape when rolled and dipped.
- What is the best way to crush the candy canes? Place the candy canes in a heavy-duty freezer bag or Ziploc bag. Use a rolling pin or the flat side of a meat tenderizer to gently crush them until they reach your desired consistency—fine for garnish, slightly chunkier for the filling.
These No-Bake Peppermint Cheesecake Bites are ready to bring holiday cheer to your kitchen and your blog!
Don’t forget to Pin this easy, no-bake recipe for your holiday party menu and share your favorite festive topping ideas in the comments below!

No-Bake Peppermint Cheesecake Bites
Ingredients
Equipment
Method
- Crush chocolate sandwich cookies into fine crumbs using a food processor or rolling pin. Mix with melted butter until combined.
- Press about 1 teaspoon of the mixture into the bottoms of mini cupcake liners. Set aside.
- In a mixing bowl, beat softened cream cheese, powdered sugar, and peppermint extract until smooth.
- Fold in melted white chocolate, whipped topping, and crushed candy canes until evenly combined.
- Spoon or pipe the cheesecake mixture over the crusts. Smooth the tops with a spatula.
- Chill for at least 2 hours or until firm. Sprinkle with extra crushed candy canes before serving.
