
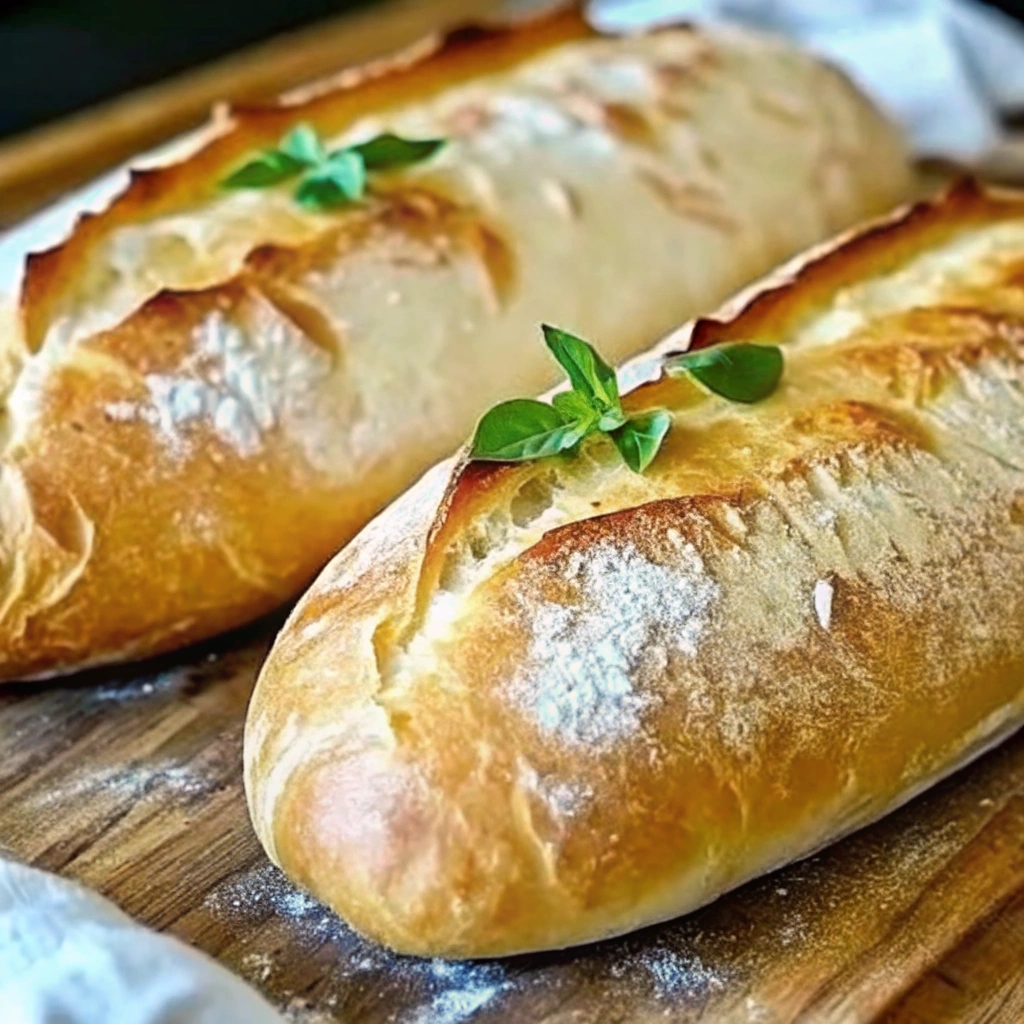
There is no smell more comforting in a kitchen than that of homemade bread baking. And when it comes to bread that is perfect for every occasion—from dipping in olive oil to making the ultimate sandwich—nothing beats a loaf of Crusty Italian Bread. This recipe delivers that signature texture: a light, airy crumb on the inside, wrapped in a thick, mahogany-brown crust that literally cracks when you slice it.
You might think achieving that artisan-bakery crust requires a fancy, expensive steam oven, but we’re going to show you the simple, clever steam method that yields a perfect, crusty exterior every single time, using just your regular home oven. This easy bread recipe is straightforward, relying on just four simple ingredients, patience during the proofing, and a final blast of heat and moisture.
Get ready to turn your kitchen into a genuine Italian panetteria with the best Crusty Italian Bread Recipe. It’s easier than you think and infinitely more rewarding.
Why This Simple Bread Recipe Works
Mastering the perfect crust and the chewy, open interior (the crumb) comes down to a few critical, science-backed steps.
- The Steam Effect (The Secret): A true crusty loaf requires steam during the first 10-15 minutes of baking. The moisture prevents the surface of the dough from drying out and setting too early. This delay allows the loaf to “spring” in the oven (the final rapid rise), resulting in a thin, crackling crust rather than a thick, tough one.
- High Hydration Dough: This recipe uses a relatively high ratio of water to flour. High hydration doughs are stickier and more challenging to work with, but they create those beautiful, irregular air pockets (the “chewy crumb”) that define artisan-style Italian bread.
- The Long, Slow Rise: Allowing the dough to proof slowly at room temperature develops complex flavors that simple, fast-rise breads lack. The longer the rise, the deeper the flavor and the better the texture.
- High Heat Finish: After the steam is released, we crank the heat up to finish the bake. This high temperature quickly dries out the surface and creates the final, deep golden-brown, shattering crust.
Ingredients
This easy bread recipe requires only four staple ingredients plus a bit of sugar for the yeast.
- 3 cups (360g) all-purpose flour (bread flour can also be used for a slightly chewier result)
- 1 $1/2$ cups (360ml) warm water ($105^\circ F$ to $115^\circ F$ / $40^\circ C$ to $46^\circ C$)
- 2 $1/4$ teaspoons active dry yeast (one packet)
- 1 teaspoon granulated sugar
- 1 $1/2$ teaspoons Kosher salt
- 1 tablespoon olive oil (for coating the bowl)
Equipment
- Large mixing bowl
- Stand mixer with a dough hook (optional, but makes kneading easier)
- Baking sheet (or pizza stone)
- Wire rack
- Shallow metal pan (or cast iron skillet) for steam
- Ice cubes or hot water (for generating steam)
- Parchment paper
Step-by-Step Instructions: Mix, Proof, and Steam Bake
Follow these three phases closely to guarantee that perfect, airy interior and thick, crusty Italian bread exterior.
Part 1: Mixing and Kneading the Dough (25 Minutes)
- Activate Yeast: In a small bowl, whisk together the warm water, yeast, and sugar. Let stand for 5–10 minutes until foamy. This confirms your yeast is active.
- Combine Dry Ingredients: In a large bowl, whisk together the flour and salt.
- Mix Dough: Pour the yeast mixture into the dry ingredients. Mix with a wooden spoon or a stand mixer (using the dough hook) until the ingredients are just combined into a shaggy, wet dough.
- Knead: Knead the dough for 5–7 minutes on medium-low speed (or 8–10 minutes by hand on a lightly floured surface) until the dough is smooth, elastic, and pulls away cleanly from the sides of the bowl. It will still be slightly sticky, which is good for hydration.
- First Rise (Bulk Fermentation): Lightly oil a clean large bowl with 1 tablespoon of olive oil. Place the dough ball in the bowl, turning to coat all sides. Cover the bowl tightly with plastic wrap or a clean kitchen towel. Place in a warm, draft-free spot for 1 to 1.5 hours, or until the dough has doubled in size.
Part 2: Shaping and Second Rise (60 Minutes)
- Gentle Deflation: Once doubled, gently punch the dough down to release the air.
- Shape: Turn the dough out onto a very lightly floured surface. Gently shape the dough into an oblong loaf (the classic Italian shape). Be careful not to press out all the air; you want to maintain some gas pockets for a chewy crumb.
- Second Rise (Proofing): Place the shaped loaf onto a large piece of parchment paper on a baking sheet. Cover the loaf loosely with the kitchen towel or plastic wrap. Let it rest for another 45–60 minutes, or until the loaf has almost doubled in size again and is puffy. The “poke test” should leave a slow-rebounding indentation.
- Preheat Oven: About 20 minutes before the end of the second rise, preheat your oven to $450^\circ F$ ($230^\circ C$). Place the empty shallow metal pan or cast iron skillet on the bottom rack of the oven.
Part 3: Baking with Steam (30 Minutes)
- Score the Loaf: Just before baking, use a very sharp knife or a razor blade (called a lame) to quickly slice 2 or 3 parallel cuts (about $1/2$-inch deep) across the top of the loaf. This controls where the steam escapes and helps the loaf expand evenly.
- Generate Steam: Carefully slide the loaf (still on the parchment paper) onto the middle rack of the preheated oven. Immediately, quickly pour 1 cup of hot water or a handful of ice cubes into the empty, hot pan on the bottom rack. Quickly shut the oven door to trap the steam. Be careful of the steam!
- Initial Bake: Bake at $450^\circ F$ for 15 minutes. The steam prevents the crust from setting, allowing the loaf to rise fully.
- Finish Baking: After 15 minutes, open the oven door and carefully remove the shallow pan and any remaining water or ice. This allows the heat to now dry out the crust. Reduce the oven temperature to $375^\circ F$ ($190^\circ C$) and continue baking for another 15–20 minutes, or until the loaf is deeply golden brown and sounds hollow when tapped on the bottom.
- Cool Completely: Transfer the loaf immediately to a wire rack. Let it cool completely for at least 1 hour before slicing. Slicing too early releases steam, which is still cooking the interior, and results in a gummy texture.
Pro Tips for the Perfect Crust and Crumb
A truly crusty Italian bread is achievable with attention to these critical, but simple, details.
- Master the Steam: The steam step is what separates good bread from great bread. The easiest way to get steam is by placing a broiler pan (or a cast iron skillet) on the lowest rack during preheating. Just before the bread goes in, toss a few ice cubes into the hot pan. The burst of steam is magical for the crust.
- Don’t Fear the Stickiness: When kneading, resist the urge to add too much extra flour. A slightly sticky, high-hydration dough is essential for the airy, chewy interior texture. Use a bench scraper or lightly oiled hands instead of more flour.
- The Tap Test: To check for doneness, tap the bottom of the baked loaf. If it sounds truly hollow, it’s done. If it sounds dull or soft, it needs 5 more minutes.
- Temperature Consistency: Ensure your water temperature is correct for activating the yeast ($105^\circ F$ to $115^\circ F$). Water that is too cold won’t activate the yeast; water that is too hot will kill it. Use an instant-read thermometer for precision.
- Store Properly: Once cooled, store your crusty Italian bread at room temperature in a paper bag (not plastic!). A plastic bag traps moisture, softening the crust. A paper bag allows air to circulate, keeping the crust crisp.
Serving Suggestions and Creative Variations
This homemade bread is a blank canvas for savory and sweet pairings.
Serving Suggestions
- Olive Oil and Balsamic: The classic Italian pairing. Serve with high-quality extra virgin olive oil and a drizzle of balsamic glaze for dipping.
- Bruschetta Base: Slice and toast the bread lightly. Top with fresh bruschetta mix (diced tomatoes, basil, garlic, and olive oil) for a perfect appetizer.
- Soup Companion: This crusty loaf is the perfect dipper for rich, hearty soups like Slow Cooker French Onion Soup or Tuscan Parmesan Cream Soup.
- Garlic Bread: Slice the loaf in half lengthwise, spread with a mixture of softened butter, garlic, and herbs, wrap in foil, and bake until heated through.
- The Ultimate Sandwich: Use thick slices of this crusty bread for hearty sandwiches like Italian roast beef or prosciutto and provolone.
Creative Variations
- Herbed Italian Loaf: Mix 1 tablespoon of dried Italian seasoning or finely chopped fresh rosemary and thyme into the dry ingredients before mixing.
- Cheese Bread: During the last 10 minutes of baking, brush the top of the loaf with olive oil and sprinkle generously with freshly grated Parmesan or Italian blend cheese.
- Seed Topping: Before the second rise, brush the top of the shaped loaf lightly with egg wash and sprinkle with sesame seeds, poppy seeds, or fennel seeds.
- Poolish or Biga (Advanced): For a deeper, more complex flavor, use a portion of the flour, water, and yeast to create a poolish (a pre-ferment) 12-18 hours before making the main dough. This adds a subtle tanginess similar to sourdough.
Frequently Asked Questions (FAQ)
- Why did my crust turn out soft instead of crusty? This almost always comes down to lack of sufficient steam. If the crust sets too quickly (in a dry oven), it can’t expand properly, resulting in a thick, leathery crust instead of a thin, shatteringly crisp one. Make sure you use ice or hot water in the hot pan at the beginning of the bake, and ensure the oven door is shut quickly to trap the moisture.
- Why did my bread crack excessively on the sides? Cracking on the sides (called “blowouts”) is usually a sign that you didn’t score the top deeply enough or that the loaf was under-proofed (didn’t rise long enough in the second rise). The pressure from the steam inside the dough needs an exit point (the score marks); if it doesn’t have one, it will burst through the weakest point on the side.
- Can I make this dough ahead of time? Yes! This dough is excellent for cold fermentation, which deepens the flavor. After the initial knead (Part 1, Step 4), place the oiled dough in a large bowl, cover it tightly, and refrigerate for anywhere from 12 to 48 hours. When ready to bake, remove the dough and let it sit at room temperature for 1-2 hours before gently shaping (Part 2, Step 2).
- Is bread flour required for the best crust? While bread flour has a higher protein content (which gives the interior a slightly chewier crumb), all-purpose flour works perfectly for a fantastic, crusty exterior. The steam and baking temperature are more important for the crust than the type of flour.
- My loaf flattened out during the second rise. What went wrong? If the dough spreads rather than rises vertically, it usually means it was over-proofed (left to rise for too long) or the gluten wasn’t developed enough during the kneading step. Ensure you knead until the dough passes the windowpane test (you can gently stretch a small piece until it’s thin enough to see light through).
This Crusty Italian Bread Recipe is simple, rewarding, and will make you feel like a true artisan baker. Enjoy the amazing aroma and the satisfaction of slicing into that perfect, crackling crust!
Don’t forget to Pin this easy bread recipe for later and share your first homemade loaf in the comments!

Crusty Italian Bread Recipe
Equipment
- mixing bowl
- measuring cups and spoons
- baking stone or baking sheet
- parchment paper
- kitchen towel
- wire rack
- oven
Ingredients
- 3 1/2 cups all-purpose flour
- 1 1/2 tsp salt
- 1 tsp sugar
- 1 packet (2 1/4 tsp) active dry yeast
- 1 1/4 cups warm water (about 110°F)
- 2 tbsp olive oil
Instructions
- In a large mixing bowl, combine the warm water, sugar, and yeast. Let sit for 5 minutes until frothy.
- Add flour, salt, and olive oil to the yeast mixture. Stir until a rough dough forms.
- Turn dough onto a floured surface and knead for 8–10 minutes until smooth and elastic.
- Place dough in a greased bowl, cover with a towel, and let rise for 1–1.5 hours or until doubled in size.
- Preheat oven to 450°F (230°C). Place a baking stone or inverted baking sheet in the oven to heat.
- Punch down dough and shape into a round loaf. Place on parchment paper and cover to rise for another 30 minutes.
- Score the top with a sharp knife and transfer (with parchment) onto the hot baking stone.
- Bake for 25–30 minutes until golden brown and crusty. Bread should sound hollow when tapped on the bottom. Cool on a wire rack before slicing.