Few desserts capture the comfort and nostalgia of Thanksgiving quite like a warm, cinnamon-scented apple pie. But while traditional pies are wonderful, sometimes the holiday calls for a dessert that is easier to serve, easier to transport, and easier to make for a crowd. That is where Old-Fashioned Apple Pie Bars come in. These bars offer everything people love about apple pie—flaky crust, tender apples, buttery crumble, and plenty of fall spices—but in a simplified, sliceable, crowd-friendly format.
Old-Fashioned Apple Pie Bars are the perfect dessert for anyone who wants homemade flavor without the fuss of rolling and shaping pie dough. They are built with three simple layers: a tender shortbread crust, a generously spiced apple filling, and a golden streusel topping that crisps beautifully in the oven. Once baked, you can cut them into clean squares, making them ideal for buffets, potlucks, Thanksgiving dessert tables, or any gathering where you want guests to grab a treat without needing plates and forks.
In this long-form article, you’ll learn the origins of this old-fashioned dessert, how to achieve the perfect texture, the best apples to use, and how to store and serve the bars for maximum impact. Written with Thanksgiving cooking and Pinterest-friendly content in mind, this guide helps you offer your readers a recipe that is both deeply comforting and wonderfully practical.
Why Apple Pie Bars Are Perfect for Thanksgiving
Thanksgiving desserts carry the expectation of tradition, warmth, and homemade flavor. Apple Pie Bars deliver all of that, but with added benefits that standard pie simply cannot match.
They Feed a Crowd
Instead of one pie that serves eight, a single sheet of apple pie bars can serve twelve to sixteen people. This makes them perfect for large holiday gatherings, Friendsgiving events, or office potlucks.
They Are Easier to Make Than a Classic Pie
No delicate pie dough to roll, no crimping the edges, and no worrying about soggy crusts. The shortbread-style crust is pressed into the pan, so the entire base stays stable and sturdy.
They Slice Cleanly
Traditional pie can be messy. Apple pie bars slice into neat squares, making serving quick and simple. It also eliminates wait times, since guests can serve themselves.
They Are Portable
If you’re transporting a dessert to another home, these bars stay intact and travel well. They don’t slump or break like pie slices sometimes do.
They Offer Old-Fashioned Flavor Without Extra Work
Spiced apples, buttery crust, and a crumble topping combine into a nostalgic dessert that tastes like something out of a classic farmhouse kitchen. The flavors are traditional, but the format fits the modern holiday table.
What Makes These Apple Pie Bars “Old-Fashioned”?
The term “old-fashioned” refers to the rustic, traditional preparation style of earlier generations—simple ingredients, straightforward methods, and warm, nostalgic flavors. Before modern baking shortcuts existed, home bakers relied on pantry basics like butter, flour, sugar, and fresh apples. The combination of a pressed crust, a stovetop apple filling, and a buttery streusel is reminiscent of the types of recipes handwritten on recipe cards passed between families.
This recipe avoids packaged shortcuts and stays faithful to that heritage. Real butter, real apples, and classic spices create an authentic old-fashioned dessert that still fits perfectly into today’s holiday cooking.
Ingredients for Old-Fashioned Apple Pie Bars
These bars use simple, wholesome ingredients that you may already have in your pantry.
For the Crust
- Unsalted butter
- Granulated sugar
- All-purpose flour
- Salt
The crust resembles a buttery shortbread that stays firm enough to hold the bars together.
For the Apple Filling
- Fresh apples
- Brown sugar
- Granulated sugar
- Lemon juice
- Ground cinnamon
- Ground nutmeg
- Ground cloves (optional)
- Cornstarch
The filling is cooked just enough to soften the apples and blend the flavors before baking.
For the Crumble Topping
- Butter
- Flour
- Brown sugar
- Oats (optional, but adds structure and flavor)
- Cinnamon
The crumble topping browns beautifully and adds a crispy texture to contrast the soft filling.
The Best Apples for Apple Pie Bars
Choosing the right apple variety matters. Too soft, and the filling becomes mushy. Too firm, and the slices never soften properly.
The best apples for baking include:
- Granny Smith
- Honeycrisp
- Golden Delicious
- Braeburn
- Jonagold
For the best flavor, combine two varieties—one tart and one sweet.
Avoid apples like Red Delicious, which do not hold up during baking.

Old-Fashioned Apple Pie Bars
Equipment
- 8-inch baking dish
- parchment paper
- mixing bowls
- fork or pastry cutter
- knife
- spatula
- measuring cups and spoons
Ingredients
- ½ cup unsalted butter softened
- 1 teaspoon vanilla extract
- ¼ teaspoon salt
- 1 cup all-purpose flour for crust
- 4–5 small to medium apples peeled and thinly sliced
- 2 tablespoons granulated sugar
- 2 tablespoons all-purpose flour for filling
- 2 teaspoons lemon juice
- 1 ½ teaspoons apple pie spice
- ¼ cup granulated sugar for topping
- ½ cup brown sugar for topping
- 1 ¼ cups all-purpose flour for topping
- ¼ teaspoon salt for topping
- 1 ½ teaspoons cinnamon
- ½ cup unsalted butter for topping
Instructions
- Preheat oven to 350°F (175°C) and line an 8-inch baking dish with parchment paper for easy cleanup.
- In a mixing bowl, combine softened butter, vanilla, salt, and flour. Mix with a fork or pastry cutter until crumbly. Press evenly into the prepared pan and bake for 10 minutes. Let cool slightly.
- In another bowl, toss sliced apples with sugar, flour, lemon juice, and apple pie spice until evenly coated. Spread the mixture over the cooled crust in an even layer.
- In a clean bowl, combine granulated sugar, brown sugar, flour, salt, cinnamon, and butter. Mix with a fork or pastry cutter until the texture is crumbly. Sprinkle evenly over the apple layer.
- Bake for 30–35 minutes, or until the top is golden and apples are tender and bubbly. Cool completely before slicing. Chill for 1–2 hours for neater bars.
Notes
How to Make Old-Fashioned Apple Pie Bars
Step 1: Prepare the Crust
Cream the butter and sugar together, then mix in the flour and salt. The dough will be crumbly but should hold together when pressed. Press it evenly into a parchment-lined baking dish to form a uniform base. Bake it until lightly golden.
Step 2: Cook the Apple Filling
In a large skillet, heat apples with brown sugar, granulated sugar, spices, and lemon juice. As the apples release their juices, add cornstarch to thicken the mixture. Cook until the apples are tender but not falling apart.
Step 3: Prepare the Crumble Topping
Combine flour, sugar, butter, and oats (if using) to form a coarse crumble. The mixture should hold together when pinched.
Step 4: Assemble the Bars
Spread the warm apple filling over the baked crust. Sprinkle the crumble evenly over the apples.
Step 5: Bake
Bake until the topping is golden and crisp. The bars should cool completely so they set properly.
Step 6: Slice and Serve
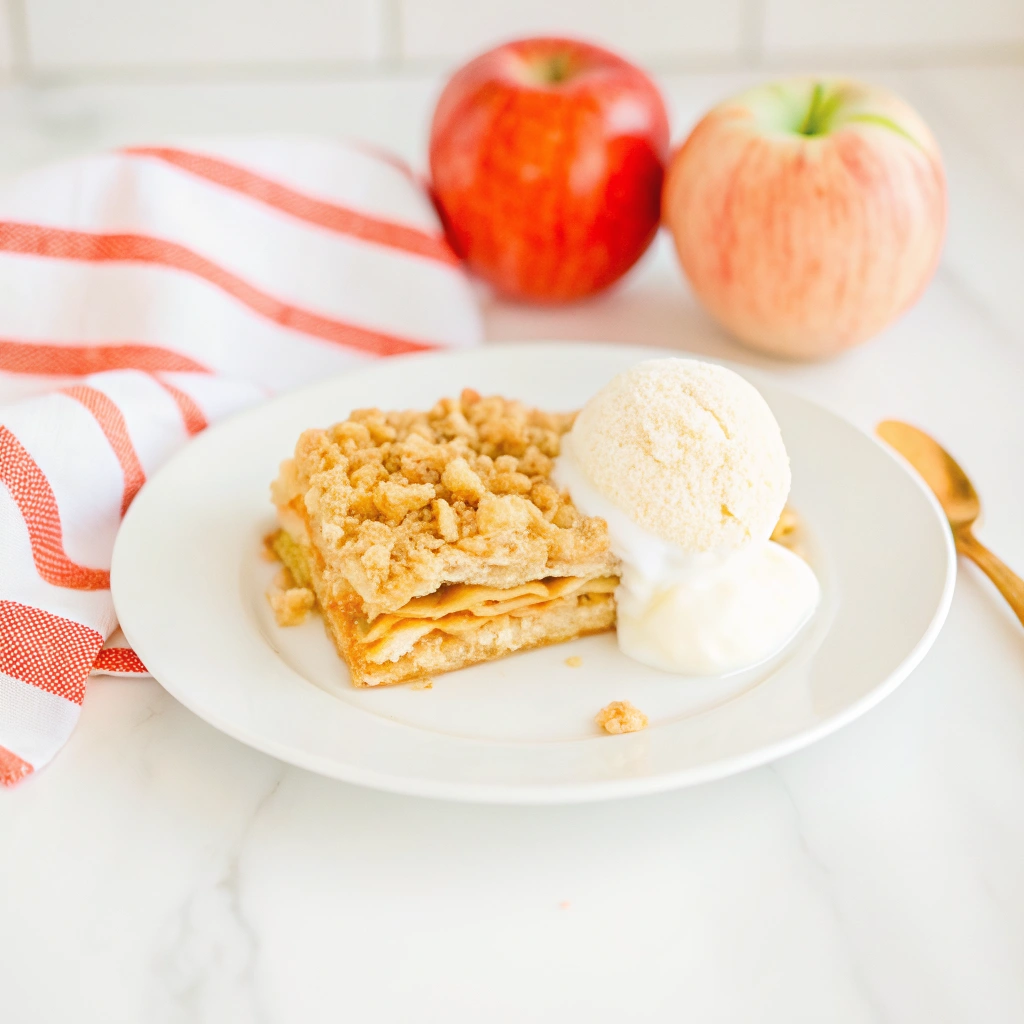
Cut into squares or rectangles. These bars are excellent served at room temperature, chilled, or warmed with a scoop of vanilla ice cream.
Tips for Perfect Apple Pie Bars
Use Parchment Paper
This makes removing and slicing the bars much easier.
Do Not Skip Par-Baking the Crust
It prevents the crust from becoming soggy and ensures clean slices.
Thicken the Apple Filling
If the filling is too runny before baking, the bars will not hold together. The cornstarch thickening step is essential.
Allow Time to Cool
If you cut the bars while warm, they will fall apart. Cooling helps everything firm up.
Add Oats for Texture
Oats give the topping structure and a slight chew, enhancing the rustic feel.
Customize the Spices
Add cardamom, allspice, or extra cinnamon for deeper fall flavor.
How to Store Apple Pie Bars
Room Temperature
Store in an airtight container for up to 2 days.
Refrigerator
Keeps well for up to 5 days. A quick warm-up in the oven makes them taste freshly baked.
Freezer
Freeze tightly wrapped bars for up to 3 months. Thaw at room temperature or warm in the oven.
These bars are great for prepping ahead of Thanksgiving or freezing leftovers for later.
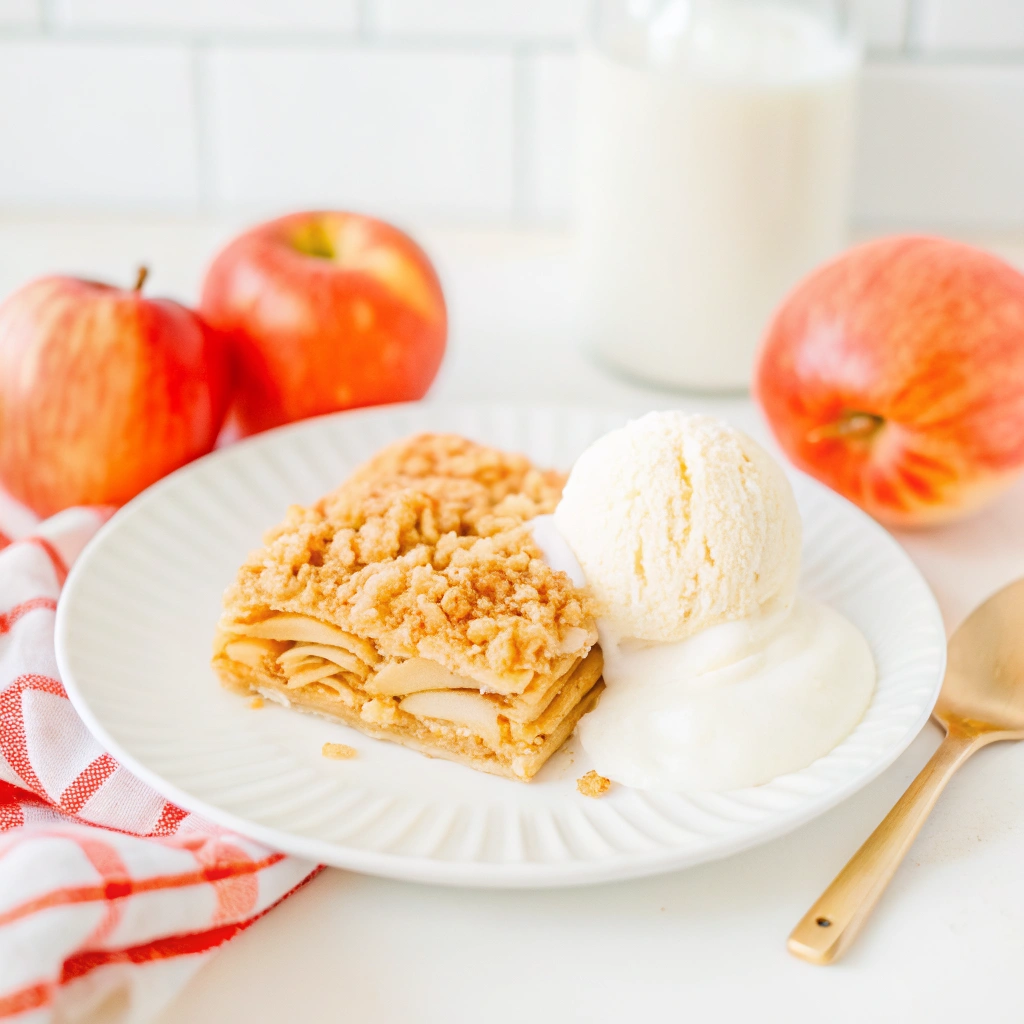
How to Serve Apple Pie Bars
These bars pair beautifully with:
- Vanilla ice cream
- Whipped cream
- Caramel drizzle
- A warm mug of cider or coffee
For Thanksgiving dessert tables, they offer a nice contrast to rich pumpkin pie and pecan pie.
They also make great edible gifts. Wrap squares individually in parchment and tie them with twine for a charming farmhouse-style presentation.