You simply can’t have a holiday party without the #1 classic! But this isn’t just any chocolate chip cookie recipe—oh no, we’re taking it to the next level.
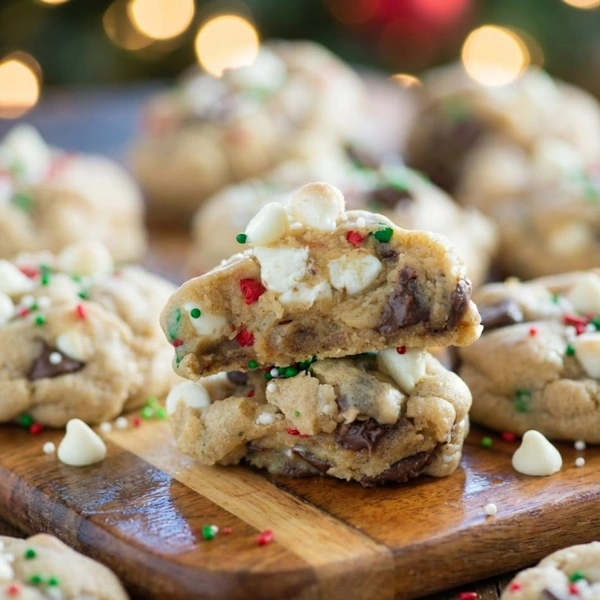
This is our ultimate, foolproof recipe for the softest, chewiest, gooiest chocolate chip Christmas cookies, made extra festive for the holidays. We’re talking thick, bakery-style cookies with perfectly golden edges, soft centers that stay gooey for days, and pockets of melty chocolate in every single bite. Santa (and your family) will thank you! And here’s what makes these extra special: we’re adding festive red and green M&Ms to make them pop on your Christmas cookie platter.
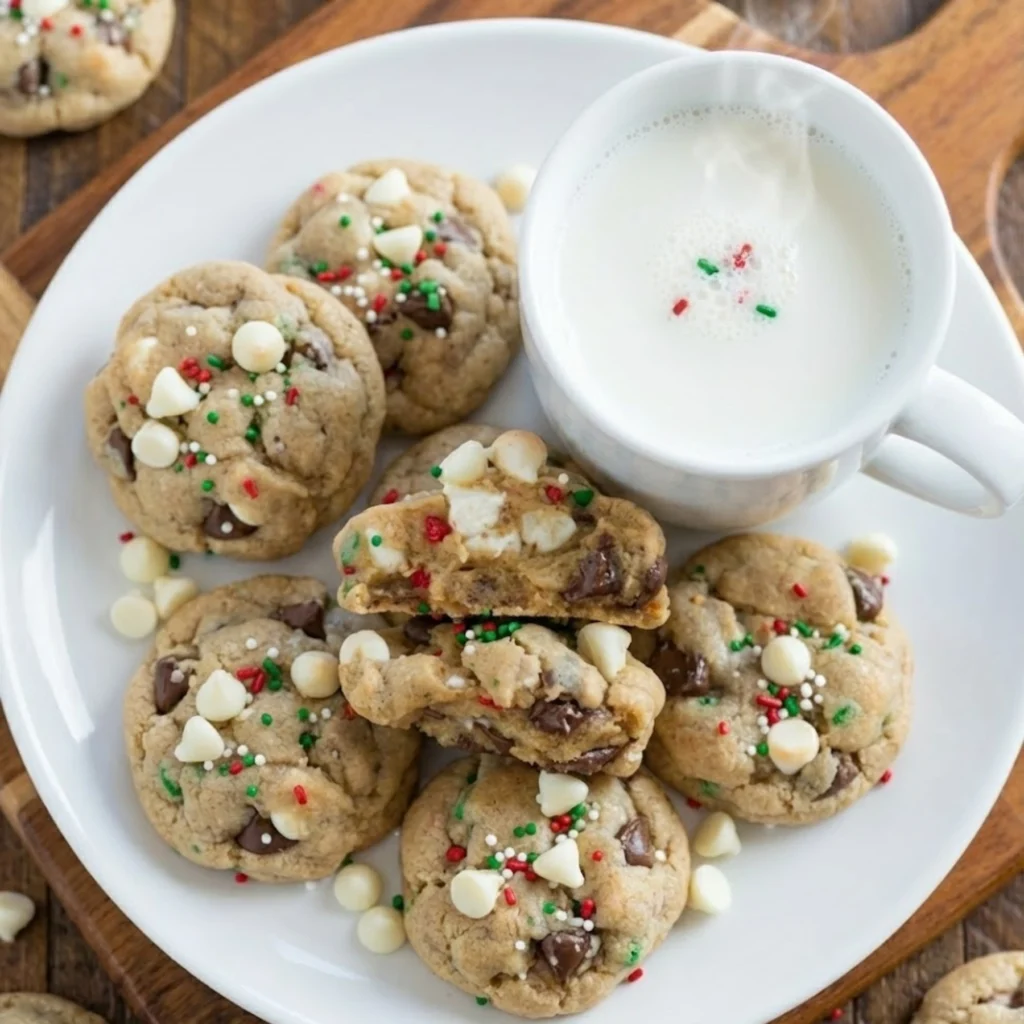
These cookies look like they came from a fancy bakery, they photograph beautifully for Pinterest, and they taste absolutely incredible. Whether you’re baking for a cookie exchange, filling up your holiday dessert table, or just need something special to leave out for Santa on Christmas Eve, these are the cookies you want. Let’s make some magic!
The Secret to Perfectly Soft & Chewy Cookies (Every Time!)
Let me share the game-changing tips that make these the absolute best chocolate chip cookies you’ll ever make. These aren’t just random suggestions—these techniques are what separate good cookies from extraordinary cookies.
Tip 1: Using Melted Butter (For Ultimate Chewiness)
Most chocolate chip cookie recipes call for softened butter, but we’re doing something different here: we’re using melted butter. This is the secret to achieving that dense, chewy, almost fudgy texture that keeps people coming back for more. When you use melted butter, it dissolves the sugar more completely, which creates a chewier cookie with a more concentrated flavor. The result? Cookies that stay soft for days and have that bakery-style texture everyone loves. Just make sure your melted butter isn’t piping hot when you add it—let it cool for a few minutes so it doesn’t cook the eggs!
Tip 2: Adding an Extra Egg Yolk (For Richness & Moisture)
Here’s a pro baker secret: we use one whole egg plus one extra egg yolk. Why? Egg yolks are packed with fat and emulsifiers, which make cookies richer, more tender, and incredibly moist. That extra yolk also helps bind everything together, creating a thicker cookie that doesn’t spread as much in the oven. It’s such a small change, but it makes a massive difference in the final texture. Your cookies will be softer, richer, and more luxurious than any basic recipe.
Tip 3: The “Don’t Overbake” Rule
This is probably the most important tip of all, and where most people go wrong! Pull your cookies out of the oven when they look slightly underdone in the center. The edges should be set and lightly golden, but the centers should still look a bit soft and puffy—maybe even a little shiny. They might look “not quite done,” but trust me, they are! Cookies continue baking on the hot pan after you remove them from the oven (this is called carryover cooking). If you wait until they look “done” in the oven, they’ll be overbaked and crispy by the time they cool. We want soft, chewy, gooey cookies, so embrace the slightly underbaked look!
Making Your Cookies “Christmas-Ready”
Let’s talk about taking these from classic chocolate chip cookies to festive, Pinterest-perfect Chocolate Chip Christmas Cookies! It’s all about the presentation, and these simple touches make them absolutely irresistible.
Using Holiday-Colored M&Ms
This is the easiest way to make your cookies scream “Christmas!” Simply swap out some (or all) of your chocolate chips for red and green M&Ms. The pop of festive color makes these cookies instantly recognizable as holiday treats, and they look absolutely stunning on a cookie platter next to other Christmas goodies. You can find special holiday M&M mixes in stores starting in November, or just pick out red and green from a regular bag. The candy shells also add a fun little crunch that contrasts beautifully with the soft, chewy cookie.
The “Pro Tip” for Bakery-Perfect Cookies
Want to know the secret to making your cookies look like they came from an expensive bakery? Here it is: right before baking, press a few extra M&Ms and chocolate chips into the top of each dough ball. When the cookies bake, those toppings stay visible and gorgeous instead of sinking into the dough. This creates that picture-perfect, professional look where you can actually see all the chocolate and candy on top. It takes an extra 30 seconds per batch, but the visual impact is incredible. These will be the most photographed cookies on your holiday table!
If you’re building a festive chocolate cookie lineup, these pair beautifully with other holiday favorites like our Chocolate Candy Cane Blossoms for a chocolate lover’s dream dessert spread!
How to Make Festive Chocolate Chip Cookies (Step-by-Step)
Ready to bake the best chocolate chip cookies of your life? Let’s break this down into simple, easy-to-follow steps!
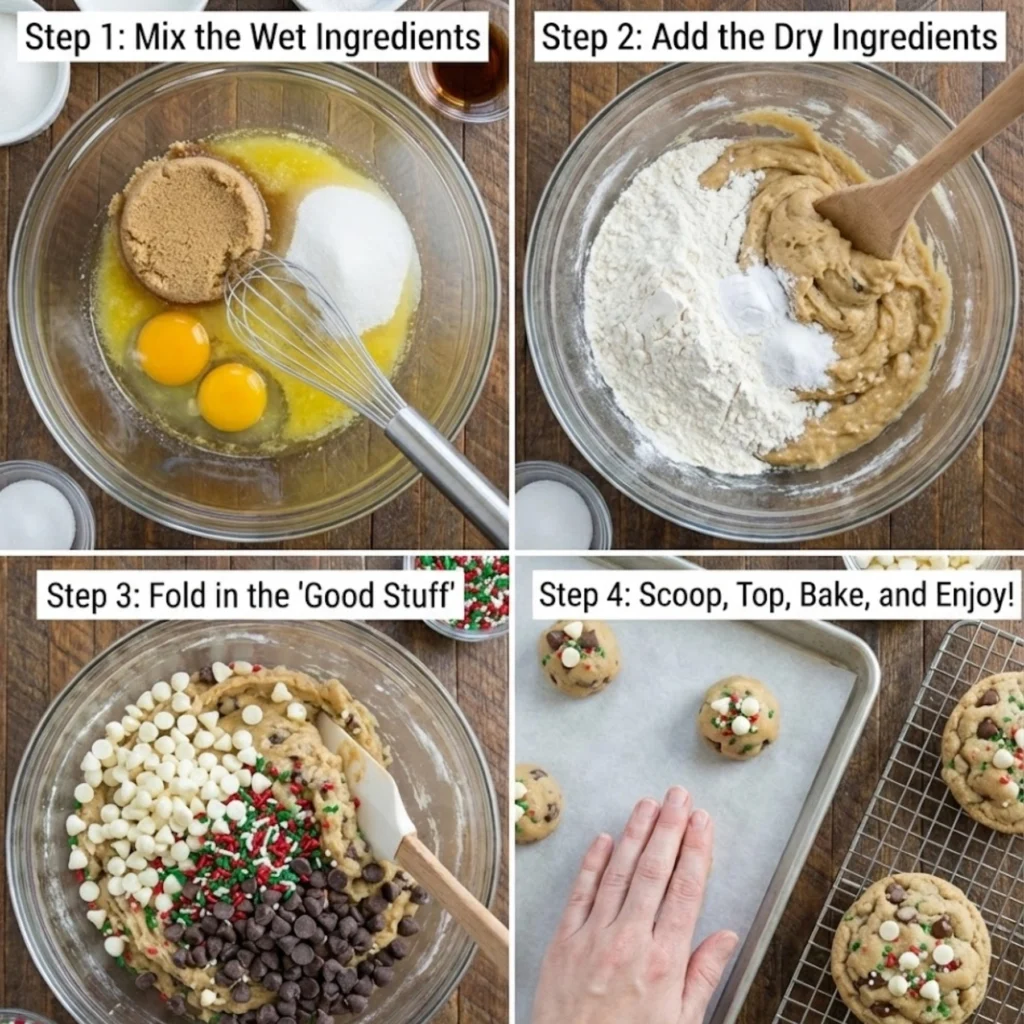
Step 1: Mix the Wet Ingredients
Start by melting your butter and letting it cool slightly (about 5 minutes—you want it warm but not hot). In a large mixing bowl, whisk together the melted butter with both brown sugar and granulated sugar until well combined and smooth. The mixture should look glossy and slightly thick. Add your whole egg, extra egg yolk, and vanilla extract, then whisk vigorously for about 30 seconds until everything is beautifully emulsified and smooth. This is where all that flavor and richness develops!
Step 2: Add the Dry Ingredients
In a separate bowl, whisk together your flour, baking soda, and salt. Add this dry mixture to your wet ingredients all at once, and use a wooden spoon or spatula to gently fold everything together. Mix just until you no longer see streaks of flour—don’t overmix! Overmixing develops gluten, which can make your cookies tough instead of tender. The dough will be thick, slightly sticky, and smell absolutely heavenly.
Step 3: Fold in the “Good Stuff”
Now for the best part! Fold in your chocolate chips and holiday M&Ms. I like to use a combination—maybe 1 cup of chocolate chips and ¾ cup of M&Ms—so you get both melty chocolate and those fun, colorful candy pieces in every cookie. Use a spatula to fold them in gently until they’re evenly distributed throughout the dough. Don’t be shy with the add-ins—we want chocolate and candy in every single bite!
Step 4: Scoop, Top, Bake, and Enjoy!
Use a cookie scoop (about 2-3 tablespoons of dough per cookie) to portion out your dough onto parchment-lined baking sheets, spacing them about 2-3 inches apart. Here’s where you use that pro trick: press 3-4 extra M&Ms and a few chocolate chips into the top of each dough ball, making them visible and pretty.
Bake at 350°F for 10-12 minutes. Remember: pull them out when the edges are golden but the centers still look slightly soft and underdone! Let them cool on the baking sheet for 5 minutes (this is crucial—they’re too soft to move immediately), then transfer to a cooling rack. Try to resist eating them all before they cool… though I won’t judge if you sneak one warm from the oven!
Can I Freeze This Cookie Dough? (Yes!)
This is one of my favorite features of this recipe—it’s incredibly freezer-friendly! This means you can prep ahead and have fresh-baked cookies whenever you want them during the busy holiday season.
How to Freeze Cookie Dough Balls
After you’ve scooped your cookie dough into balls (and added those pretty M&Ms and chocolate chips on top), place them on a parchment-lined baking sheet and pop the whole thing in the freezer. Let them freeze solid for about 2-3 hours. Once they’re frozen hard, transfer them to a freezer-safe zip-top bag or airtight container. They’ll keep beautifully for up to 3 months!
Label the bag with the date and baking instructions so future-you doesn’t have to remember the details. You can freeze as many or as few as you want—some people like to freeze a whole batch, while others freeze half and bake half fresh.
Baking Directly from Frozen
Here’s the beauty of frozen cookie dough: you can bake it straight from the freezer without thawing! Just add 1-2 extra minutes to the baking time. Place your frozen dough balls on a baking sheet and pop them in the oven at 350°F for 12-14 minutes instead of the usual 10-12. The cookies will bake up just as perfectly soft and delicious as fresh dough.
This is absolutely life-changing during the holidays. Imagine: unexpected guests drop by, or you suddenly need cookies for a last-minute party—just pull a few dough balls from the freezer and have warm, fresh-baked cookies in 15 minutes. You’ll look like a baking hero!
Your Top Chocolate Chip Cookie Questions Answered
Let’s tackle the most common chocolate chip cookie issues so you can bake with confidence!
“Why are my cookies flat?”
If your cookies are spreading into thin pancakes, there are usually two culprits. First, make sure your butter wasn’t too warm when you mixed the dough. It should be melted and cooled slightly—if it’s still hot, it can make the dough too soft. Second, check your baking soda! Old baking soda loses its leavening power, which means your cookies won’t puff up properly. If your baking soda is more than 6 months old, replace it. You can test it by adding a little to some vinegar—if it fizzes vigorously, it’s still good. Other possible causes: too much butter, not enough flour (make sure you’re measuring correctly!), or an oven that’s running too cool.
“Can I use chocolate chunks instead of chips?”
Absolutely, yes! Chocolate chunks are actually my favorite for a really indulgent cookie. They create these big, irregular pockets of melty chocolate that are absolutely incredible. You can use chopped chocolate bars, buy pre-made chocolate chunks, or use a combination of chunks and chips. Dark chocolate chunks, milk chocolate chunks, or even white chocolate chunks would all be delicious. The chunks melt a bit more than chips do, giving you even gooier pools of chocolate throughout your cookies.
“How do I store them to keep them soft?”
Store your cooled cookies in an airtight container at room temperature. Here’s the secret to keeping them soft: add a slice of bread to the container! The cookies will absorb moisture from the bread, staying soft and chewy for up to a week. Replace the bread slice every couple of days if needed. You can also layer the cookies with parchment paper if you want to stack them. Never store cookies in the refrigerator—this actually dries them out faster!
Frequently Asked Questions
Do I need to chill this dough?
Nope! One of the best things about this recipe is that you can bake the cookies immediately without any chilling time. The melted butter technique and the flour ratio create a dough that holds its shape perfectly without needing to be chilled first. However, if you want to chill the dough (maybe you’re prepping ahead or you prefer the flavor development that happens during chilling), you absolutely can! Chilled dough will spread slightly less and create an even thicker cookie. If you do chill it, let it sit at room temperature for about 10-15 minutes before scooping so it’s not rock-hard.
Can I use a different kind of M&M?
Definitely! While red and green M&Ms are perfect for Christmas, you can customize these cookies for any holiday or occasion. Use pastel M&Ms for Easter, orange and black for Halloween, red and pink for Valentine’s Day, or just stick with classic rainbow M&Ms year-round. Peanut M&Ms would add a fun nutty crunch, and peanut butter M&Ms would be absolutely delicious with the chocolate. Mini M&Ms are also cute and distribute more evenly throughout the cookies. Get creative and make them your own!
What’s the best kind of chocolate chip to use (semi-sweet, milk, etc.)?
This totally comes down to personal preference! Semi-sweet chocolate chips are the classic choice—they’re not too sweet and have a nice balance with the cookie dough. Milk chocolate chips are sweeter and creamier, perfect if you have a serious sweet tooth. Dark chocolate chips (60-70% cacao) add a more sophisticated, less sweet flavor that many adults love. My personal favorite? A combination! Try half semi-sweet and half dark chocolate, or mix semi-sweet chips with some chopped milk chocolate bars. You can also use chocolate chunks, chocolate discs, or even chopped chocolate bars for those big, irregular chocolate pieces that look so professional.
Time to Bake Some Holiday Magic!
This is truly the perfect, classic cookie to make your holiday season a little sweeter. The soft, chewy texture combined with all that melty chocolate and those festive red and green M&Ms creates the ultimate crowd-pleasing treat. That festive color just makes them even more fun and adds that special holiday touch to your cookie platter!
Whether you’re team “chocolate chip cookies are the only cookies that matter” or you’re just looking for a reliable, delicious recipe that the whole family will love, these Chocolate Chip Christmas Cookies are it. They’re foolproof, they’re gorgeous, and they taste absolutely incredible.
Bake a batch for Santa (or just for yourself—no judgment here!). Let me know if you agree these are the best chocolate chip cookies you’ve ever made in the comments below. I love hearing about your holiday baking adventures! And don’t forget to save this recipe to your “Holiday Baking” board on Pinterest so you can find it every Christmas season. Happy baking!

Chocolate Chip Christmas Cookies
Equipment
- mixing bowls
- stand mixer or handheld mixer
- whisk
- parchment paper
- cookie scoop (3 tbsp)
- baking sheets
- wire cooling rack
- microwave-safe bowl
Ingredients
- 3 cups all-purpose flour (380 grams)
- 1 tbsp cornstarch
- 1 tsp baking soda
- 1 tsp fine sea salt
- 2 sticks unsalted butter (247 grams)
- 1/2 cup granulated sugar (100 grams)
- 1 1/4 cups light brown sugar (247 grams)
- 2 tsp vanilla extract
- 2 large eggs
- 1 3/4 cups mini semi-sweet chocolate chips (or 2 cups regular)
- 16 oz chocolate melting wafers
- assorted Christmas sprinkles
Instructions
- Set out butter and eggs to soften to room temperature.
- Measure flour properly using weight or spoon-and-sweep method to avoid dry cookies.
- Measure remaining ingredients.
- In a medium bowl whisk together flour, cornstarch, baking soda, and salt.
- Cream butter with brown and granulated sugar in a stand mixer for about 2 minutes.
- Add vanilla and eggs and beat 30–40 seconds.
- Gradually beat in the flour mixture until just combined. Add chocolate chips and mix briefly.
- Preheat oven to 350°F and line baking sheets with parchment paper.
- Use a 3 tbsp cookie scoop to portion dough.
- Arrange on baking sheets and bake 11–13 minutes until edges are golden and centers set.
- Cool 5 minutes on the baking sheet, then transfer to a wire rack to cool completely.
- Melt chocolate wafers in microwave at 50% power in 30-second intervals until smooth.
- Dip half of each cooled cookie in chocolate, place on a baking sheet, and immediately add sprinkles.
- Allow chocolate to set at room temperature or chill for 10 minutes.