
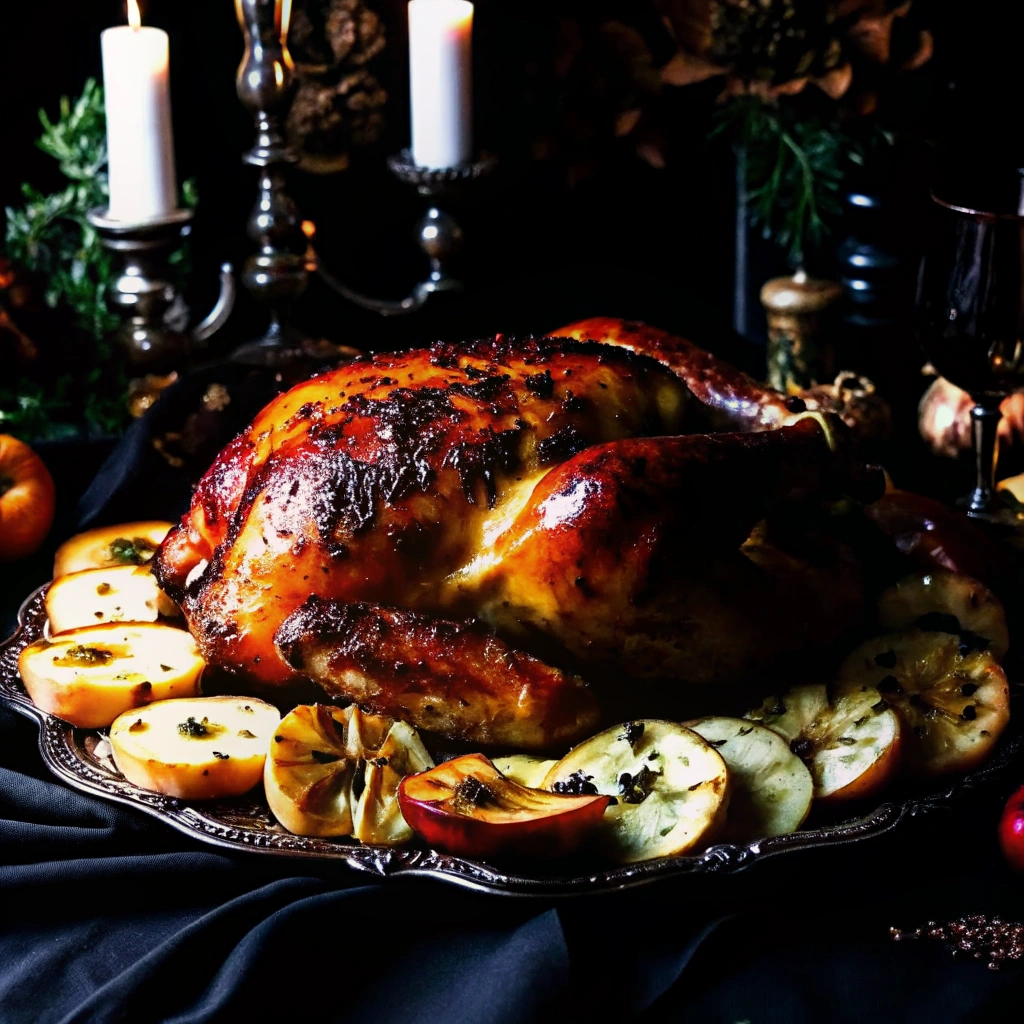
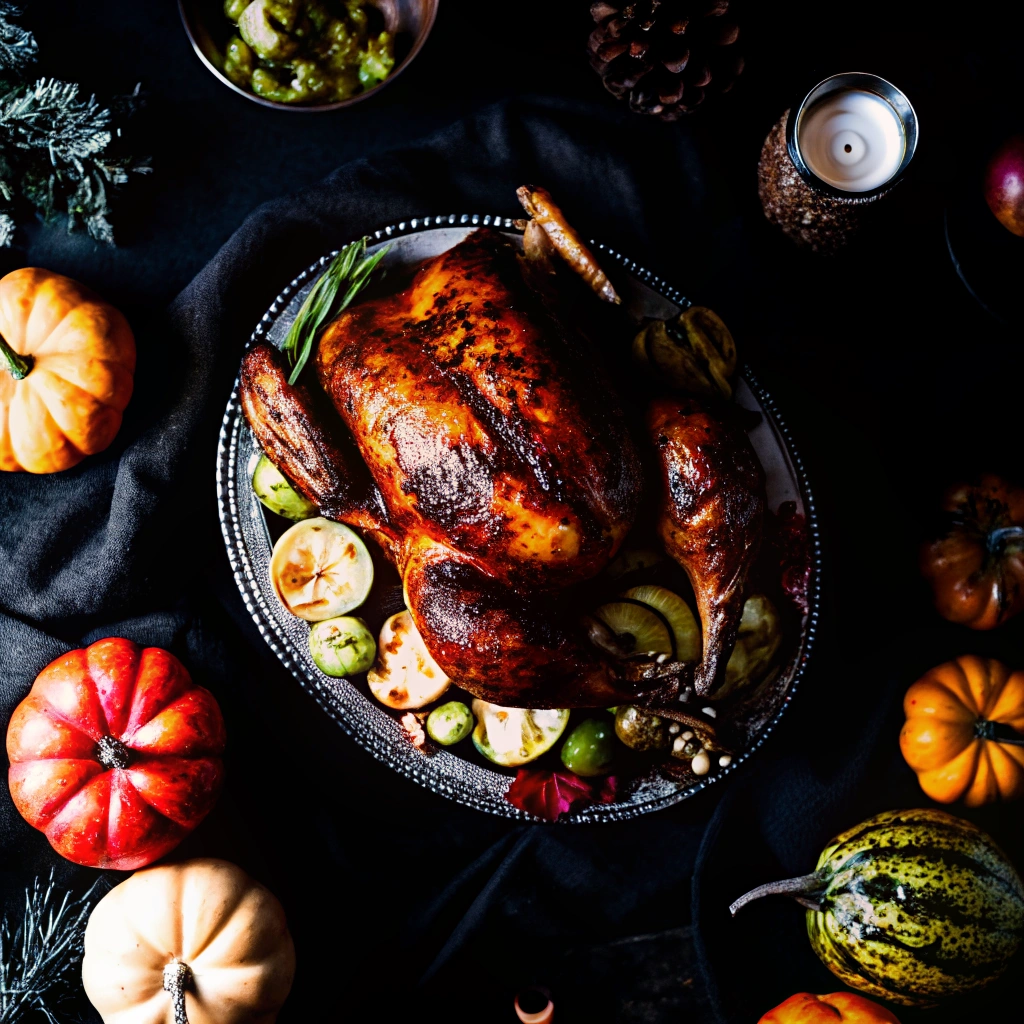
If you’ve ever wrestled with a dry, flavorless roast chicken, this recipe is your game-changer. Introducing the Cider Brined Roast Chicken—a simple, yet transformative technique that guarantees meat so moist and tender it practically melts in your mouth, all encased in glorious, golden-brown, crispy skin. The secret lies in a simple brine made with fragrant apple cider, which infuses the chicken with subtle autumnal notes and, most importantly, locks in moisture during the high-heat roasting process.
Roasting a whole chicken shouldn’t be intimidating; it should be rewarding! The cider brine ensures that even if you accidentally overcook the bird by a few degrees, the meat will still remain juicy. We pair this amazing moisture retention with a simple high-heat roasting method to deliver that perfectly crackling skin every home cook dreams of. The result is a dinner that is impressive enough for a holiday meal, yet easy enough for a cozy Sunday supper.
Get ready to master the art of the perfect roast with this Cider Brined Roast Chicken Recipe. It’s flavorful, tender, and guaranteed to become your new favorite way to prepare poultry.
Why Brining is the Key to a Perfect Roast Chicken
Brining, which involves soaking the chicken in a solution of salt, sugar, and water (plus our secret ingredient: apple cider!), is a non-negotiable step for the best roast. Here is why this Cider Brine method works wonders:
- Maximum Moisture Retention: The salt in the brine solution denatures the proteins in the chicken meat. These altered proteins can then hold onto more moisture as the chicken cooks, preventing the meat from drying out under high heat.
- Deep Flavor Infusion: The apple cider, brown sugar, herbs, and aromatics in the brine are absorbed into the meat, flavoring the chicken from the inside out, providing a delicate, sweet, and savory note.
- Tender Texture: Brining breaks down some of the muscle fibers, resulting in a noticeably more tender and succulent final product.
- Better Crispy Skin: The rinsing and drying process after brining is essential. It draws out surface moisture, which allows the skin to crisp up and brown beautifully during roasting.
Ingredients
This recipe is divided into the brine, the chicken itself, and the aromatic additions.
For the Apple Cider Brine
- 8 cups water (or 4 cups water and 4 cups apple cider for a stronger flavor)
- 4 cups pure apple cider (not apple juice)
- 1/2 cup Kosher salt
- 1/4 cup packed light brown sugar
- 4 sprigs fresh thyme
- 2 sprigs fresh rosemary
- 1 tablespoon black peppercorns
- 4 cloves garlic, smashed
- 2 bay leaves
For the Roast Chicken
- 1 whole chicken (5 to 6 lbs), giblets removed
- 1 tablespoon olive oil (or melted butter)
- 1 teaspoon Kosher salt (for finishing, after brining)
- 1/2 teaspoon black pepper (for finishing)
Aromatics for the Cavity (Optional but Recommended)
- 1 small apple, quartered
- 1 small onion, quartered
- 2 sprigs fresh rosemary
- 2 sprigs fresh thyme
Step-by-Step Instructions: Brine, Dry, and Roast
Achieving a juicy chicken with crispy skin requires following the steps in order: Brine, Dry, and Roast.
Part 1: Preparing the Cider Brine (12-24 Hours Ahead)
- Combine Brine Ingredients: In a large pot or Dutch oven, combine 4 cups of water (or apple cider mix), Kosher salt, brown sugar, thyme, rosemary, peppercorns, garlic, and bay leaves.
- Heat and Dissolve: Bring the mixture to a simmer over medium heat, stirring until the salt and sugar are completely dissolved.
- Cool Completely: Remove the pot from the heat. Add the remaining 4 cups of cold water (or cold cider/water mix) to rapidly cool the brine. It is essential that the brine is completely chilled before adding the chicken to prevent food safety issues. You can add ice cubes to speed up this process.
- Brine the Chicken: Once the brine is cold, place the whole chicken into the brine, ensuring it is fully submerged. If your pot isn’t large enough, use a large brining bag or a clean bucket.
- Refrigerate: Cover the container and refrigerate for a minimum of 12 hours up to a maximum of 24 hours. Do not brine for longer than 24 hours, as the meat can become too salty or mushy.
Part 2: Drying the Chicken (Crucial for Crisp Skin)
- Rinse Thoroughly: Remove the chicken from the brine. Discard the brine solution and aromatics. Rinse the chicken well both inside and out under cold running water to remove excess surface salt.
- Pat Dry: Pat the chicken absolutely dry with paper towels. You want the skin as dry as possible.
- Air Dry (Optional, but Recommended): For the absolute crispiest skin, place the chicken, breast-side up, on a wire rack set over a baking sheet. Refrigerate it, uncovered, for 4 to 8 hours (or even overnight). This air-drying process extracts even more moisture from the skin.
Part 3: Roasting the Chicken
- Preheat and Prep: Preheat your oven to 425∘F (220∘C). Place a wire rack inside a sturdy, rimmed roasting pan or baking sheet.
- Stuff the Cavity: Place the apple, onion, rosemary, and thyme quarters inside the chicken cavity. (Do not pack tightly; the aromatics are for flavor, not stuffing). Use kitchen twine to tie the legs together, which helps the chicken cook evenly and look better.
- Season the Skin: Rub the entire exterior of the chicken with 1 tablespoon of olive oil or melted butter. Sprinkle lightly with 1 teaspoon of Kosher salt (since we rinsed off the brine) and 1/2 teaspoon of black pepper.
- Roast at High Heat: Place the chicken on the prepared wire rack, breast-side up. Roast for 15 minutes at 425∘F. This initial burst of high heat encourages the skin to crisp up quickly.
- Lower the Heat: After 15 minutes, reduce the oven temperature to 375∘F (190∘C) and continue roasting for another 60 to 75 minutes.
- Check Temperature: The chicken is done when a meat thermometer inserted into the thickest part of the thigh (avoiding bone) registers an internal temperature of 165∘F (74∘C).
- Rest (Non-Negotiable): Remove the chicken from the oven and transfer it to a cutting board. Tent it loosely with foil and let it rest for 15 to 20 minutes. This allows the juices to redistribute back into the meat, ensuring ultimate juiciness.
- Carve and Serve: Carve the chicken and serve immediately, drizzling any pan juices over the meat.
Pro Tips for the Best Roast Chicken
Mastering the Cider Brined Roast Chicken involves a few key steps to ensure both moisture and crispiness.
- The Cooling Period: Never put a raw chicken into warm or hot brine. The brine must be completely chilled. If you are pressed for time, use extra ice in the brine to bring the temperature down quickly before adding the bird.
- The Brining Window: Stick closely to the 12-24 hour window. Brining for less time won’t yield the full benefit, and brining for significantly longer will result in overly salty and texturally compromised meat.
- Positioning is Key: Always roast the chicken on a wire rack over a pan. This allows air to circulate entirely around the bird, preventing the bottom side from sitting in its own juices and becoming soggy.
- The Butter Bath: While oil works fine, rubbing the skin generously with softened butter (especially compound butter mixed with fresh herbs) is the ultimate secret weapon for a rich flavor and extra-crispy, golden skin.
- If the Skin Browns Too Fast: If the skin is perfectly golden before the chicken reaches 165∘F, tent the chicken loosely with aluminum foil to prevent burning while the inside finishes cooking.
Serving Suggestions and Flavor Variations
The subtle sweetness of the Cider Brined Roast Chicken makes it incredibly versatile.
Serving Suggestions
- Classic Comfort: Pair with classic comfort sides like the Classic Green Bean Casserole and Southern Maple Sweet Potato Casserole for a perfect holiday meal.
- Fall Favorites: Serve alongside roasted root vegetables (carrots, parsnips, potatoes) that can roast in the pan underneath the rack, soaking up the chicken juices.
- Fresh Finish: Serve with a light side salad dressed with a bright apple cider vinaigrette to complement the brine’s flavor profile.
Creative Variations
- Spicy Cider Glaze: During the last 15 minutes of roasting, brush the chicken with a glaze made from reduced apple cider, a touch of maple syrup, and a pinch of cayenne pepper or red pepper flakes.
- Herbaceous Rub: Mix the 1 tablespoon of olive oil with 1 tablespoon of finely chopped fresh herbs (sage, rosemary, thyme) before rubbing it over the chicken skin for a more pronounced herbal flavor.
- Citrus Boost: Add the peels of one large orange and one lemon to the brine solution and the cavity aromatics for a brighter, citrusy flavor note.
- Garlic and Honey: Add 1/4 cup of honey and 6 cloves of smashed garlic to the brine mixture. This adds a beautiful, savory-sweet caramelization to the skin.
Frequently Asked Questions
- Do I have to rinse the chicken after brining? Yes, absolutely. Rinsing the chicken after it comes out of the brine is essential to wash off excess salt from the surface. If you skip this step, the skin will be far too salty, even if you pat it dry.
- Can I use chicken parts (breasts, thighs) instead of a whole chicken? Yes, you can! Brining time for smaller cuts needs to be adjusted. For boneless chicken breasts, brine for only 30 to 60 minutes. For bone-in thighs or breasts, brine for about 2 to 4 hours. Follow the same rinsing and drying steps.
- Is a brine the same as a marinade? No. A brine relies primarily on a salt solution to fundamentally change the muscle structure, resulting in juicier meat. A marinade uses acids (like vinegar, lemon juice, or wine) and oils, which primarily tenderize the surface of the meat and add external flavor. Brining is far superior for preventing dryness in large cuts of poultry.
- How do I safely store and reheat leftover roast chicken? Store leftover chicken in an airtight container in the refrigerator for up to 3 days. To reheat without drying it out, slice the meat and place it in a shallow baking dish with a splash of chicken broth. Cover tightly with foil and heat in a 300∘F oven until warmed through.
- What should I do with the carcass? Don’t discard it! A roasted chicken carcass makes the most flavorful homemade chicken stock or broth. Simmer it with water, carrots, celery, onion, and herbs for several hours.
This Cider Brined Roast Chicken is a simple but impactful recipe that will earn you rave reviews. Enjoy the juicy results!
Don’t forget to Pin this recipe for later and share your own delicious creations in the comments below!
Cider Brined Roast Chicken
Ingredients
Equipment
Method
- In a large pot, combine apple cider, water, salt, brown sugar, garlic, bay leaves, peppercorns, rosemary, and thyme. Stir until salt and sugar dissolve.
- Submerge the chicken in the brine. Cover and refrigerate for at least 8 hours or overnight.
- Remove chicken from brine, rinse, and pat completely dry with paper towels.
- Preheat oven to 425°F (220°C). Place chicken in a roasting pan and rub with olive oil.
- Roast chicken for 80–90 minutes, or until internal temperature reaches 165°F (74°C).
- Let rest for 10–15 minutes before carving and serving.