
Every St. Patrick’s Day dessert table needs a centerpiece — the one thing that makes people stop mid-conversation, eyes wide, reaching for a piece before they’ve even asked what it is. These Fudgy Green Velvet Brownies are unambiguously, definitively that thing.
Inspired by the beloved red velvet cake and its iconic cream cheese pairing, this recipe takes everything great about that classic and rebuilds it in the most festive, fudgy, vibrantly green form imaginable. The brownie base is dense, deeply rich, and the kind of emerald green that looks almost too beautiful to eat — almost. The cream cheese frosting on top is tangy, cloud-soft, and the perfect cool counterpoint to all that fudgy intensity below. Finish with a shower of shamrock sprinkles and you have the most visually spectacular St. Patrick’s Day dessert you’ve ever put on a table.
The best part? These are far simpler to make than they look. One bowl, one pan, and under an hour from start to finish. Let’s make something that earns a standing ovation. 🍀
Why You’ll Love These Fudgy Green Velvet Brownies
These earn their place at the top of your St. Patrick’s Day dessert lineup — and here’s the full case for why:
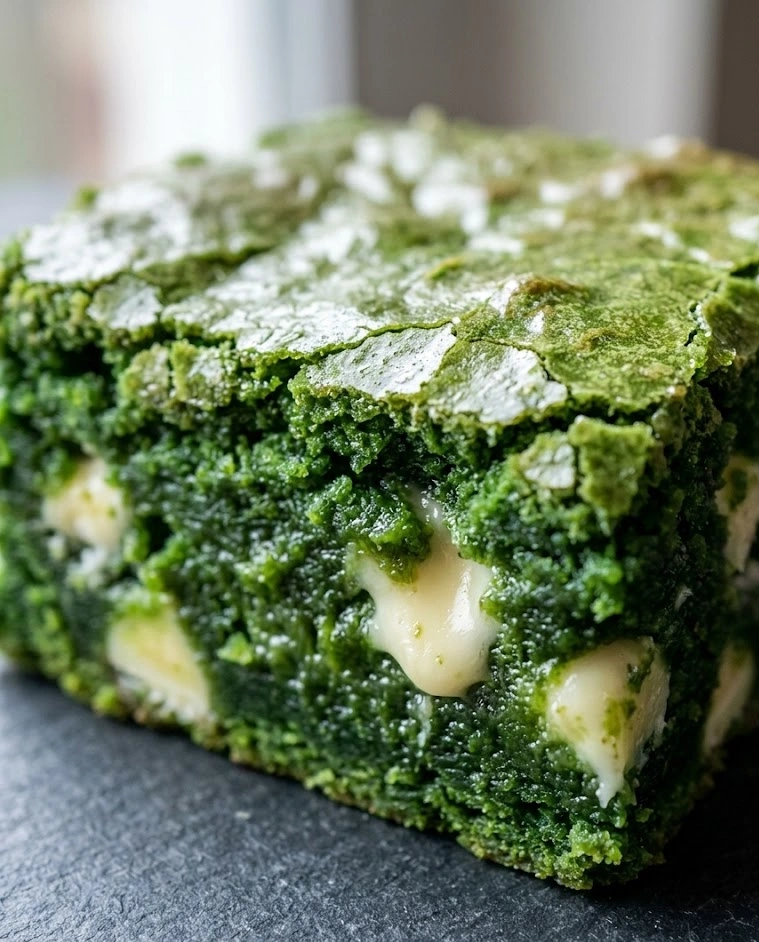
- Jaw-dropping visual impact — that vibrant emerald green against the white cream cheese frosting is the most dramatic, beautiful St. Patrick’s Day dessert presentation you can achieve with minimal effort.
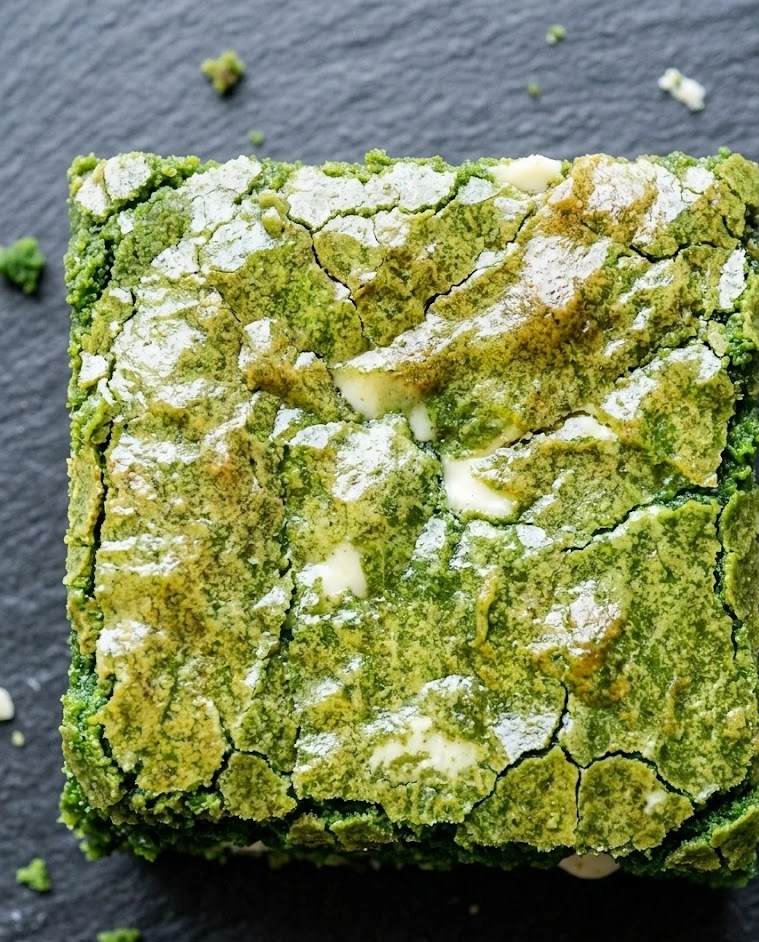
- Impossibly fudgy texture — dense, gooey, crinkly-topped perfection in every single square. These are the brownies people describe in reverent tones.
- The cream cheese frosting is everything — tangy, creamy, perfectly sweet, and the ideal counterbalance to the rich, intense brownie base.
- One bowl, one pan — this is genuinely simple baking dressed up to look wildly sophisticated. Nobody needs to know.
- Make-ahead perfection — like all great St. Patrick’s Day desserts, these taste better the next day. Make them the night before and arrive at your celebration as an absolute legend.
Common Mistakes — And How to Avoid Them
Green velvet brownies have a few unique considerations beyond standard brownie pitfalls. Here’s your complete guide to a flawless result.
Using liquid food coloring instead of gel. This is the most critical mistake unique to this recipe. Liquid food coloring adds water to your batter, which interferes with the emulsion, dilutes the color, and can produce a streaky, uneven result. Gel food coloring is concentrated, water-free, and delivers that deep, saturated emerald green with just a tiny amount. It is non-negotiable for this recipe.
Adding too much coloring at once. Gel coloring is extraordinarily powerful. Add it one small drop at a time, folding completely between additions, until you reach your desired shade. Over-colored batter can develop a slightly bitter, chemical aftertaste that no amount of frosting will mask. Build the color gradually and stop when it’s gorgeous.
Overbaking and losing the fudge factor. Green velvet brownies are just as vulnerable to overbaking as any other brownie — more so, because the visual cues that normally indicate doneness are obscured by the color. You cannot judge a green velvet brownie by looking at the top. Use the toothpick test exclusively: moist fudgy crumbs means perfect; clean toothpick means you went too far.
Making the frosting too thin. A cream cheese frosting that’s too loose will slide off the brownies, pool at the edges, and look messy rather than polished. Beat the cream cheese and butter until truly fluffy before adding the powdered sugar, and only add cream a few drops at a time. The frosting should hold a soft peak and spread smoothly without any runniness.
Frosting while warm. Even slightly warm brownies will melt cream cheese frosting on contact. This point cannot be overstated. Cool completely at room temperature, then refrigerate for 20 minutes before frosting. Your patience will be rewarded with the most beautiful, clean, professional-looking St. Patrick’s Day dessert you’ve ever made.
Chef’s Notes
The insider details that elevate these from a fun holiday bake to a genuinely unforgettable St. Patrick’s Day dessert:
- White chocolate is the secret weapon. Unlike classic red velvet cake which relies on cocoa powder for its base flavor, these green velvet brownies use melted white chocolate as their foundation. White chocolate provides richness, sweetness, and a neutral-colored base that lets the green sing through at full intensity without any browning from dark cocoa interfering with the color.
- A tiny drop of teal or blue gel coloring alongside the green creates a deeper, more jewel-toned emerald that looks far more sophisticated than a straight bright green. Add it one micro-drop at a time and watch the color transform.
- Vanilla bean paste instead of extract in both the brownie and frosting adds visible black specks that create a beautiful visual contrast against the green base and add a deeper, more complex vanilla flavor that makes both components taste noticeably more special.
- Toast your white chocolate carefully. If you want an even deeper flavor base, toast the white chocolate in a low oven at 250°F for 10–12 minutes, stirring every few minutes, until it turns a light golden color. This caramelized white chocolate adds an extraordinary butterscotch-like depth that makes the brownies taste unlike anything else.
- Flaky sea salt on the frosting. A light scatter of Maldon or fleur de sel over the cream cheese frosting before the sprinkles adds a sophisticated salty-sweet contrast that transforms these from a fun holiday treat into something genuinely elegant.
Key Ingredients — And Why They Matter
White Chocolate is the architectural foundation that makes green velvet brownies possible. Its pale color allows the green food coloring to shine through at full saturation, while its fat content — cocoa butter — provides the rich, fudgy, dense texture we’re after. Use a good-quality white chocolate bar rather than chips, which contain stabilizers that prevent smooth melting and can cause the batter to seize.
Unsalted Butter works in concert with the white chocolate to create the brownie’s incredibly tender, rich crumb. As always, browning the butter before using adds a deep, nutty complexity that is completely invisible in a standard brownie but here — without dark cocoa to compete — comes through beautifully as a warm, caramel undertone beneath the green.
Eggs and Egg Yolks provide structure and the essential fudge factor. Two whole eggs plus one extra yolk is the ideal ratio — the extra fat from the additional yolk pushes the texture decisively into fudgy territory and prevents the brownies from baking up cakey or dry.
Green Gel Food Coloring is the magic ingredient that transforms a simple white chocolate brownie into the most spectacular St. Patrick’s Day dessert on any table. Gel coloring — specifically the highly concentrated variety from brands like Americolor or Wilton — gives a vibrant, deep, saturated emerald green that holds its color beautifully through baking without fading, streaking, or adding any off-flavors.
All-Purpose Flour in a deliberately small quantity is what keeps these firmly in fudgy brownie territory rather than sliding toward cakey. Less flour means a denser, more fudge-like structure. Measure it carefully — spoon into the measuring cup and level off — because even a few extra grams of flour can noticeably affect the final texture.
Full-Fat Cream Cheese is the non-negotiable foundation of the frosting. Use full-fat, block-style cream cheese — not low-fat, not whipped, not spreadable. Block cream cheese has a firmer structure that produces a stable, pipeable frosting that holds its shape beautifully on top of the brownies rather than weeping or sliding. Bring it fully to room temperature before beating for the smoothest possible result.
Powdered Sugar in the frosting provides sweetness, structure, and the smooth, matte finish that makes cream cheese frosting look so polished and professional. Sift it before adding — lumpy powdered sugar produces a lumpy frosting, and these St. Patrick’s Day desserts deserve better than lumpy.
How to Make Fudgy Green Velvet Brownies
Ingredients — Brownie Base (Makes 16 squares)
- ½ cup (115g) unsalted butter
- 6 oz (170g) good-quality white chocolate, roughly chopped
- ¾ cup (150g) granulated sugar
- ¼ cup (55g) light brown sugar, packed
- 2 large eggs plus 1 egg yolk, room temperature
- 1½ tsp pure vanilla extract or vanilla bean paste
- ¾ cup (90g) all-purpose flour
- ¼ tsp salt
- Green gel food coloring (start with ½ tsp, adjust to desired shade)
- Optional: 1 tiny drop teal gel coloring for a deeper emerald
Ingredients — Cream Cheese Frosting
- 8 oz (225g) full-fat block cream cheese, fully room temperature
- ¼ cup (55g) unsalted butter, room temperature
- 2 cups (240g) powdered sugar, sifted
- 1 tsp pure vanilla extract or vanilla bean paste
- 1–2 tbsp heavy cream
- Pinch of salt
To Finish
- Shamrock sprinkles, green sugar crystals, or gold star sprinkles
- Flaky sea salt (optional but spectacular)
Instructions
- Preheat and prep. Preheat oven to 350°F (175°C). Line an 8×8-inch baking pan with parchment paper, leaving overhang on two sides. Grease lightly.
- Brown the butter. In a medium saucepan over medium heat, melt the butter, stirring occasionally, until it turns golden brown and smells deeply nutty — about 4–5 minutes. Watch carefully and remove from heat the moment it’s ready. Pour into a large heatproof bowl.
- Melt the white chocolate. Add the chopped white chocolate to the hot brown butter immediately and stir gently until completely melted and smooth. If needed, set the bowl over a pot of barely simmering water for gentle, even melting. Let the mixture cool for 5 minutes until just warm.
- Add sugars. Whisk both sugars into the white chocolate mixture until fully combined and slightly grainy — this is normal and correct at this stage.
- Add eggs and vanilla. Add the eggs, egg yolk, and vanilla extract to the mixture. Whisk vigorously for about 90 seconds until the mixture is smooth, glossy, and noticeably thickened. This step is important — the vigorous whisking creates the signature crinkly top.
- Color the batter. Add the green gel food coloring, starting with a small amount and folding it in completely before assessing the color. Add more in tiny increments until you reach a deep, vibrant emerald green. Add a micro-drop of teal if using. The batter should look almost jewel-bright — it will bake slightly darker.
- Add the flour. Sift the flour and salt over the colored batter. Fold gently with a rubber spatula until just combined — stop the moment no flour streaks remain. Do not overmix.
- Bake. Pour the batter into the prepared pan and smooth to an even layer. Bake for 24–28 minutes until the top is set and a toothpick inserted in the center comes out with moist fudgy crumbs. The green color makes visual assessment difficult — trust the toothpick exclusively.
- Cool completely. Remove from the oven and cool in the pan on a wire rack until fully at room temperature — at least 1 hour. Do not rush this step. Refrigerate for 20 minutes once at room temperature before frosting.
- Make the cream cheese frosting. Beat the room-temperature cream cheese and butter together with an electric mixer on medium-high speed for 3 full minutes until pale, light, and completely smooth. Add the sifted powdered sugar in two additions, mixing on low between each to avoid a powdered sugar cloud. Add the vanilla, salt, and 1 tablespoon of heavy cream. Beat on medium-high for 2 minutes until light, fluffy, and spreadable. Add a second tablespoon of cream only if needed for spreading consistency.
- Frost the brownies. Use the parchment overhang to lift the completely chilled brownie slab onto a cutting board. Spread the cream cheese frosting in a generous, even layer across the entire surface, creating soft swoops and swirls with the back of a spoon for a beautiful, textured finish.
- Decorate and chill. Scatter shamrock sprinkles and green sugar crystals generously over the frosting. Add flaky sea salt if using. Refrigerate for at least 30 minutes until the frosting is firm.
- Slice and serve. Using a sharp knife wiped clean between every single cut, slice into 16 squares. The contrast of the vibrant green brownie base against the white frosting in each cut piece is genuinely breathtaking. Arrange on your St. Patrick’s Day dessert table and prepare for the reactions.
Variations & Tips
Add a mint twist. Add ½ teaspoon of pure peppermint extract to the brownie batter and another ½ teaspoon to the cream cheese frosting for a mint-chocolate-adjacent flavor profile that leans fully into the St. Patrick’s Day dessert spirit and pairs the visual drama with an equally dramatic flavor statement.
Make them with a swirl top. Reserve ¼ cup of the green brownie batter before pouring into the pan. Pour the main batter in, then dollop the reserved batter on top and use a toothpick to create intricate swirl patterns across the surface before baking. The swirled top bakes into a visually stunning marbled effect.
Make them gluten-free. A 1:1 gluten-free all-purpose flour blend substitutes seamlessly here with no other adjustments needed. The fudgy, white-chocolate-based texture is naturally very forgiving of the gluten-free swap.
Make them dairy-free. Use vegan butter throughout, substitute dairy-free white chocolate, and use a full-fat vegan cream cheese for the frosting. Coconut cream in place of heavy cream in the frosting works beautifully and adds a subtle tropical note that is surprisingly delightful.
Make a layered St. Patrick’s Day dessert bar. Press a layer of crushed Golden Oreos or graham crackers mixed with melted butter into the bottom of the pan before pouring in the brownie batter. It creates a cookie-crust base that adds crunch, texture, and an extra flavor layer that makes these feel even more indulgent and special.
Pro tips:
- For perfectly even squares, use a ruler and a sharp knife to score the slab lightly before cutting all the way through. Clean edges photograph beautifully and look spectacular on a dessert table.
- The frosted, uncut brownie slab can be refrigerated overnight and sliced the next day — the texture actually improves significantly after a night in the refrigerator as the fudge firms and the flavors deepen.
- If your cream cheese frosting develops small lumps, it means the cream cheese wasn’t fully at room temperature. Microwave the frosting in 5-second bursts, stirring between each, until it smooths out.
How to Meal Prep
These are genuinely among the most party-ready and prep-friendly St. Patrick’s Day desserts you can add to your celebration arsenal — and the timeline could not be more forgiving or convenient.
Bake the brownie base up to 3 days in advance and store it tightly wrapped in plastic wrap at room temperature. It actually improves over those 3 days as the texture settles and deepens. The cream cheese frosting can be made up to 2 days ahead, stored in an airtight container in the refrigerator, and brought to room temperature for 20 minutes and briefly re-beaten before spreading.
For maximum convenience, frost and decorate the complete brownie slab the evening before your St. Patrick’s Day event and refrigerate overnight uncovered until the frosting sets firm, then loosely covered. The overnight chill firms up the fudge base dramatically, deepens the green color slightly, and makes slicing the next day into impossibly clean, beautiful squares almost effortless. Transport the cut squares in a single layer in a covered container — they hold beautifully at cool room temperature for up to 6 hours and refrigerated for up to 5 days.
Cultural Context: Green Velvet, Red Velvet, and the American Art of the Celebration Brownie
The Fudgy Green Velvet Brownie is a direct descendant of one of America’s most beloved and storied baked goods — the red velvet cake. Red velvet’s origins are genuinely disputed among food historians, with competing claims tracing it to the Waldorf-Astoria Hotel in New York City in the 1930s, to Southern home baking traditions of the same era, and to the clever marketing of Adams Extract Company, which sold red food coloring alongside a recipe card for what we now recognize as the classic red velvet cake. What is certain is that its combination of a subtle cocoa flavor, dramatic color, and tangy cream cheese frosting captured the American imagination so completely that it has never let go.
The genius of the velvet technique — using color, a tender crumb, and cream cheese frosting as the defining trilogy — is that it translates effortlessly across the color spectrum. Pink velvet for Valentine’s Day. Blue velvet for the Fourth of July. And most joyfully of all, emerald green velvet for St. Patrick’s Day, where the color does double duty as both a baking technique and an act of festive cultural expression.
St. Patrick’s Day desserts in America have always celebrated green with unrestrained enthusiasm — a tradition rooted in the wearing of the green that symbolized Irish national identity and the lush, rain-blessed landscape of Ireland itself. The shamrock, the rolling hills, the spring grass — green in Irish cultural tradition is the color of home, of luck, and of belonging. Translated onto a dessert table in the form of these vibrantly emerald, impossibly fudgy brownies, that symbolism becomes something edible and joyful and entirely, deliciously its own thing.
Make these Fudgy Green Velvet Brownies and you’re not just baking a St. Patrick’s Day dessert — you’re participating in a living tradition of celebration, color, and the deeply human instinct to mark special occasions with something beautiful and homemade and shared. That’s what baking has always been for, and there is no better reason to preheat the oven.
Fudgy Green Velvet Brownies
Ingredients
Equipment
Method
- Preheat oven to 350°F (175°C). Line an 8×8-inch pan with parchment paper and lightly grease.
- Brown the butter over medium heat until golden and nutty, about 4–5 minutes. Pour into a heatproof bowl.
- Add chopped white chocolate to the hot butter and stir until completely smooth. Let cool slightly.
- Whisk in granulated sugar and brown sugar until combined. Add eggs, egg yolk, and vanilla. Whisk vigorously until glossy and thickened.
- Add green gel food coloring gradually, folding until a deep emerald shade is reached.
- Fold in flour and salt until just combined. Do not overmix.
- Spread batter evenly in the pan and bake 24–28 minutes until a toothpick shows moist fudgy crumbs. Cool completely.
- Beat cream cheese and butter until smooth and fluffy. Add powdered sugar, vanilla, salt, and cream. Beat until light and spreadable.
- Spread frosting evenly over chilled brownies. Decorate with sprinkles and flaky sea salt if using.
- Chill for at least 30 minutes, then slice into 16 squares using a clean, sharp knife.