
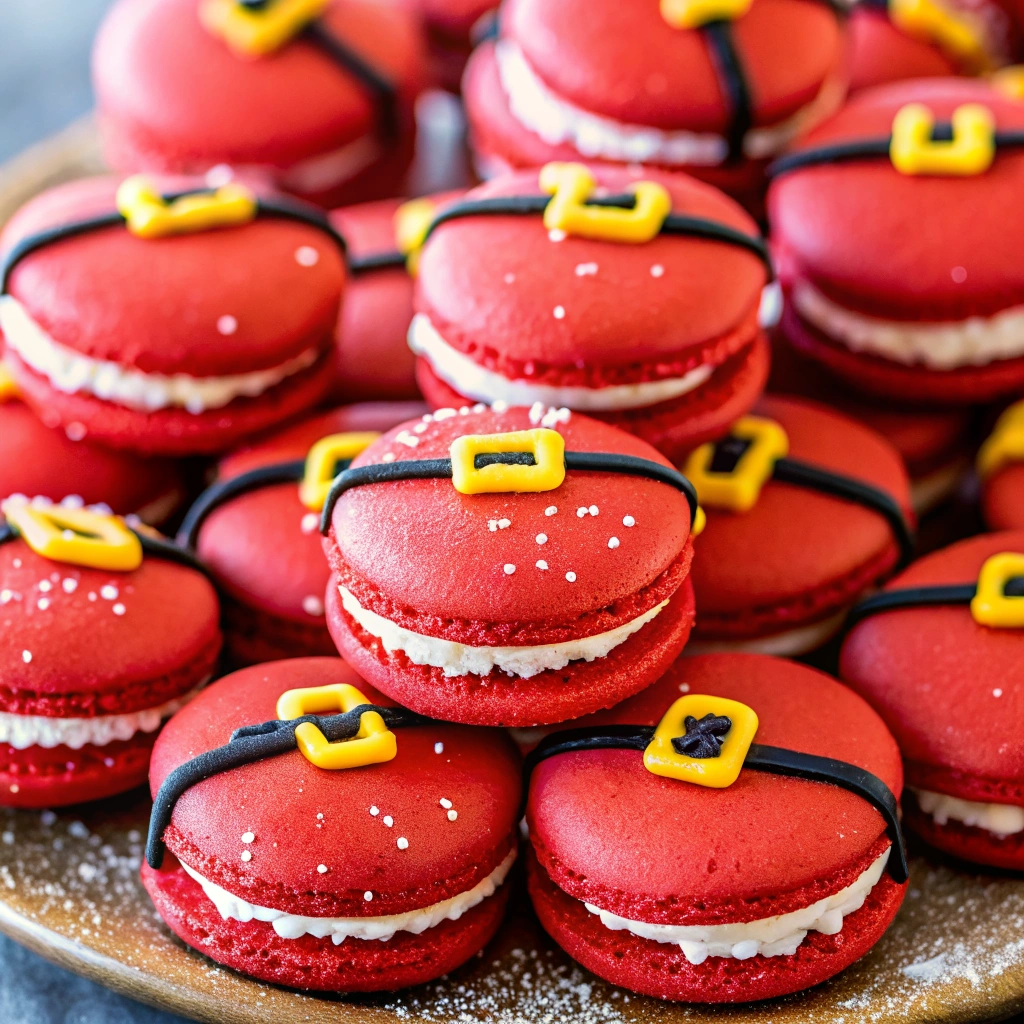
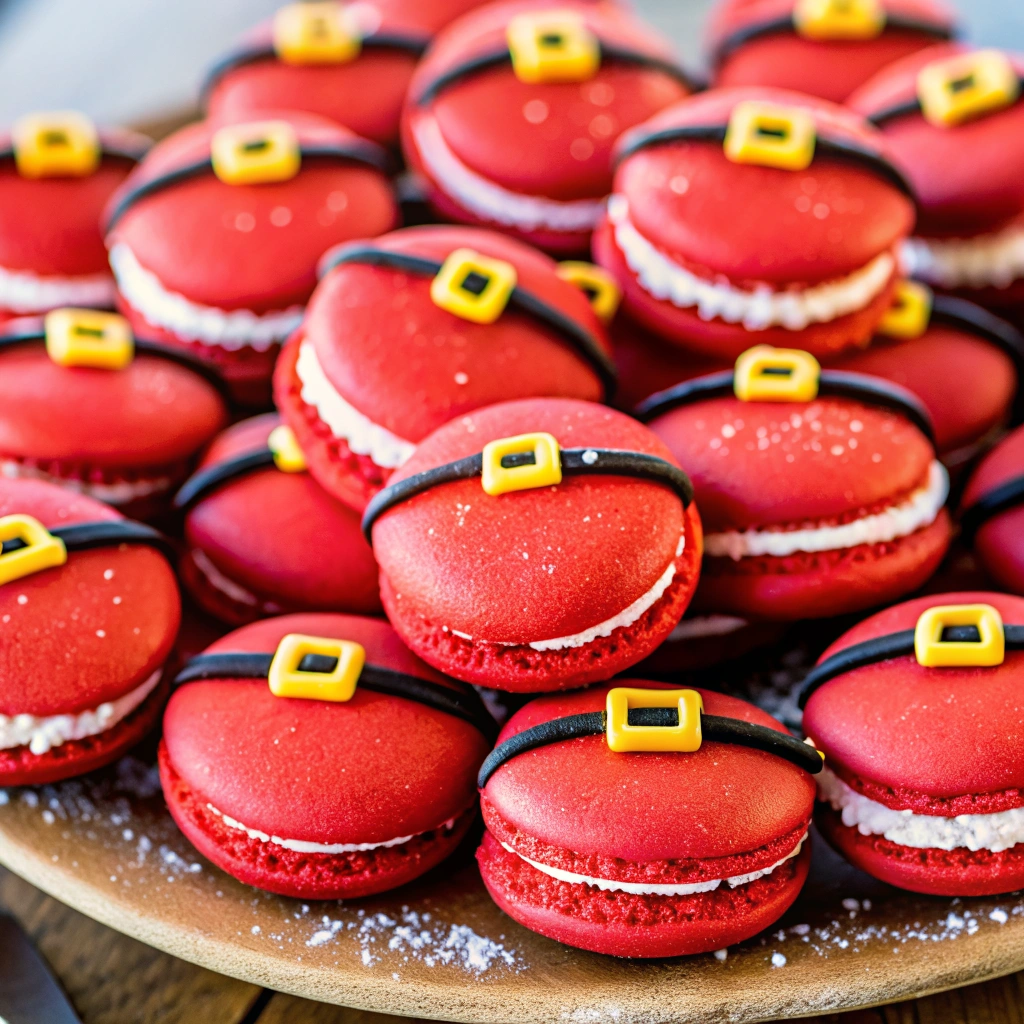
There is no holiday cookie more elegant, challenging, or rewarding than the macaron. And when those delicate, airy shells are transformed into the jolly face of Santa Claus, they become the ultimate festive showstopper! These Santa Claus Macarons combine the crisp, airy texture of a classic French shell with the rich, comforting flavors of the holiday season, all wrapped up in a stunning, edible centerpiece.
Macarons have a reputation for being tricky, but this guide breaks down every step into simple, actionable tips. We’ll cover the secrets to achieving perfect “feet” (the ruffled base), smooth, uncracked shells, and the precise technique for piping the iconic Santa hat and beard shapes. Forget flat shells and hollow centers—with precise measurements and a patient hand, you’ll master this gorgeous holiday treat. We pair the shells with a classic vanilla bean buttercream, perfect for complementing any holiday flavor, and finish them with edible markers and colorful sanding sugar.
Get ready to impress everyone on your list with these beautiful, complex, and unbelievably delicious Santa Claus Macarons. This is your foolproof guide to holiday baking perfection!
Why Santa Macarons Are the Ultimate Holiday Treat
Macarons are already popular, but transforming them into a festive character elevates their appeal, making them highly viral and effective for your blog.
- High-Impact Visuals: The contrast of the bright red hat, fluffy white beard, and pink face is incredibly photogenic. They practically scream “Pin Me!”
- The Gifting Factor: Macarons are inherently delicate and considered a premium baked good. Packaging a dozen Santa macarons creates an extraordinary, personalized gift that goes far beyond a standard sugar cookie.
- Mastering the Challenge: The perceived difficulty makes the successful result even more rewarding. Bakers often search specifically for troubleshooting guides for character macarons, making this post an authoritative resource.
- Custom Flavor Potential: While the shell is almond and sugar, the filling can be adjusted to any seasonal flavor, such as peppermint, eggnog, or gingerbread, ensuring versatility.
Ingredients
Note: Macarons require precise measurements. You MUST use a digital kitchen scale for all ingredient measurements below to ensure success. Volume measurements (cups) are highly unreliable for this recipe.
For the Macaron Shells (French Method)
- 130g Almond Flour, finely ground
- 130g Powdered Sugar (Confectioners’ Sugar)
- 46g Egg Whites, aged (see Pro Tips)
- 130g Granulated Sugar
- 66g Water
- 46g Egg Whites, room temperature (fresh, not aged)
- 1/2 teaspoon Cream of Tartar (or 1 tsp lemon juice)
- Red Gel Food Coloring (high-quality, concentrated gel only)
- Pink/Flesh Gel Food Coloring (optional, small drop of red/yellow mix)
For the Simple Vanilla Buttercream
- 1/2 cup (1 stick) unsalted butter, softened
- 2 cups powdered sugar, sifted
- 1 teaspoon vanilla bean paste or pure vanilla extract
- 2–3 tablespoons heavy cream or milk
- Pinch of Kosher salt
For Decoration
- Small black edible marker (or melted black chocolate) for eyes
- White sanding sugar (for the hat trim)
Step-by-Step Instructions: Shells, Batter, and Assembly
We will be using the Italian Meringue Method for the most stable and reliable macaron shells, which is recommended when using dark colors like red.
Part 1: Preparing the Meringue and Dry Ingredients (20 Minutes)
- Prep Dry Ingredients (Tant Pour Tant): Sift the 130g almond flour and 130g powdered sugar together twice into a large bowl. Ensure there are no lumps.
- Make the First Egg White Batch: In a stand mixer bowl, combine the 46g of aged egg whites (see Pro Tips) and the cream of tartar. Mix on medium speed until frothy.
- Prepare the Syrup: In a small saucepan, combine the 130g granulated sugar and 66g water. Stir briefly. Heat over medium-high heat. Insert a candy thermometer and cook without stirring until the syrup reaches exactly 245∘F (118∘C).
- Whip the Italian Meringue: With the mixer running on low speed, slowly and carefully drizzle the hot sugar syrup into the bowl with the frothing egg whites. Once all the syrup is added, increase the speed to medium-high and whip for 5-8 minutes until the meringue is stiff, very glossy, and holds sharp peaks.
Part 2: Macaronage and Coloring (20 Minutes)
- Form the Paste: Pour the 46g of fresh egg whites over the almond flour and powdered sugar mixture (Tant Pour Tant). Use a rubber spatula to mix it into a thick, stiff paste.
- Fold in Meringue: Add about 1/3 of the meringue to the paste and fold until just incorporated to loosen the batter.
- Color the Batter: Divide the remaining batter into three bowls:
- Red: Mix most of the batter with concentrated red gel food coloring.
- White: Leave a small amount plain white for the beard and hat rim.
- Pink/Flesh: Mix a very small amount with a tiny pinprick of red and yellow gel for the face color.
- Note: Only use gel colors, as liquid colors will destabilize the batter.
- Macaronage (The Fold): Add the remaining meringue to each colored paste. Fold gently, scraping the sides and cutting through the middle, until the batter reaches the “ribbon stage.” When you lift the spatula, the batter should fall off in a slow, continuous ribbon that sinks back into the bowl within 20 seconds.
Part 3: Piping and Baking (1.5 Hours Total)
- Prep Bags and Templates: Fit three piping bags with round tips (Wilton 1A is ideal). Fill each bag with the Red, White, and Flesh-colored batter. Place a Santa template (easily found online) under your parchment paper or silicone mat.
- Pipe the Face: Pipe a small pink/flesh circle for the face.
- Pipe the Hat: Using the red batter, pipe a triangle shape attached to the top of the face circle.
- Pipe the Beard and Hat Trim: Using the white batter, pipe a semi-circle shape under the face for the beard, and a thin line along the bottom of the red hat for the trim. Add a tiny white dot at the top of the hat.
- Tap and Rest (Crucial): Lift the baking sheet about 6 inches and gently drop it onto the counter 4-5 times. This releases air bubbles and is essential for preventing cracked shells. Pop any remaining surface bubbles with a toothpick.
- The Drying Stage (Croute): Let the piped shells rest at room temperature for 30–60 minutes. The shell surface should be completely dry to the touch (the croute). When you lightly touch a shell, no batter should stick to your finger.
- Bake: Bake for 14–17 minutes at 300∘F (150∘C). The feet should have risen, and the shells should not wiggle when gently touched.
- Cool: Slide the parchment paper off the hot pan onto a wire rack. Do not attempt to remove the shells until they are completely cool.
Part 4: Assembly and Decoration (20 Minutes)
- Make the Buttercream: Beat the softened butter until fluffy. Gradually add the sifted powdered sugar, vanilla extract, and salt. Beat until combined. Add heavy cream one tablespoon at a time until the desired piping consistency is reached.
- Fill the Shells: Match up similar-sized shells. Pipe a ring of buttercream onto the flat side of one shell and gently sandwich it with the matching shell.
- Final Touches: Using the black edible marker or melted chocolate, draw small dots for the eyes onto the pink/flesh face area. If desired, brush the white parts with a tiny bit of simple syrup and sprinkle with white sanding sugar for a shimmery effect.
- Age (Optional but Best): Place the filled macarons in an airtight container in the refrigerator for 12–24 hours. This allows the filling’s moisture to soften the shell slightly, leading to the perfect texture.
Pro Tips for Macaron Shell Success
Macarons demand precision, but the reward is worth the effort. Follow these tips rigorously to prevent common failures.
- Age Your Egg Whites: Separate your eggs (46g aged whites) 1–2 days ahead of time. Store them in a container in the fridge. Bringing them to room temperature just before use is mandatory. Aging dehydrates the whites slightly, creating a more stable meringue.
- Sift, Sift, Sift: Sift your almond flour and powdered sugar twice. Large particles are the primary cause of cracked, lumpy shells. After sifting, discard any large bits of almond meal that won’t pass through the sieve.
- Achieve the Lava Stage: The macaronage (folding) process is the most delicate step. Stop folding when the batter flows off your spatula in a thick ribbon, and you can draw an “8” without the ribbon breaking. It should take about 15–20 seconds for the batter line to disappear back into the bowl. Over-folding leads to flat, footless shells; under-folding leads to stiff peaks.
- The Tap and Dry is Mandatory: You must tap the piped shells sharply to release air bubbles—this prevents cracking during baking. The subsequent drying time (the croute) is necessary. If you skip this, the steam inside the shell has nowhere to escape, and the top will crack.
- Oven Temperature Management: Oven temperature fluctuation is a major culprit for failure. Use an oven thermometer to ensure your oven is truly at 300∘F. If the temperature is too low, the feet won’t rise. Too high, and the shells will crack and burn.
- Don’t Rush Cooling: If you try to peel the shell off the mat before it’s completely cool, the bottom will stick and rip. Wait until they are fully cooled and they should lift cleanly from the parchment.
Serving, Gifting, and Festive Variations
These Santa Claus Macarons are versatile and perfect for celebrating the season.
Gifting and Display
- Edible Gifts: Line small cellophane bags or decorative tins with tissue paper. Place the macarons gently inside, face up. They are best gifted and consumed within three days.
- Cookie Exchange Centerpiece: Arrange the Santa macarons on a tiered display tray, alternating with simpler cookies like Pumpkin Chocolate Chip Cookies or Cranberry Pistachio Biscotti.
- Dessert Board: Use the macarons as the centerpiece of a holiday dessert charcuterie board, surrounded by chocolate shavings, fresh raspberries, and tiny sprigs of rosemary.
Festive Flavor Variations
- Peppermint Mocha Filling: Add 1/4 teaspoon of peppermint extract and 2 tablespoons of melted, cooled dark chocolate to the vanilla buttercream for a minty, rich filling.
- Gingerbread Cream: Add 1 tablespoon of molasses, 1/2 teaspoon of ground ginger, and 1/4 teaspoon of cinnamon to the buttercream for a warm, spicy flavor.
- Eggnog Spice: Use Rum Extract instead of vanilla in the buttercream and add a pinch of freshly grated nutmeg for an authentic eggnog flavor.
Shell Customization
- Sparkly Santa Hat: Before drying the shells, immediately after piping the red hat, dust it heavily with red sanding sugar. This will stick to the wet batter and bake into a beautiful, glittery finish.
- Textured Beard: Use a small star tip (Wilton 2D) instead of a round tip for the white beard and hat trim. This adds a beautiful, fluffy, piped texture that looks just like Santa’s fur trim.
Frequently Asked Questions (Macaron Troubleshooting)
- Why did my macarons crack on top? The most common cause is a failed Croute (drying step). You must let the shells rest until the surface is dry to the touch. If the shell is still sticky, the steam inside during baking will push through the skin, causing the surface to crack. Another cause is baking at too high a temperature.
- My macarons didn’t grow feet. What happened? This is usually caused by under-macaronage (the batter was too stiff) or a lack of proper Croute drying. If the batter is too stiff, it can’t spread, and the feet can’t form. If the surface is too wet, the steam cannot escape properly, suppressing the rise.
- Why are my shells hollow? Hollow shells are often related to over-whipping the meringue or baking at too low a temperature. If the oven temperature is too low, the shell rises too slowly, and the air pocket doesn’t properly fill with the batter. Try increasing the baking temperature by 5∘F next time.
- Can I use liquid food coloring? Absolutely not. Liquid food coloring introduces too much water into the batter, which destabilizes the meringue and will cause the shells to become runny, spread too much, and fail to develop feet. Always use concentrated gel food coloring, like Americolor or Wilton Gel.
- How should I store finished Santa Macarons? Store filled macarons in an airtight container in the refrigerator for up to 5 days. They actually taste best after aging for 12–24 hours in the fridge. Remove them from the fridge 15–20 minutes before serving. You can also freeze them for up to 1 month—thaw overnight in the refrigerator.
- Why did my red macaron batter look brown after baking? Deep colors like red and black can often “dull out” or brown during baking. To prevent this:
- Use a concentrated gel color and use more than you think you need.
- Use the Italian Meringue Method (as outlined here), which is more stable than the French method when adding intense coloring.
- Consider adding a tiny drop of titanium dioxide (white gel color) to brighten the base color before adding the red.
These Santa Claus Macarons are guaranteed to bring festive cheer and a huge “wow” factor to your holiday table. Happy baking!
Don’t forget to Pin this show-stopping Santa Macaron guide for your holiday baking and share a picture of your finished Santas in the comments!
Santa Claus Macarons
Ingredients
Equipment
Method
- Sift almond flour and powdered sugar together into a bowl to remove any lumps.
- In a separate bowl, beat egg whites with cream of tartar until foamy. Gradually add granulated sugar and continue whipping until stiff, glossy peaks form.
- Add red gel food coloring to the meringue and gently fold in the sifted almond mixture until the batter flows like lava.
- Transfer batter to a piping bag fitted with a round tip. Pipe small circles onto a parchment-lined baking sheet. Tap the sheet to release air bubbles.
- Let shells rest at room temperature for 30–40 minutes until a skin forms on top. Preheat oven to 300°F (150°C).
- Bake for 14–15 minutes until firm and slightly shiny. Allow to cool completely before removing from the parchment.
- In a bowl, beat butter, powdered sugar, vanilla, and milk until smooth and fluffy. Transfer to a piping bag.
- Pipe filling onto half the macaron shells and top with remaining shells. Decorate tops with white chocolate, marshmallows, and sprinkles to resemble Santa hats.