
When you want St Patrick’s Day treats that are both adorable and genuinely delicious, these Shamrock Cookie Cups deliver on every level. They’re the kind of handheld dessert that makes people smile before they even take a bite, combining the best parts of cookies and cupcakes into one perfectly portioned, festively decorated little package.
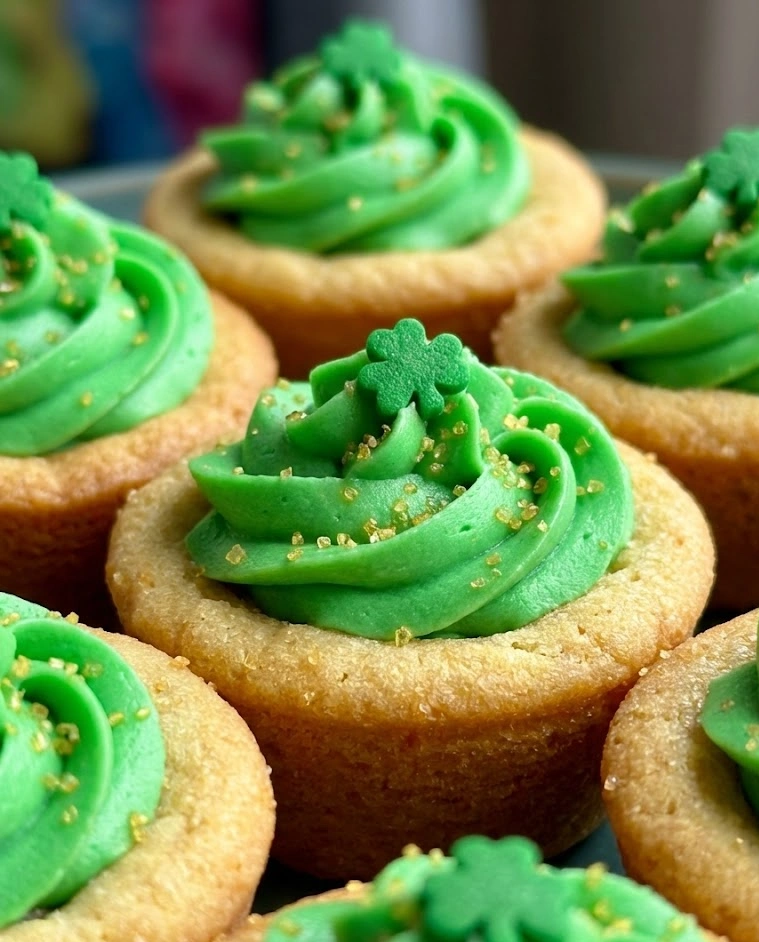
Picture this: tender, buttery sugar cookie dough pressed into muffin tins to create edible cups with perfectly formed wells in the center. Those wells get filled with swirls of vibrant green buttercream frosting, then topped with shamrock sprinkles, edible gold stars, or whatever festive decorations your heart desires. They’re like tiny edible treasure bowls just waiting to be devoured.
The brilliance of cookie cups as St Patrick’s Day treats lies in their impressive appearance combined with surprisingly simple execution. No cookie cutters required, no complicated assembly, no structural engineering degree needed. You literally just press dough into muffin cups, bake, fill, and decorate. Even baking beginners can create professional-looking results on their very first attempt.
Why You’ll Love These Shamrock Cookie Cups
These cookie cups occupy that perfect sweet spot between cookies and cupcakes, giving you the best qualities of both in one convenient, self-contained dessert. The cookie shell is sturdy enough to hold without crumbling but tender enough to bite through easily. The frosting is generous enough to feel indulgent but not so much that it’s overwhelming.
The built-in portion control is genuinely helpful for parties and gatherings. Each cookie cup is exactly one serving – no cutting, no serving utensils needed, no plates required. Guests can grab one and keep mingling, making these perfect for standing-room-only celebrations.
Kids can genuinely help make these from start to finish, which makes them wonderful for family baking projects or classroom cooking activities. Pressing dough into muffin cups is easy and fun for little hands, and decorating the frosted cups gives kids a creative outlet where they feel proud of their contributions.
The customization potential is enormous. Change the cookie flavor, swap frosting colors, use different sprinkles and decorations, or even fill the cups with pudding, ganache, or mousse instead of frosting. Once you master the basic cookie cup technique, endless variations become possible.
Make-ahead friendly and transport-friendly combine to make these ideal for busy schedules and potluck situations. Bake the cookie cups days in advance and store them unfrosted. Fill and decorate the morning of your event. They travel beautifully in muffin tins or cupcake carriers without getting squished or ruined.
Key Ingredients
All-Purpose Flour creates the structure of these cookie cups and gives them their tender-yet-sturdy texture. You’ll need about 2.5 cups, measured properly by spooning into the measuring cup and leveling off rather than scooping directly from the bag. Proper flour measurement is crucial for cookies that hold their cup shape without being tough or crumbly.
Butter provides rich flavor and creates that melt-in-your-mouth texture that makes these cookie cups so satisfying. Use unsalted butter so you can control the salt level precisely. The butter must be softened to room temperature – it should give slightly when pressed but still hold its shape. One cup (two sticks) of butter creates perfectly rich cookie dough.
Granulated Sugar sweetens the cookie dough and helps create structure and a slight crispness on the outside of the cookie cups while keeping the interior tender. The sugar also helps the cookies brown beautifully and develop flavor during baking. You’ll need about 3/4 cup for the dough.
Eggs bind the dough together, add moisture and richness, and help create the tender crumb texture these cookie cups need. Use large eggs at room temperature for the best incorporation into the butter-sugar mixture. Cold eggs can cause the butter to seize and create lumpy dough.
Vanilla Extract adds warmth and depth to the sugar cookie flavor without announcing itself. Pure vanilla extract tastes noticeably better than imitation in sugar cookies where the vanilla contributes significantly to the overall flavor profile. You’ll need about 2 teaspoons – one for the dough and one for the frosting.
Baking Powder gives the cookie cups their slight rise and tender texture. Unlike flat cookies that spread, these cups need enough leavening to create a light, cake-like texture that’s pleasant to bite through. Make sure your baking powder is fresh – old baking powder creates flat, dense cookies.
Salt enhances all the other flavors and prevents the cookies from tasting one-dimensionally sweet. Even though you’re using unsalted butter, you still need added salt to balance the sugar and bring out the vanilla and butter flavors fully.
Powdered Sugar forms the base of the buttercream frosting that fills these adorable cookie cups. You’ll need about 3 cups for a generous amount of frosting. Always sift powdered sugar before using to eliminate lumps that would otherwise create grainy, unpleasant frosting texture.
Green Gel Food Coloring transforms white buttercream into that vibrant shamrock green that makes these unmistakably St Patrick’s Day treats. Gel coloring creates more intense color than liquid drops without adding excess moisture that would thin the frosting. Start with a few drops and add more gradually until you achieve perfect leprechaun green.
Heavy Cream or Milk adjusts frosting consistency to the ideal pipeable texture. Start with 2 tablespoons and add more if needed, one teaspoon at a time, until the frosting is smooth enough to pipe but thick enough to hold beautiful swirls. Heavy cream creates richer frosting, while milk makes it slightly lighter.
Shamrock Sprinkles and Decorations are the finishing touches that make these cookie cups festive and party-ready. Look for shamrock-shaped sprinkles, green jimmies, gold stars, or any combination of green, white, and gold decorations. These turn simple filled cookie cups into unmistakably St Patrick’s Day treats that capture the holiday spirit.
How to Make Shamrock Cookie Cups
Step 1: Preheat your oven to 350°F (175°C). Generously spray a 12-cup muffin tin with non-stick cooking spray, making sure to coat the bottom and sides of each cup thoroughly. Alternatively, use butter to grease each cup if you prefer. Proper greasing is essential – these cookie cups must release easily after baking or they’ll break.
Step 2: In a medium bowl, whisk together 2.5 cups all-purpose flour, 1.5 teaspoons baking powder, and 1/2 teaspoon salt. Set this dry mixture aside. Pre-mixing ensures even distribution of the baking powder throughout the dough, which means consistent cookie cups rather than some fluffy and some flat.
Step 3: In a large mixing bowl using an electric mixer, beat 1 cup softened butter and 3/4 cup granulated sugar together on medium speed for 3-4 minutes until light, fluffy, and noticeably paler in color. This creaming process incorporates air that helps create tender cookies.
Step 4: Add 1 large egg and 2 teaspoons vanilla extract to the butter-sugar mixture and beat on medium speed until fully incorporated and smooth. The mixture should look cohesive and creamy rather than separated or curdled.
Step 5: Add the dry flour mixture to the wet ingredients and mix on low speed just until the flour disappears and a soft dough forms. Don’t overmix once flour is added – overmixing develops gluten and creates tough, chewy cookies instead of tender, cake-like cups. The dough should be soft, smooth, and hold together well.
Step 6: Divide the dough into 12 equal portions – a cookie scoop works perfectly for this, or you can eyeball it into golf-ball-sized pieces. Roll each portion briefly between your palms to create smooth balls.
Step 7: Place one dough ball into each greased muffin cup. Using your fingers or the back of a small spoon, press each ball down and up the sides of the muffin cup to create a cup shape with a well in the center. The dough should come about 2/3 up the sides of the muffin cup and be thicker on the bottom than the sides.
Step 8: The well in the center should be deep enough to hold frosting but not so deep that the bottom is paper-thin and fragile. Aim for walls about 1/4 inch thick and a bottom about 1/3 inch thick. Don’t worry about making them perfectly uniform – rustic, handmade appearance is part of their charm.
Step 9: Bake for 15-18 minutes until the cookie cups are set and very lightly golden around the edges. The centers should still look quite pale – you don’t want them to brown too much or they’ll taste dry and overcooked. The edges will firm up as they cool even if they seem slightly soft when you remove them from the oven.
Step 10: Remove the cookie cups from the oven and let them cool in the muffin tin for 10 minutes. This cooling period is crucial – trying to remove them too early will cause them to break apart. After 10 minutes, carefully run a butter knife around the edge of each cup and gently lift them out onto a wire cooling rack.
Step 11: If any cups lost their well shape during baking and puffed up in the center, gently press the centers back down with the back of a spoon while they’re still warm. The warm cookie will be pliable enough to reshape without cracking.
Step 12: Allow the cookie cups to cool completely to room temperature before filling and decorating. Filling warm cookie cups will cause the frosting to melt into a puddle rather than holding its pretty swirled shape.
Step 13: While the cookie cups cool, make your green buttercream frosting. Beat 1/2 cup softened butter in a large bowl with an electric mixer on medium speed for 2-3 minutes until light and fluffy.
Step 14: Add 3 cups sifted powdered sugar to the butter one cup at a time, beating on low speed after each addition until incorporated. Once all the sugar is added, increase speed to medium-high and beat for 2 minutes until the frosting is light, fluffy, and smooth.
Step 15: Add 1 teaspoon vanilla extract and 2 tablespoons heavy cream to the frosting and beat until smooth and fully incorporated. Check the consistency – it should hold stiff peaks when you lift the beater but still be smooth and pipeable. Add more cream if too thick or more powdered sugar if too thin.
Step 16: Add green gel food coloring to the frosting, starting with just 4-5 drops. Beat until the color is evenly distributed, then assess. Add more coloring gradually, one drop at a time, beating between additions, until you achieve a vibrant shamrock green that screams St Patrick’s Day.
Step 17: Transfer the green frosting to a piping bag fitted with a large star tip (Wilton 1M or 2D work beautifully). If you don’t have piping bags, a gallon-size zip-top bag with one corner snipped off works surprisingly well for these St Patrick’s Day treats.
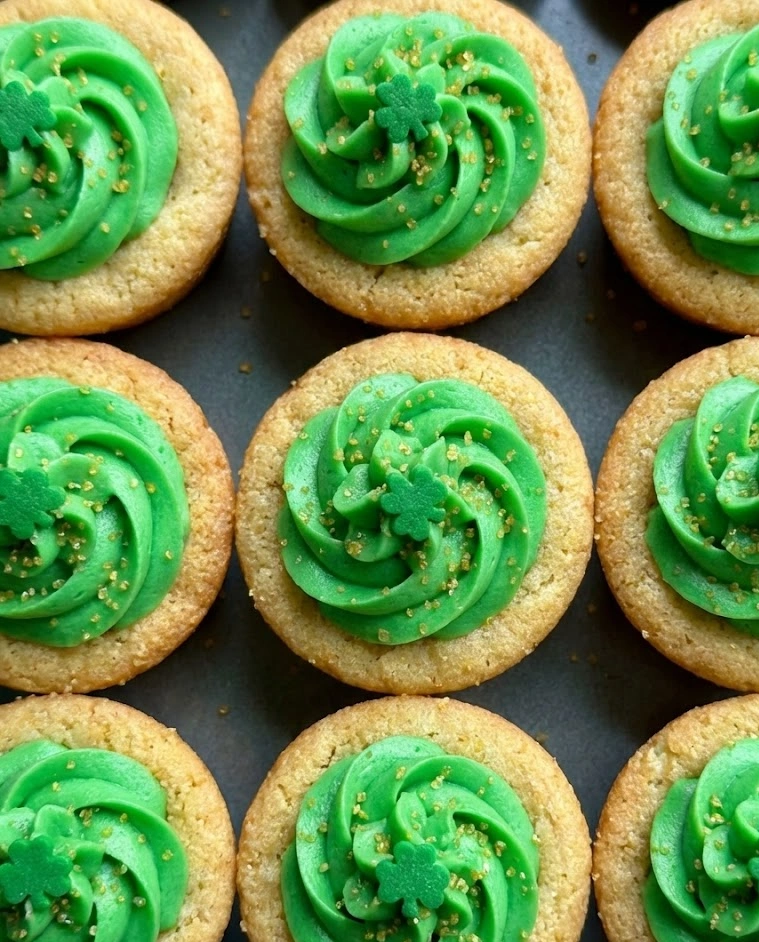
Step 18: Pipe generous swirls of green frosting into the center well of each cooled cookie cup. Fill them generously but not so much that frosting spills over the edges. The frosting should mound slightly above the rim of the cookie cup for maximum visual impact.
Step 19: While the frosting is still soft and slightly tacky, immediately sprinkle shamrock sprinkles, green jimmies, gold stars, or your chosen decorations over the frosting. The decorations will stick securely to the fresh frosting but won’t adhere once it dries.
Step 20: Let the decorated cookie cups sit at room temperature for about 30 minutes to allow the frosting to set slightly before serving or packaging. Once set, they’re ready to enjoy or can be stored for your St Patrick’s Day celebration.
Variations & Tips
Chocolate Cookie Cups: Replace 1/2 cup of the flour with unsweetened cocoa powder for chocolate cookie cups that taste like brownie bowls. The chocolate pairs beautifully with mint frosting for a Thin Mint-inspired variation.
Lemon Shamrock Cups: Add 1 tablespoon of lemon zest to the cookie dough and 2 teaspoons of lemon juice to the frosting for bright, citrusy cookie cups that taste like spring. The lemon and green color combination is refreshing and unexpected.
Filled Surprise Center: Before baking, press a chocolate kiss, caramel candy, or mini Rolo into the bottom of each dough cup. When baked, the candy creates a melted surprise center that makes these even more special.
Cream Cheese Frosting: Replace half the butter in the frosting with softened cream cheese for tangy, luxurious cream cheese frosting that tastes more sophisticated and less one-dimensionally sweet.
Mini Cookie Cups: Use a mini muffin tin to create bite-sized cookie cups perfect for parties where guests want to sample multiple desserts. Reduce baking time to 10-12 minutes and use less frosting per cup.
Pudding Filled: Instead of buttercream frosting, fill the cooled cookie cups with instant vanilla or chocolate pudding tinted green. Top with whipped cream and shamrock sprinkles for a lighter, creamier variation.
Gluten-Free Version: Replace the all-purpose flour with a 1:1 gluten-free baking flour blend. The texture will be nearly identical, making these St Patrick’s Day treats accessible to guests with celiac disease or gluten sensitivity.
Funfetti Addition: Stir 1/4 cup of rainbow sprinkles into the cookie dough before pressing into muffin cups for colorful confetti throughout the cookie that peeks through when you bite in.
Pro Tip – Uniform Wells: To create perfectly uniform wells in your cookie cups, use the back of a round tablespoon measure or a small wooden tart tamper to press the dough. These tools create consistent depth and shape better than fingers alone and prevent tearing.
Preventing Sticking: If you’re nervous about the cookie cups sticking despite greasing, you can use paper muffin liners and press the dough into the lined cups. The cookies won’t release quite as cleanly from paper, but they’ll definitely come out without breaking.
Leftovers & Storage
Shamrock Cookie Cups store beautifully and maintain their texture and appearance for several days when stored properly, making them excellent make-ahead St Patrick’s Day treats that reduce last-minute stress.
Store unfrosted cookie cups in an airtight container at room temperature for up to 5 days, or freeze them for up to 3 months. Layer them carefully with parchment paper between each level to prevent them from sticking together or crushing each other. The unfrosted cups maintain their perfect texture and are ready to fill and decorate whenever needed.
Frosted cookie cups should be stored in an airtight container in the refrigerator for up to 3 days. The buttercream needs refrigeration to stay fresh and stable. Arrange them in a single layer if possible, or use a cupcake carrier with individual wells that prevent them from touching and smudging each other’s frosting.
Bring refrigerated frosted cookie cups to room temperature for 20-30 minutes before serving for the best flavor and texture. Cold buttercream tastes muted and has a firmer texture that’s less pleasant than room-temperature frosting. The cookies themselves also taste better at room temperature.
Never freeze frosted cookie cups – the buttercream separates and becomes grainy when thawed, completely ruining the appearance and texture. Always freeze only the unfrosted cookie shells and add fresh frosting after thawing.
For transporting these St Patrick’s Day treats to parties, place them in a muffin tin (the same one you baked them in works perfectly) for secure transport. Cover the entire tin with plastic wrap or aluminum foil to protect the decorations. The muffin tin keeps each cup in its own compartment, preventing shifting and damage during travel.
Create an impressive party display by arranging the cookie cups on a tiered cupcake stand or decorative platter. Scatter chocolate gold coins around the base, add small shamrock decorations, or create a rainbow arch over the display using colored paper or fruit leather for maximum festive impact.
Package individual cookie cups in clear cellophane bags tied with green ribbons for charming party favors or gifts. Add a small gift tag that says “Lucky Treats” or “Shamrock Sweets” and you’ve got adorable take-home treats that look professionally packaged.
If the cookie cups lose their crispness after a day or two (especially in humid weather), you can refresh them slightly by placing them in a 300°F oven for 5 minutes before cooling and refilling. This gentle warming evaporates absorbed moisture and restores some of the original texture.
Leftover unfilled cookie cups make excellent vessels for other desserts beyond frosting. Fill them with ice cream and top with hot fudge, use them as bowls for fruit and yogurt parfaits, or fill with chocolate ganache for an elegant truffle-like dessert.
These Shamrock Cookie Cups prove once and for all that the very best St Patrick’s Day treats combine impressive appearance with achievable execution, creating desserts that make everyone smile while keeping the baker’s stress level at absolute minimum. Make these once and they’ll become your signature contribution to every March celebration – the adorable handheld treats that disappear first, photographed constantly, and requested year after year by everyone lucky enough to grab one before they vanish like leprechaun gold at sunrise!
Shamrock Cookie Cups
Ingredients
Equipment
Method
- Preheat oven to 350°F (175°C) and generously grease a 12-cup muffin tin.
- Whisk together flour, baking powder, and salt in a medium bowl.
- Beat butter and granulated sugar until light and fluffy.
- Add egg and 1 teaspoon vanilla extract, mixing until smooth.
- Gradually mix in dry ingredients until a soft dough forms.
- Divide dough into 12 portions and press into muffin cups, forming wells in the center.
- Bake for 15–18 minutes until lightly golden. Cool in pan 10 minutes, then transfer to wire rack.
- Beat butter for frosting until fluffy. Add powdered sugar gradually, then mix in remaining vanilla and heavy cream until smooth.
- Add green gel food coloring and beat until desired shamrock green color is achieved.
- Pipe or spoon frosting into cooled cookie cups and decorate with shamrock sprinkles.