
When it comes to St. Patrick’s Day desserts, there is something wonderfully pure and joyful about a great cookie. No layering, no chilling, no temperature gymnastics — just a beautiful, soft, chewy, completely festive cookie that makes every single person who picks one up smile before they’ve even taken a bite. These Easy St. Patrick’s Day Cookies are exactly that kind of magic.
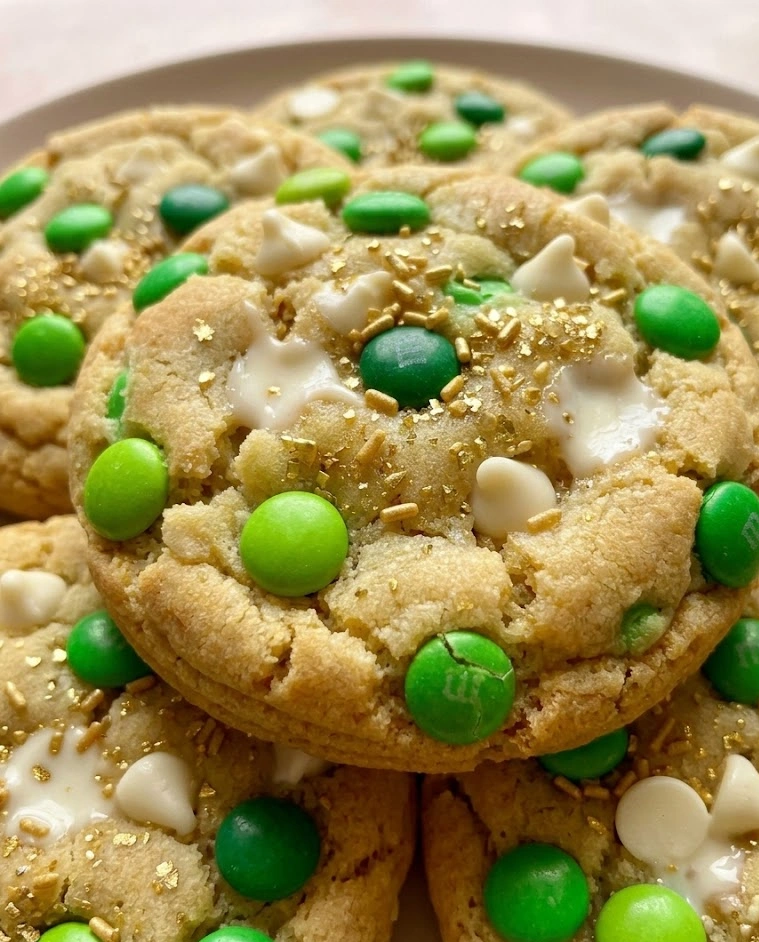
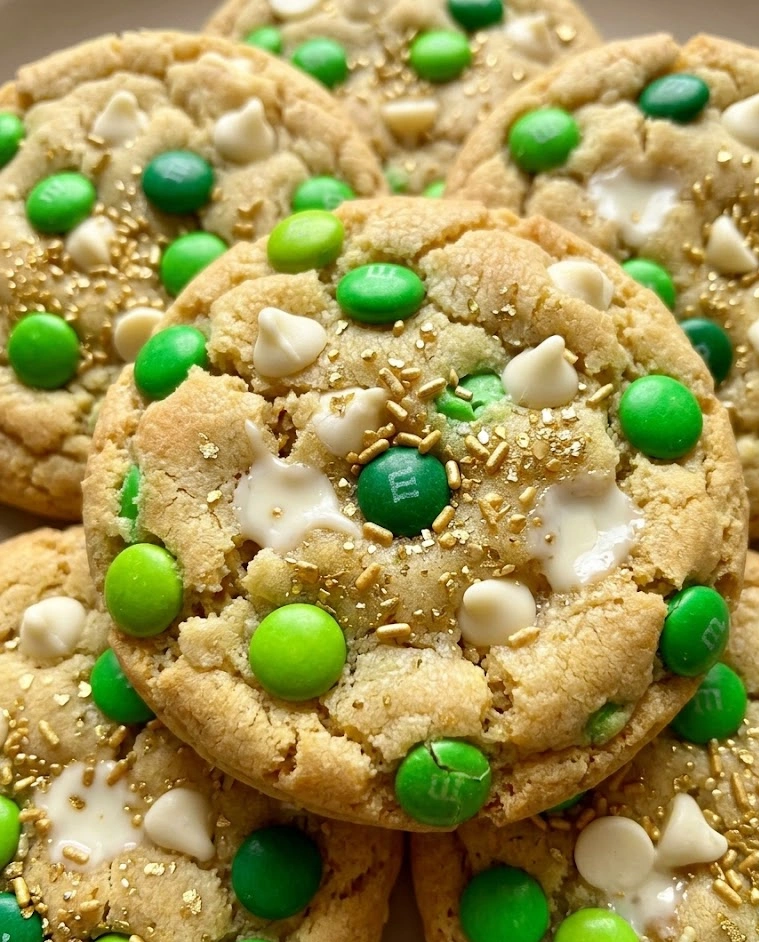
These are the cookies that cover every base on a St. Patrick’s Day dessert table. They’re soft and buttery in the center with just enough crisp at the edge. They’re loaded with green M&Ms, white chocolate chips, and a generous shower of rainbow sprinkles that make them look like a pot of gold and a rainbow collided in the most delicious way possible. A swipe of green glaze and a scatter of shamrock decorations on top and you have a St. Patrick’s Day dessert that looks professionally made and tastes absolutely homemade in the best possible sense.
Whether you’re baking for a classroom party, a neighborhood celebration, a family St. Patrick’s Day tradition, or simply because March needed a reason to involve butter and sugar, these cookies are your answer. Thirty minutes, one bowl, zero stress. Let’s bake.
Why You’ll Love These Easy St. Patrick’s Day Cookies
These earn the top spot on your St. Patrick’s Day dessert list and stay there permanently. Here’s the full case:
- Thirty minutes start to finish — no chilling required, no complicated techniques, no special equipment beyond a mixing bowl and a baking sheet.
- Perfectly soft and chewy every time — the combination of brown sugar, melted butter, and an extra egg yolk produces a cookie texture that is genuinely foolproof and deeply satisfying.
- Endlessly fun to decorate — the green glaze and shamrock toppers make these the ideal kid-friendly St. Patrick’s Day dessert baking project. Everyone gets involved, everyone has a role, and the results are gorgeous regardless of skill level.
- Crowd-pleasing without exception — green M&Ms, white chocolate chips, and rainbow sprinkles inside a soft sugar cookie is the kind of flavor and texture combination that transcends age, preference, and skepticism entirely.
- Completely customizable — change the mix-ins, adjust the glaze color, add different decorations. This recipe is a framework for the most joyful St. Patrick’s Day dessert baking session of the year.
Common Mistakes — And How to Avoid Them
Simple cookie recipes still have their pitfalls. Here’s how to navigate every one of them for a perfect batch every single time.
Using melted butter that’s too hot. Melted butter is the key to a chewy, flat-in-the-best-way cookie — but if it’s piping hot when it meets the sugar, it begins to cook the eggs and creates a greasy, separated batter. Let your melted butter cool for 5 minutes until it’s warm but not hot before whisking in the sugars. It should feel comfortable to the touch.
Skipping the brown sugar. Both brown and white sugar serve specific purposes in this recipe and neither can be omitted without consequence. White sugar promotes spread and crisp edges; brown sugar — with its molasses content — keeps the center chewy, moist, and deeply flavorful for days. The combination is the reason these cookies stay soft long after baking.
Overmixing after adding the flour. The moment the flour goes in, the mixing should be gentle and minimal. Overmixing develops gluten and produces a tough, bread-like cookie rather than the tender, soft one you’re after. Fold the flour in until you can just barely see no more dry streaks — a few extra folds beyond that and you’ll notice the difference in the final texture.
Baking until they look done. St. Patrick’s Day cookies — like all great soft cookies — should come out of the oven looking slightly underdone. The edges should be set and just beginning to turn golden while the center still looks soft and slightly glossy. They will firm up completely on the baking sheet during the mandatory resting period. Baking until they look fully done means they’ll be dry and overbaked by the time they cool.
Glazing before the cookies are completely cool. A glaze applied to a warm cookie will be absorbed immediately, leaving no visible layer and no beautiful green surface. Cool the cookies fully on a wire rack before any glaze touches them — the result is a clean, opaque, gorgeous green layer that sits on top of the cookie rather than sinking in.
Making the glaze too thin. A runny glaze slides off the cookie, pools on the edges, and looks sloppy rather than polished. The glaze should be thick enough to coat the back of a spoon and hold its shape for two seconds before slowly dripping off. Add powdered sugar to thicken and liquid a drop at a time to loosen — go slowly and you’ll land on the perfect consistency.
Chef’s Notes
The small details that make the difference between a good batch and an absolutely legendary St. Patrick’s Day dessert:
- Use melted butter, not softened. This is intentional and important. Melted butter coats the flour proteins differently than creamed butter, producing a denser, chewier, fudgier cookie with a slight crisp at the edge and a soft, gooey center that stays that way for days. It’s a technique borrowed from the brownie world and it works extraordinarily well in a loaded cookie.
- Under-bake by exactly one minute. Whatever your oven’s timing, pull the cookies out one full minute before you think they’re ready. This single habit, applied consistently, is the difference between cookies people describe as incredible and cookies that are merely fine.
- Bang the pan on the counter. The moment the pan comes out of the oven, lift it 2–3 inches and drop it flat onto the counter two or three times. This deflates any puffiness, creates beautiful craggly tops, and settles the mix-ins into a more even distribution throughout the cookie. It’s a professional bakery technique and it takes zero extra effort.
- Press extra M&Ms and white chocolate chips onto the tops of the cookies immediately after they come out of the oven, while they’re still soft. The visible mix-ins on the surface make these St. Patrick’s Day desserts look bakery-professional and photograph magnificently.
- Add a pinch of cream of tartar to the dough alongside the baking soda. It reacts with the soda to produce a slightly tangier, more complex flavor and helps keep the cookies soft and chewy at their centers for longer than baking soda alone achieves.
Key Ingredients — And Why They Matter
Melted Unsalted Butter is the foundational choice that defines the texture of these cookies. Melting rather than creaming the butter eliminates the air incorporation step, producing a denser, more fudge-adjacent cookie rather than a light, cakey one. The flavor of browned melted butter in a cookie is also noticeably richer and more complex than softened creamed butter — worth the extra four minutes without question.
Brown Sugar and White Sugar together create the perfect flavor and texture equilibrium that makes these St. Patrick’s Day desserts so universally irresistible. The brown sugar’s molasses content keeps the cookies moist and chewy for days; the white sugar promotes the slight crisp at the edges and the beautiful golden spread that makes a cookie look like a cookie.
An Extra Egg Yolk alongside the whole egg is the single best thing you can add to a cookie recipe for richness and chewiness. The additional fat from the extra yolk pushes the texture in a decidedly fudgy, tender direction and adds a depth of flavor that makes people take a second bite and wonder what makes these taste better than a standard cookie.
Green M&Ms are the visual and textural heart of this St. Patrick’s Day dessert. They bring a satisfying crunch, a pop of chocolate in every bite, and — most importantly — the festive green color that signals to everyone at the party that these cookies were made with intention and joy. Pull the green M&Ms from a standard bag or buy a bag of green-only candies for maximum impact and minimum waste.
White Chocolate Chips provide creamy, sweet contrast to the green M&Ms and balance the overall flavor profile with a mild, milky richness that keeps the cookie from feeling too heavily chocolatey. Their pale color also adds visual contrast against the green mix-ins that makes the cookies look more layered and intentional. Use good-quality white chocolate chips for a noticeably better melt and flavor.
Rainbow Sprinkles baked into the cookie dough create the most joyful, colorful cross-section when the cookies are bitten into — flecks of color visible throughout the crumb that make each cookie feel like a small celebration. Use the rod-shaped jimmies rather than the round nonpareil variety, which tend to bleed color into the surrounding dough during baking.
The Green Glaze is the finishing touch that transforms these from great cookies into unmistakable St. Patrick’s Day desserts. Powdered sugar, a tiny amount of milk, vanilla, and green gel food coloring combine into a glaze that sets to a soft, slightly opaque finish that looks beautiful, adds a gentle extra sweetness, and provides the perfect surface for shamrock decorations and gold sanding sugar.
How to Make Easy St. Patrick’s Day Cookies
Ingredients — Cookie Dough (Makes 18–20 cookies)
- ½ cup (115g) unsalted butter, melted and cooled slightly
- ¾ cup (165g) light brown sugar, packed
- ¼ cup (50g) granulated white sugar
- 1 large egg plus 1 egg yolk, room temperature
- 1½ tsp pure vanilla extract
- 1¾ cups (220g) all-purpose flour
- ½ tsp baking soda
- ¼ tsp cream of tartar
- ½ tsp salt
- ¾ cup (130g) green M&Ms — plus extra for pressing on top
- ½ cup (85g) white chocolate chips — plus extra for pressing on top
- ¼ cup (40g) rainbow jimmie sprinkles
Ingredients — Green Glaze
- 1 cup (120g) powdered sugar, sifted
- 1½–2 tbsp whole milk
- ¼ tsp pure vanilla extract
- Green gel food coloring
- Pinch of salt
To Decorate
- Shamrock sprinkles or shamrock sugar decorations
- Gold sanding sugar or gold star sprinkles
- Rainbow nonpareil sprinkles
Instructions
- Preheat the oven to 350°F (175°C). Line two large baking sheets with parchment paper. Set aside.
- Make the dough. In a large bowl, whisk the melted, cooled butter with both sugars until smooth and well combined — about 60 seconds. Add the whole egg, egg yolk, and vanilla extract and whisk vigorously for another 60 seconds until the mixture is glossy, slightly pale, and thickened.
- Add the dry ingredients. Sift the flour, baking soda, cream of tartar, and salt directly into the wet mixture. Switch to a rubber spatula and fold gently until just combined — stop the moment no dry flour streaks remain.
- Fold in the mix-ins. Add the green M&Ms, white chocolate chips, and rainbow sprinkles. Fold in with four or five gentle strokes — you want them distributed evenly but you do not want to crush the M&Ms or break down the sprinkle rods.
- Portion the dough. Using a medium cookie scoop or two tablespoons, portion the dough into balls of about 2 tablespoons each. Place on the prepared baking sheets about 2 inches apart — these cookies spread moderately and need the space.
- Bake. Bake one sheet at a time in the center of the oven for 10–12 minutes until the edges are just set and faintly golden and the centers still look soft, slightly underdone, and glossy. They will look underbaked — this is correct and intentional.
- Bang and press. The moment the pan comes out of the oven, drop it firmly on the counter two or three times. Immediately press a few extra green M&Ms and white chocolate chips onto the tops of each cookie while still soft and warm.
- Cool on the pan. Let the cookies rest on the baking sheet for 5 full minutes before transferring to a wire rack. They will firm up completely during this time. Transfer gently and cool completely before glazing — at least 20 minutes.
- Make the glaze. Whisk together the sifted powdered sugar, 1½ tablespoons of milk, vanilla, and a pinch of salt until completely smooth. Add green gel food coloring one tiny drop at a time, stirring completely between additions, until you reach your ideal shade of festive green. The glaze should be thick enough to coat the back of a spoon with a clean, opaque layer. Add the remaining milk only if needed for spreading consistency.
- Glaze the cookies. Using the back of a spoon or a small offset spatula, spread a thin, even layer of green glaze over the top of each completely cooled cookie, leaving a small border of cookie showing around the edges for a clean, intentional look.
- Decorate immediately. While the glaze is still wet, place a shamrock sprinkle or sugar decoration in the center of each cookie. Scatter gold sanding sugar around the shamrock for a pot-of-gold effect. Add a few rainbow sprinkles if you like. Work quickly — the glaze begins setting within 3–4 minutes.
- Set and serve. Let the glaze set completely — about 15 minutes at room temperature or 5 minutes in the refrigerator. Arrange on your St. Patrick’s Day dessert table and watch them disappear faster than you made them.
Variations & Tips
Make them mint chocolate chip. Add ½ teaspoon of pure peppermint extract to the dough and swap the white chocolate chips for dark chocolate chips for a mint-chocolate St. Patrick’s Day dessert variation that leans fully into the holiday’s signature flavor pairing. Reduce the peppermint extract carefully — a little goes a very long way.
Make them frosted sugar cookies. Skip the glaze and top each cookie with a generous swirl of green cream cheese frosting piped from a star tip instead. It transforms these into the most festive, bakery-style St. Patrick’s Day dessert cookies you’ve ever seen and takes about four extra minutes.
Make them gluten-free. A 1:1 gluten-free all-purpose flour blend substitutes seamlessly here. The melted butter and high brown sugar ratio makes this recipe particularly forgiving of the gluten-free swap — the texture stays chewy and tender with no modification needed beyond the flour change.
Make them vegan. Replace the butter with melted vegan butter, the eggs with two flax eggs (2 tbsp ground flaxseed plus 6 tbsp water, rested 10 minutes), and use dairy-free white chocolate chips and vegan-certified M&M alternatives. The texture is slightly less rich but absolutely delicious and completely party-worthy.
Make cookie sandwiches. Pair two cookies together with a layer of green-tinted vanilla buttercream or mint cream cheese frosting sandwiched between them for the most dramatic, indulgent St. Patrick’s Day dessert presentation on any table. They photograph beautifully and disappear at an almost alarming rate.
Pro tips:
- All cookies bake differently in every oven — bake a test cookie first to dial in the exact timing for your specific oven before committing the full batch.
- Store baked, unglazed cookies in an airtight container at room temperature for up to 5 days. Glaze the day before or day of serving for the freshest, most vibrant look.
- Cookie dough balls freeze beautifully for up to 3 months — bake straight from frozen, adding 2–3 minutes to the bake time, for fresh St. Patrick’s Day dessert cookies on demand throughout the entire holiday season.
How to Meal Prep
These Easy St. Patrick’s Day Cookies are one of the most practical and stress-free St. Patrick’s Day desserts to prepare in advance — and the timeline gives you enormous flexibility no matter how busy your schedule gets in the lead-up to March 17th.
The cookie dough can be made up to 3 days ahead and stored tightly covered in the refrigerator — in fact, a 24-hour refrigerator rest deepens the flavor significantly as the sugars hydrate fully into the flour and the butter flavors develop. Scoop the dough into balls, place on a parchment-lined tray, cover tightly, and refrigerate. Bake directly from the refrigerator with no adjustment to time or temperature needed.
For the most flexible approach, portion the dough into balls and freeze them on a parchment-lined tray until solid, then transfer to a freezer bag where they keep for up to 3 months. Bake from frozen whenever St. Patrick’s Day dessert cravings strike — or bake the full batch, cool completely, and store unglazed in an airtight container at room temperature for up to 5 days. Glaze and decorate the morning of your event for the freshest, most vibrant, most beautiful result with zero morning-of stress.
Cultural Context: Cookies, Celebration, and the Joy of St. Patrick’s Day Baking
The cookie — in all its endlessly varied, culturally specific, personally meaningful forms — is arguably the most democratic and universally beloved baked good in the world. Every culture has its version: the Italian biscotti, the French sablé, the Scottish shortbread, the American chocolate chip. What they all share is the quality of being personal, portable, shareable, and deeply connected to the specific occasions and people they’re made for.
St. Patrick’s Day baking in America has always centered on joy, color, and communal celebration rather than strict culinary tradition. While Ireland has its own beautiful baking heritage — soda bread, barn brack, porter cake, and rich butter-laden biscuits — the American St. Patrick’s Day dessert tradition grew from the Irish diaspora’s desire to celebrate their heritage visibly and joyfully in their adopted home, with the tools and ingredients of American baking culture readily at hand.
Green-colored baked goods for St. Patrick’s Day became a beloved tradition through the 20th century as food coloring became widely available and home baking culture exploded in post-war America. The act of tinting something green — cookies, cakes, brownies, doughnuts — became a direct, accessible, joyful act of cultural participation available to anyone with a mixing bowl and a bottle of food coloring, regardless of whether they had a drop of Irish blood.
These Easy St. Patrick’s Day Cookies sit beautifully in that tradition. They are simple enough for a first-time baker and a six-year-old in equal measure. They are festive enough to anchor any St. Patrick’s Day dessert table. And they carry with them the essential quality that the very best holiday baking always has — the feeling that someone made something with their hands specifically for this occasion, specifically for the people gathered around the table, and that the making of it was just as joyful as the eating. That’s what St. Patrick’s Day is really about. And that’s what a great cookie has always been for.
Easy St. Patrick’s Day Cookies
Ingredients
Equipment
Method
- Preheat oven to 350°F (175°C). Line baking sheets with parchment paper.
- Whisk melted butter with brown sugar and granulated sugar until smooth. Add egg, egg yolk, and vanilla. Whisk until glossy and slightly thickened.
- Fold in flour, baking soda, cream of tartar, and salt until just combined.
- Gently fold in green M&Ms, white chocolate chips, and rainbow sprinkles.
- Scoop dough into 2-tablespoon portions and place 2 inches apart on prepared baking sheets.
- Bake 10–12 minutes until edges are set and centers still look slightly soft. Cool on pan 5 minutes before transferring to wire rack.
- Whisk powdered sugar, milk, vanilla, and green gel food coloring until smooth and thick enough to coat the back of a spoon.
- Spread glaze over completely cooled cookies and decorate immediately with shamrock sprinkles and gold sugar. Let set before serving.