
Why You’ll Love This Recipe
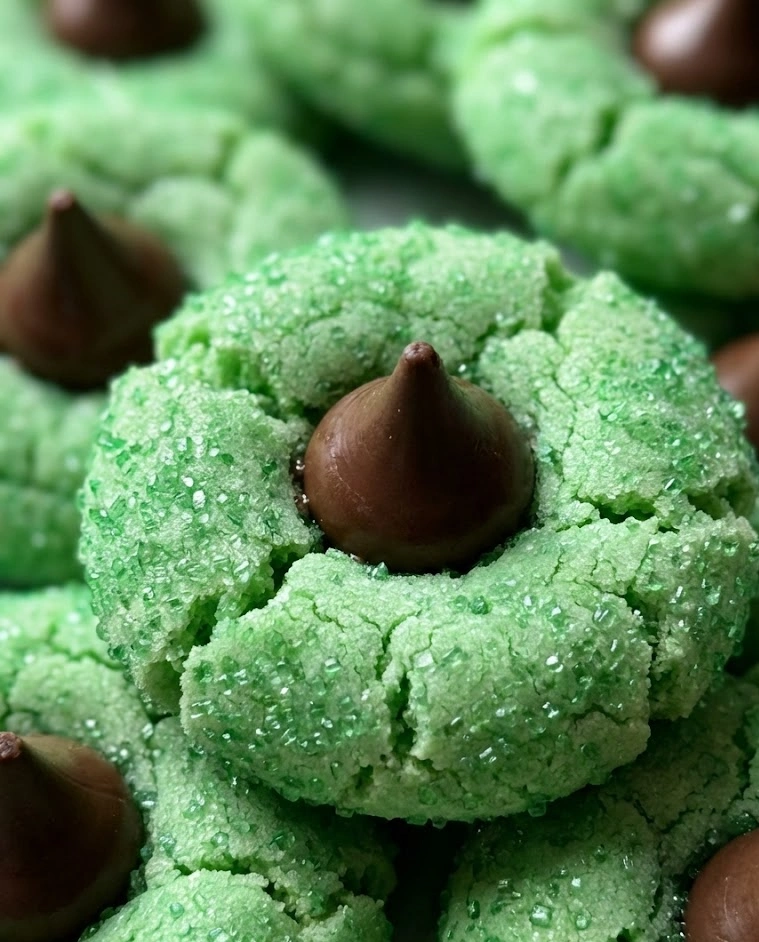
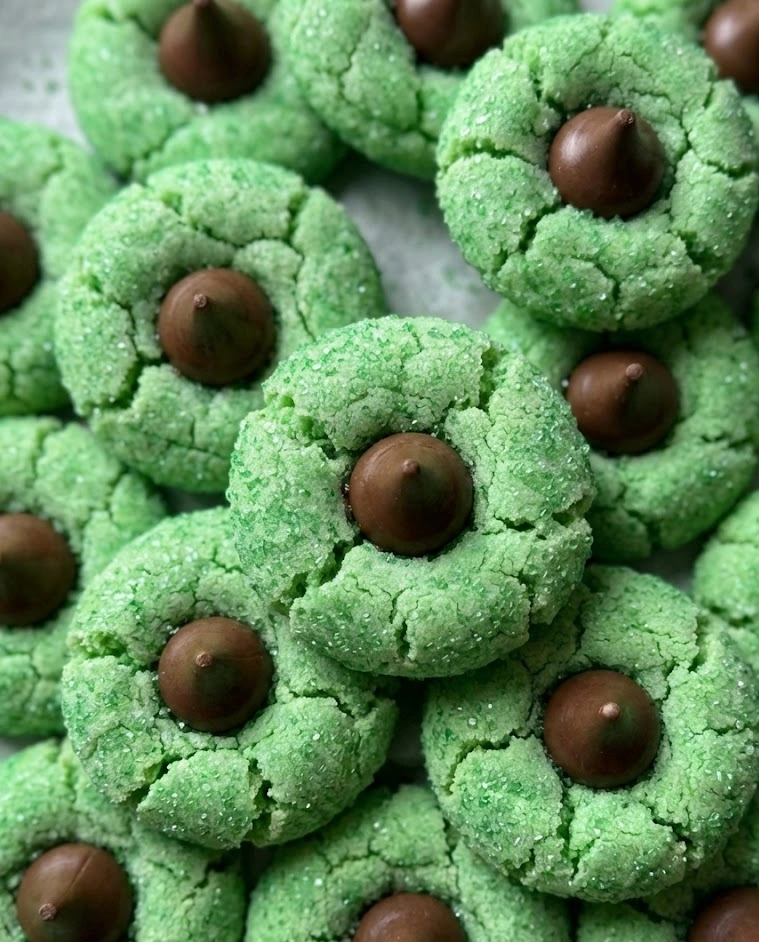
These St. Patrick’s Day Mint Blossom Cookies are the festive twist on classic peanut blossom cookies that will steal the show at any March celebration! Picture this: soft, chewy chocolate cookies rolled in sparkly green sugar, topped with a perfect mint chocolate candy that melts slightly into the warm cookie. Each bite delivers that irresistible chocolate-mint combination that tastes like a thin mint Girl Scout cookie met a hug!
What makes these absolutely addictive is the texture play. The cookie base is fudgy and tender with deep cocoa flavor, while the crackled green sugar coating adds a delightful crunch and festive shimmer. Then comes that mint chocolate candy on top—slightly melted and gooey in the center, creating the perfect crown for each cookie.
The best part? They look absolutely stunning on a dessert table! Those emerald-green sugar crystals catch the light beautifully, and the contrast between the dark chocolate cookie and bright green topping is pure St. Patrick’s Day magic. Kids go wild for these, but adults love them just as much. They’re nostalgic, delicious, and so fun to make!
Why You’ll Love This
- Speed: Mix, roll, and bake in 35 minutes—faster than a trip to the bakery!
- Flavor: Rich chocolate cookie meets cool mint candy for that craveable thin-mint taste
- Cost: Uses Andes mints or Hershey’s Kisses with mint—affordable and available everywhere
🍀 Dress Up Your St. Patrick’s Day Table!

St. Patrick’s Day Party Supplies
Buy Now → Buy Now →
  Buy Now →
St Patrick’s Day Party Supplies
Buy Now →Pro-Tips for Success
The Candy Timing Trick: Press your mint candies into the cookies immediately when they come out of the oven while they’re still piping hot. The residual heat softens the candy just enough to nestle it into the cookie without it sliding off. Wait even 2 minutes and the cookie will be too firm—timing is everything here!
Double Rolling for Maximum Sparkle: Roll your cookie dough balls in granulated sugar first, then in the green sparkling sugar. This creates better adhesion and a more even, gorgeous coating. The base layer of regular sugar helps the colored sugar stick and creates extra crunch!
Prevent Candy Sliding: After pressing candies into hot cookies, don’t move them for at least 10 minutes. The candy needs time to set back up. If you try to transfer them to a cooling rack too soon, the melted candy will slide right off or stick to your spatula. Patience pays off!
What You’ll Need
Prep Time: 15 minutes
Cook Time: 10 minutes
Total Time: 25 minutes (plus 15 minutes cooling)
Yield: 36 cookies
Difficulty: Easy
Ingredients
Chocolate Cookie Base:
- 1¾ cups all-purpose flour (210g)
- ½ cup unsweetened cocoa powder (45g)
- 1 tsp baking soda (5g)
- ¼ tsp salt (1.5g)
- ½ cup unsalted butter, softened (113g / 1 stick)
- ½ cup granulated sugar (100g)
- ½ cup light brown sugar, packed (100g)
- 1 large egg, room temperature
- 2 tbsp milk (30ml)
- 1 tsp vanilla extract (5ml)
- ½ tsp peppermint extract (2.5ml—optional for extra mint punch)
For Rolling:
- ½ cup granulated sugar (100g)
- ½ cup green sparkling or sanding sugar (100g)
Toppings:
- 36 Andes mint candies, unwrapped (or mint Hershey’s Kisses)
Instructions
1. Preheat & Prep Your Station
Preheat your oven to 350°F (175°C). Line two large baking sheets with parchment paper. Unwrap all your mint candies now—you’ll need to move fast when the cookies come out! Place your rolling sugars in separate shallow bowls.
2. Sift the Dry Ingredients
In a medium bowl, sift together the flour, cocoa powder, baking soda, and salt. Sifting removes cocoa lumps and ensures even distribution. This step is crucial for smooth, lump-free chocolate cookies!
3. Cream Butter & Sugars
In a large bowl or stand mixer with paddle attachment, beat the softened butter with both sugars on medium-high speed for 3-4 minutes. You want it light, fluffy, and almost mousse-like in texture. This incorporates air for soft, tender cookies.
4. Add Wet Ingredients
Beat in the egg until fully incorporated and the mixture looks smooth. Add the milk, vanilla extract, and peppermint extract (if using). Mix on low speed until everything is evenly combined. The mixture might look slightly curdled—totally normal!
5. Combine Wet & Dry
With mixer on low, gradually add the flour mixture to the wet ingredients. Mix just until no visible flour streaks remain and the dough comes together. It should be soft, slightly sticky, and rich dark chocolate in color.
6. Shape into Balls
Using a cookie scoop (about 1 tablespoon / 15ml), scoop portions of dough and roll into smooth balls between your palms. Consistency in size means even baking—they’ll all finish at the same time!
7. Double Sugar Roll
First, roll each dough ball in the plain granulated sugar to coat completely. Then immediately roll in the green sparkling sugar, pressing gently so it adheres well. This two-step process creates maximum sparkle and crunch!
8. Arrange on Sheets
Place sugar-coated dough balls 2 inches apart on your prepared baking sheets. They’ll spread slightly during baking, and you need room for air circulation. Aim for 12 cookies per standard baking sheet.
9. Bake to Perfection
Bake for 9-11 minutes. The cookies should look set around the edges but still slightly soft and puffy in the center. They might look underdone—that’s perfect! They’ll continue cooking on the hot pan and firm up as they cool.
10. Add the Mint Crowns
The second the cookies come out of the oven, immediately press an unwrapped mint candy firmly into the center of each hot cookie. The candy will soften slightly and nestle into the cookie surface. Work quickly before cookies cool!
11. Set & Cool
Let cookies cool completely on the baking sheet for at least 15 minutes. This allows the mint candy to firm back up and adhere properly. Don’t rush this step or you’ll have a melted candy mess! Once set, transfer to a wire rack or serve directly from the sheet.
12. Admire Your Creation
Look at those gorgeous emerald sparkles against the rich chocolate! The mint candies should have a slight indent but still hold their shape beautifully. These are ready to wow your St. Patrick’s Day crowd!
Storage & Reheating
Room Temperature: Store in an airtight container at room temperature for up to 1 week. Place parchment or wax paper between layers to prevent the mint candies from sticking to each other. The cookies stay soft and chewy while the candies remain perfectly intact!
Preventing Candy Melt: If your kitchen is warm, store cookies in a cool, dry place away from heat sources. The mint candies can soften if exposed to warmth for extended periods. A basement or air-conditioned room works perfectly.
Refrigeration: These cookies are absolutely delicious chilled! Store in the fridge for up to 2 weeks. The mint candies become extra firm and snappy, while the chocolate cookie stays wonderfully fudgy. Some people actually prefer them cold—try both ways and see what you love!
Freezing (Complete Cookies): Freeze fully assembled cookies in a single layer on a baking sheet until solid (about 1 hour). Transfer to a freezer-safe container with parchment between layers for up to 3 months. Thaw at room temperature for 20 minutes. The texture stays perfect!
Freezing (Cookie Dough Only): Roll dough balls in both sugars, place on a parchment-lined tray, and freeze solid (about 2 hours). Transfer to freezer bags for up to 3 months. Bake directly from frozen at 350°F for 11-13 minutes, then add mint candies as directed. Fresh cookies anytime!
Make-Ahead Strategy: Bake cookies up to 3 days ahead and store airtight without the mint candies. When ready to serve, warm cookies in a 300°F oven for 3-4 minutes until just warm, then press in the mint candies. They’ll look and taste freshly baked!
Alternative Candy Options: Can’t find Andes mints? Try mint Hershey’s Kisses, York Peppermint Pattie Minis, or even regular Hershey’s Kisses for a non-mint chocolate version. Trader Joe’s dark chocolate mint stars also work beautifully and add extra visual flair!
Serving Presentation: Arrange these on a white or cream platter to make that green sugar really pop! For parties, serve alongside a glass of cold milk, Irish coffee, or mint hot chocolate. The chocolate-mint combo is universally loved and always disappears first!
Gift-Giving Tip: Pack 6-8 cookies in a clear cellophane bag, tie with green-and-white striped ribbon, and add a tag that says “Mint to Be!” They make adorable St. Patrick’s Day party favors or teacher gifts that look professionally made.
St. Patrick’s Day Mint Blossom Cookies
Ingredients
Equipment
Method
- Whisk together flour, baking soda, baking powder, and salt in a medium bowl. Set aside.
- Cream butter until smooth, then add granulated sugar and brown sugar. Beat until light and fluffy.
- Add eggs one at a time, mixing well after each. Add peppermint extract and vanilla extract and mix briefly.
- If using, mix in green gel food coloring until evenly tinted.
- Gradually add dry ingredients to wet ingredients, mixing just until combined.
- Cover dough and refrigerate for at least 30 minutes to prevent spreading.
- Roll dough into 1-tablespoon balls and roll in green sugar until fully coated.
- Bake at 350°F (175°C) for 9–11 minutes until edges are set and lightly golden.
- Let cookies cool on the baking sheet for 2–3 minutes, then press one chocolate piece into the center of each cookie.
- Allow cookies to cool completely before transferring or storing.