
Why You’ll Love This Recipe
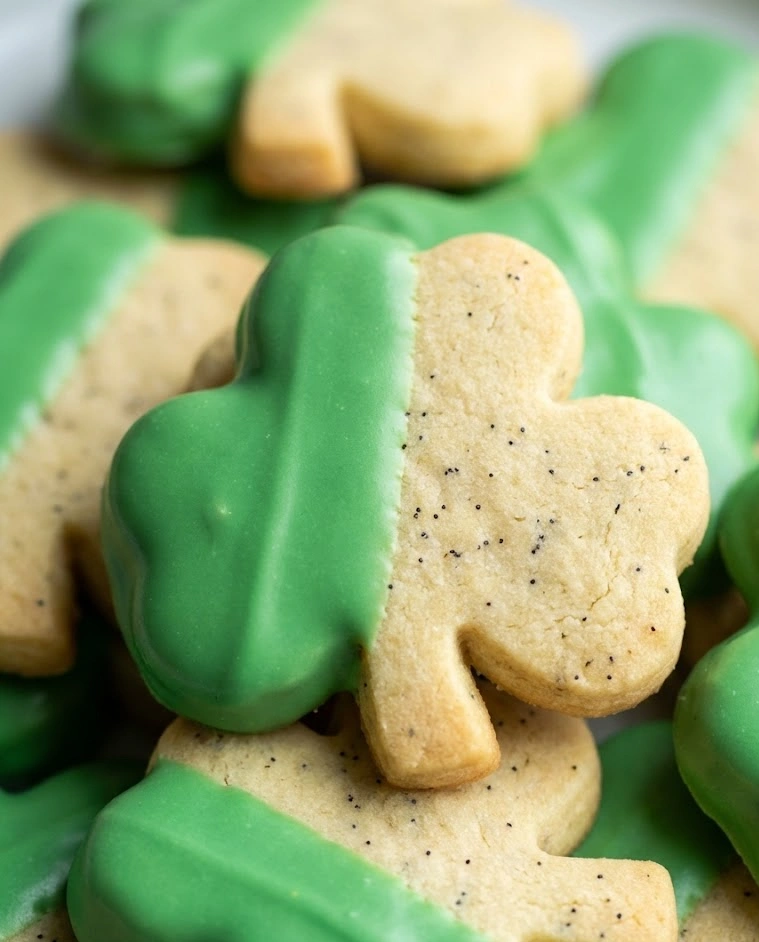
These Vanilla Bean Shamrock Cookies are the elegant, show-stopping centerpiece your St. Patrick’s Day celebration deserves! Picture perfectly buttery vanilla bean sugar cookies cut into adorable shamrock shapes, decorated with a smooth royal icing that creates those crisp, bakery-quality edges. The real vanilla bean specks throughout give them a gourmet touch that tastes as incredible as they look.
What sets these apart from ordinary sugar cookies is the flavor depth. Real vanilla bean paste creates tiny black flecks and an aromatic, almost floral vanilla taste that’s miles beyond basic extract. The cookies themselves have that perfect snap on the outside with a tender, melt-away center that’s neither too crispy nor too soft.
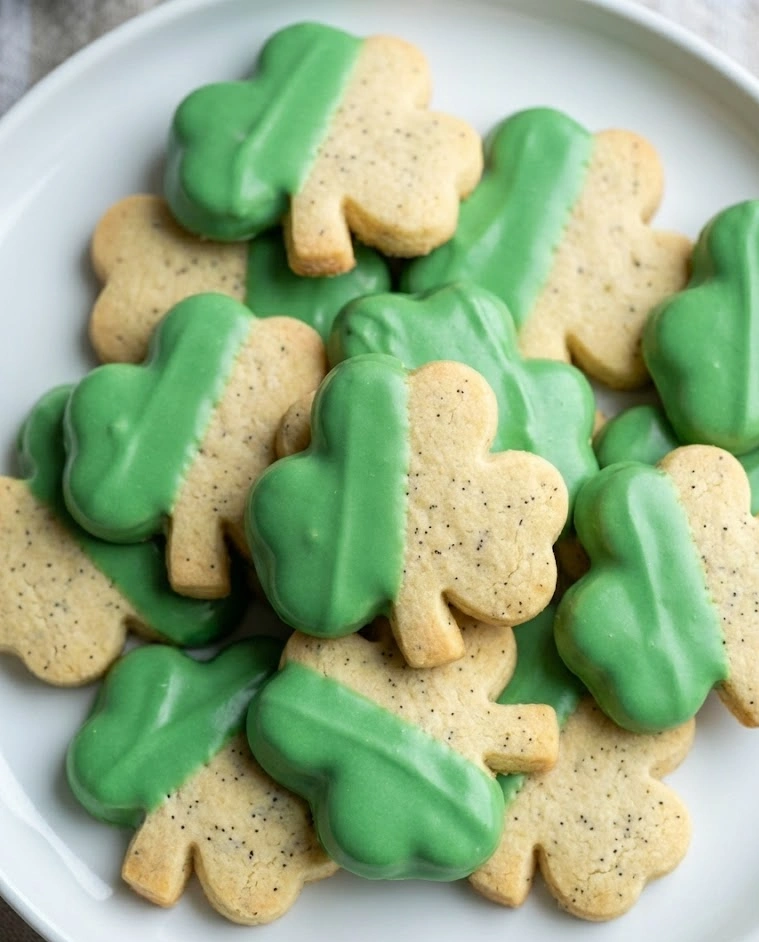
The decorating process is easier than you think! Whether you go for classic green shamrocks with white piping, ombré shades of green, or add gold luster dust for extra sparkle, these cookies look professionally made. They’re guaranteed Instagram moments and taste even better than they photograph. Plus, kids love helping with the decorating—it’s a fun family activity!
Why You’ll Love This
- Speed: Make the dough in 20 minutes, chill while you prep icing, then bake and decorate
- Flavor: Real vanilla bean creates bakery-quality taste that store-bought extract can’t match
- Cost: One batch makes 30+ cookies—way cheaper than buying decorated cookies at $4 each!
Pro-Tips for Success
Chill for Clean Cuts: After rolling your dough, pop it in the fridge for 10 minutes before cutting shapes. This prevents the dough from sticking to your shamrock cutter and gives you ultra-clean edges that hold their shape beautifully during baking. Cold dough = perfect shamrocks every time!
Royal Icing Consistency Guide: For outlining, you want “stiff peak” consistency that holds its shape (think toothpaste). For flooding, thin it with water until it’s like honey—it should settle smooth within 10 seconds. Test on a plate before committing to your cookies. This two-consistency method creates those professional bakery lines!
The Toothpick Trick: After flooding your cookie with icing, use a toothpick to pop any air bubbles and guide the icing into corners. Gently shake or tap the cookie on your work surface to help the icing self-level. This creates that perfectly smooth, glossy finish without visible brush strokes!
What You’ll Need
Prep Time: 20 minutes
Chill Time: 1 hour
Cook Time: 10 minutes
Decorating Time: 30-40 minutes
Total Time: 2 hours
Yield: 30-36 cookies (depending on cutter size)
Difficulty: Moderate
Ingredients
Vanilla Bean Cookie Dough:
- 3 cups all-purpose flour (360g)
- 1 tsp baking powder (5g)
- ½ tsp salt (3g)
- 1 cup unsalted butter, softened (227g / 2 sticks)
- 1 cup granulated sugar (200g)
- 1 large egg, room temperature
- 1 large egg yolk
- 2 tbsp vanilla bean paste (or 1 vanilla bean, scraped)
- 1 tsp vanilla extract (5ml)
Royal Icing:
- 4 cups powdered sugar, sifted (480g)
- 3 tbsp meringue powder (21g)
- 5-6 tbsp warm water (75-90ml)
- Gel food coloring (Kelly green, forest green, or your choice of shades)
Optional Decorations:
- White sanding sugar or pearl sprinkles
- Gold luster dust or edible gold stars
- Green sparkling sugar
Instructions
1. Mix the Dry Foundation
In a medium bowl, whisk together the flour, baking powder, and salt until evenly combined. This ensures your leavening is distributed perfectly throughout. Set aside while you work on the butter mixture.
2. Cream Butter & Sugar
In a large bowl or stand mixer with paddle attachment, beat the softened butter and sugar on medium-high speed for 3-4 minutes. You want it light, fluffy, and pale in color. This incorporates air for tender cookies with perfect texture.
3. Add Eggs & Vanilla
Beat in the whole egg and egg yolk, one at a time, mixing well after each addition. Add the vanilla bean paste and vanilla extract, beating until the mixture is smooth and you can see those gorgeous vanilla bean specks throughout.
4. Form the Dough
With mixer on low, gradually add the flour mixture. Mix just until the dough comes together with no visible flour streaks. Don’t overmix or you’ll get tough cookies! The dough should be soft but not sticky.
5. Chill the Dough
Divide dough in half and shape each portion into a flat disk. Wrap tightly in plastic wrap and refrigerate for at least 1 hour or up to 3 days. Chilled dough cuts cleanly and holds its shape during baking.
6. Preheat & Prep
When ready to bake, preheat your oven to 350°F (175°C). Line two baking sheets with parchment paper. Lightly flour your work surface and rolling pin to prevent sticking.
7. Roll & Cut
Working with one disk at a time (keep the other chilled), roll dough to ¼-inch thickness. Use a shamrock cookie cutter to cut shapes, placing them 1 inch apart on prepared baking sheets. Re-roll scraps once for maximum cookies.
8. Bake to Perfection
Bake for 9-11 minutes until edges are barely golden and centers look set but not browned. They should still look slightly soft—they’ll firm up as they cool. Don’t overbake or they’ll be crispy instead of tender!
9. Cool Completely
Let cookies cool on the baking sheet for 3 minutes, then transfer to wire racks to cool completely—at least 30 minutes. Cookies must be completely cool before decorating or the icing will melt and slide off.
10. Make the Royal Icing
In a large bowl or stand mixer, combine sifted powdered sugar and meringue powder. Add 5 tablespoons warm water and beat on low speed for 1 minute, then medium-high for 5-7 minutes until stiff peaks form. The icing should be bright white and hold its shape.
11. Color & Consistency
Divide icing into separate bowls for different colors. Add gel food coloring and mix until even. For outlining, keep one portion at stiff consistency. For flooding, thin another portion with water (add 1 teaspoon at a time) until it flows like honey but still holds a ribbon shape for 10 seconds.
12. Outline First
Transfer stiff icing to a piping bag fitted with a #2 or #3 tip (or use a ziplock bag with a tiny corner snipped). Pipe a careful outline around each shamrock shape, staying just inside the edge. Let this dry for 15 minutes before flooding.
13. Flood & Smooth
Using thinned icing in a squeeze bottle or piping bag, fill in the outlined area completely. Use a toothpick to spread into corners and pop bubbles. Gently tap the cookie to help icing settle smooth. Work quickly as it begins to set within minutes!
14. Add Details & Sparkle
While the flood icing is still wet, add your decorative touches: pipe white details, sprinkle with sanding sugar, or place edible pearls. For gold accents, let icing dry completely (2-4 hours), then brush with gold luster dust mixed with vodka or lemon extract.
15. Let Dry Completely
Allow decorated cookies to dry at room temperature for at least 4 hours or overnight for best results. The icing should be completely hard to the touch and matte in appearance. Now they’re ready to stack, package, or display!
Storage & Reheating
Room Temperature: Once icing is completely dry, store cookies in an airtight container at room temperature for up to 2 weeks. Place parchment or wax paper between layers to protect the icing. They actually taste better after a day or two when flavors meld!
Avoiding Humidity: Royal icing hates humidity! On humid days, store cookies in containers with a food-safe silica packet to keep them crisp. Never refrigerate royal iced cookies as condensation will make the icing weep and colors bleed.
Freezing (Undecorated Cookies): Baked, cooled cookies freeze beautifully for up to 3 months. Layer between parchment in a freezer-safe container. Thaw at room temperature for 20 minutes, then decorate as fresh. Perfect for spreading out your prep work!
Freezing (Decorated Cookies): Yes, you can freeze fully decorated cookies! Once icing is completely dry, freeze in a single layer on a baking sheet for 1 hour, then transfer to containers with parchment between layers. They’ll keep for 2 months. Thaw in the container at room temperature to prevent condensation.
Gift-Giving Tip: Package these in clear cellophane bags tied with green ribbon for adorable St. Patrick’s Day party favors or gifts. Stack 3-4 cookies per bag for a professional bakery presentation. Add a “Made with Love” tag for extra charm!
Make-Ahead Strategy: Bake cookies up to 1 week ahead and store airtight. Make royal icing up to 3 days ahead and store in an airtight container at room temperature (stir before using). Decorate 1-2 days before your event for the freshest taste and beautiful appearance!
Vanilla Bean Shamrock Cookies
Ingredients
Equipment
Method
- Prepare natural green coloring using either blanched spinach puree or matcha mixed with warm milk.
- Whisk flour, baking powder, and salt together in a bowl.
- Cream butter, sugars, and vanilla bean seeds until light and fluffy.
- Add eggs one at a time, then mix in vanilla and almond extracts.
- Mix in natural green coloring until evenly distributed.
- Add dry ingredients gradually, mixing just until combined.
- Divide dough, wrap, and refrigerate for at least 2 hours.
- Roll dough to 1/4-inch thickness and cut shamrock shapes.
- Bake at 325°F (spinach) or 350°F (matcha) until edges are set but not browned.
- Cool completely, then glaze with vanilla glaze and decorate if desired.