
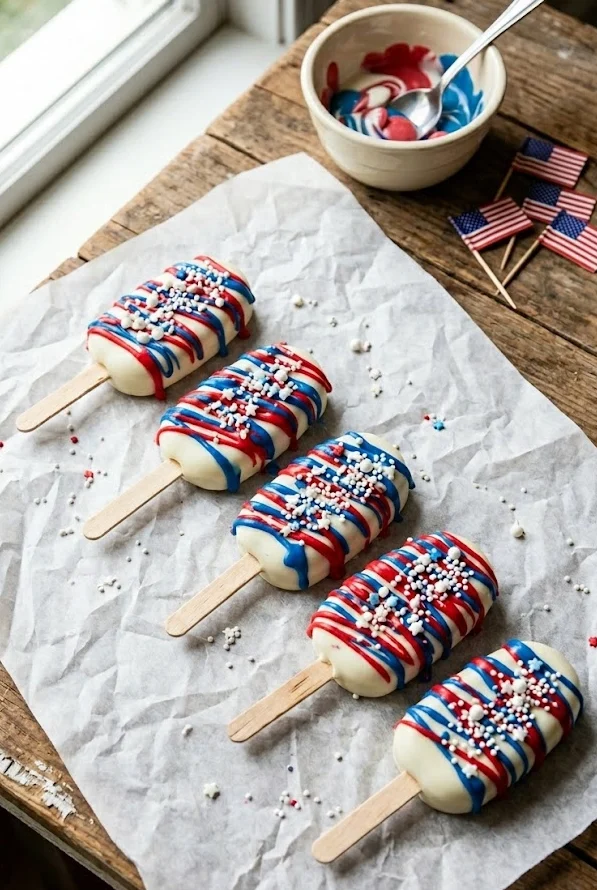
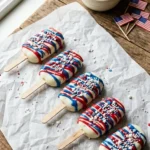
If you’re searching for a 4th of July food dessert that’s festive, fun, and genuinely simple to pull off, cakesicles are about to become your new favorite. These red, white, and blue treats look like you spent hours in the kitchen — but they come together with just a handful of ingredients and zero complicated techniques.
Cakesicles are essentially cake pops in popsicle form. You crumble cake, mix it with frosting, press the dough into a mold, coat it in white chocolate, and decorate with a patriotic drizzle. That’s it. They’re one of the most crowd-pleasing 4th of July food ideas you can bring to a BBQ, and they work perfectly for kids and adults alike.
Why You’ll Love These 4th of July Cakesicles
These cakesicles check every box for a great holiday dessert. They’re easy, they’re make-ahead friendly, and they look absolutely stunning on a party platter.
You don’t need to bake anything from scratch if you use leftover cake or a simple boxed mix. That makes this one of the most convenient easy 4th of July food dessert options on your list. Whether you’re feeding a crowd at a backyard BBQ or packing up patriotic treats for a neighborhood gathering, these deliver every time.
They’re also fantastic for kids. Little ones love helping drizzle the red and blue icing, press sprinkles on top, and — of course — eat them straight off the stick.
Common Mistakes and How to Avoid Them
The most common issue is adding too much frosting to the cake mixture. You only need enough to make the crumbles hold together like soft dough. Too much and the cakesicles become sticky and impossible to shape cleanly.
Another frequent mistake is skipping the freeze step. Before you dip the cakesicles in chocolate, they need at least 30 minutes in the freezer. If they’re not fully chilled and firm, they’ll fall apart the moment they hit the warm coating.
Finally, don’t rush the white chocolate coating. Use melts designed for dipping, thin them with a small amount of coconut oil, and work in short microwave bursts stirring in between. Overheated chocolate seizes and becomes grainy — patience here makes all the difference.
Key Ingredients
Vanilla cake is the base of everything. You can use leftovers, a baked boxed mix, or even store-bought cake crumbles. The flavor doesn’t matter too much since the coating takes center stage, but vanilla keeps things light and sweet.
Frosting acts as the binder. Buttercream — homemade or store-bought — is the classic choice. Cream cheese frosting also works beautifully and adds a slight tang that pairs well with the sweet white chocolate shell.
White candy melts create the iconic smooth coating. They’re specifically designed for dipping and set firmly at room temperature, which is exactly what you want for a clean, polished finish.
Gel food coloring gives you bold, vibrant red and blue without watering down your icing. A small amount goes a long way, and the colors stay bright even after drying.
Powdered sugar mixed with a few drops of water creates the drizzle icing. It’s thick enough to hold its shape but thin enough to pipe through a zip-top bag — no piping tips required.
How to Make 4th of July Cakesicles
- Crumble your cake into a large bowl using your hands or a fork until no large chunks remain.
- Add frosting a few spoonfuls at a time and mix until the mixture holds together like soft playdough.
- Press the cake dough firmly into a silicone cakesicle mold, filling each cavity all the way to the top.
- Insert a popsicle stick into each cavity and freeze for 30 minutes or until completely solid.
- Melt white candy melts in the microwave in 20-second bursts, stirring between each. Add a teaspoon of coconut oil if the coating feels too thick.
- Pop the cakesicles out of the mold and dip each one fully into the white chocolate, letting the excess drip off cleanly.
- Place on parchment paper and allow the coating to set completely at room temperature.
- Mix powdered sugar with a few drops of water to make a smooth, thick icing. Divide into two bowls and tint one red and one blue with gel food coloring.
- Transfer each color to a zip-top bag, snip a tiny corner off, and drizzle over the set cakesicles in a striped pattern.
- Add sugar pearl sprinkles before the drizzle sets, then allow everything to dry fully before serving.
Variations and Tips
If you want to make a gluten-free version, simply use your favorite GF cake mix and check that your candy melts are certified gluten free. The rest of the recipe stays exactly the same, making this one of the most adaptable easy 4th of July food dessert recipes around.
For a chocolate twist, use chocolate cake as the base and dip in dark candy melts instead of white. It creates a richer, fudgier bite that chocolate lovers will go crazy for.
Pro tip: change the drizzle colors to match any celebration. Use green and red for Christmas, pastels for Easter, or team colors for a birthday party. These cakesicles are a year-round crowd-pleaser with just one small tweak.
Another great addition is a surprise center. Before pressing the cake dough fully into the mold, add a small dollop of Nutella, peanut butter, or strawberry jam right in the middle. It adds a gooey, unexpected element that makes every bite memorable.
FAQs
Can I use a boxed cake mix? Absolutely. A boxed vanilla, funfetti, or chocolate cake baked and cooled works perfectly. This is actually the easiest way to make these if you don’t have leftovers on hand.
Do I need a special mold? A silicone cakesicle mold gives you the cleanest popsicle shape and makes unmolding effortless. In a pinch you can hand-shape them like cake pops, but the mold is worth getting for the iconic look.
Why is my white chocolate coating cracking? This usually happens when the cakesicles are too cold and the chocolate is too warm. Let them sit at room temperature for just a minute or two after freezing before dipping.
Can I make these ahead of time? Yes — these are perfect for making in advance. Decorate them fully, wrap individually in plastic wrap, and freeze for up to one month. Thaw overnight in the fridge and they’re ready to serve.
4th of July Cakesicles
Equipment
- silicone cakesicle mold
- mixing bowl
- microwave-safe bowl
- spatula
- parchment paper
Ingredients
- 4 cups vanilla cake crumbs
- 0.5 cup vanilla frosting
- 16 oz white candy melts
- 1 tsp coconut oil
- 1 cup powdered sugar
- 2 tbsp water
- 1 tsp red gel food coloring
- 1 tsp blue gel food coloring
- 2 tbsp white sugar pearl sprinkles
- 8 popsicle sticks
Instructions
- Crumble the cake into a large mixing bowl until no large chunks remain.
- Add frosting a little at a time and mix until the cake mixture holds together like soft dough.
- Press the cake mixture firmly into a silicone cakesicle mold, filling each cavity completely.
- Insert popsicle sticks and freeze for 30 minutes or until completely firm.
- Melt the white candy melts in the microwave using 20-second intervals, stirring after each interval. Add coconut oil if needed.
- Remove the cakesicles from the mold and dip each one into the melted white coating. Let excess coating drip off.
- Place the coated cakesicles on parchment paper and allow the coating to set completely.
- Mix powdered sugar with water until smooth. Divide into two bowls and color one red and one blue using gel food coloring.
- Transfer each icing color into a zip-top bag, snip a small corner, and drizzle over the cakesicles.
- Sprinkle with sugar pearls before the drizzle sets. Allow everything to dry fully before serving.