
Mummy Brownies wrap a rich, fudgy brownie in white chocolate bandages and two candy eyes for the easiest Halloween dessert on this list. They taste like a classic bakery brownie underneath all that spooky styling, with a shiny, crackly top and a soft, fudgy center. One bite and the reaction is instant — even though the whole thing comes together in one bowl.
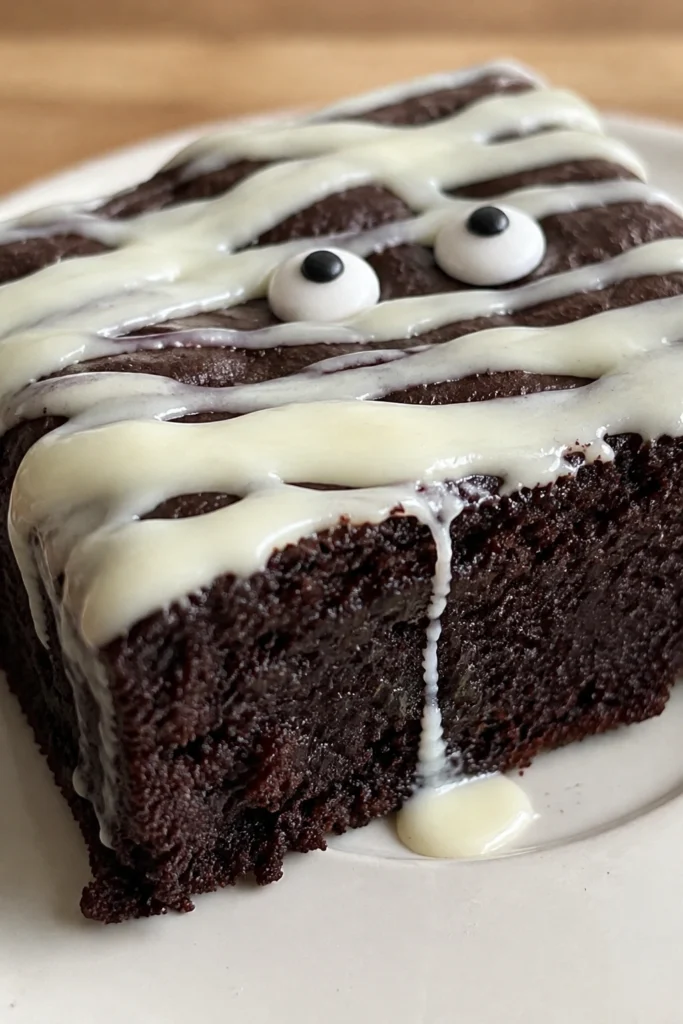
Table of Contents
Why You’ll Love This Mummy Brownies Recipe
- One bowl, no mixer needed — this batter comes together by hand in about 10 minutes, so there’s no stand mixer to haul out and barely any cleanup.
- Fudgy, bakery-style texture — melted butter and a short bake time keep the center soft and dense instead of cakey.
- Halloween-cute without any skill — the “bandages” are just drizzled white chocolate, so even a shaky hand still looks intentional.
Ingredients You’ll Need
Here’s what makes these mummy brownies work, ingredient by ingredient:
- Cocoa powder — use a natural unsweetened cocoa for a classic brownie flavor; Dutch-process works too and gives an even darker color.
- Melted butter (not softened) — melting the butter is what gives brownies that shiny, crackly top, so don’t skip this step or sub in oil.
- White candy melts — these set up firm at room temperature, unlike white chocolate chips, which can stay slightly soft; either works, but candy melts are more forgiving for beginners.
- Mini candy eyes — found in the baking aisle near sprinkles around Halloween; small chocolate chips turned point-side out work in a pinch.
How to Make Mummy Brownies
- Preheat the oven to 350°F (175°C) and line an 8×8-inch pan with parchment paper, leaving a little overhang on two sides to lift the brownies out later.
- Whisk the melted butter and sugar together until glossy, about 1 minute, then whisk in the cocoa powder until smooth.
- Add the eggs one at a time, whisking well after each, then whisk in the vanilla and salt.
- Fold in the flour and baking powder just until no dry streaks remain — a few strokes too many and the brownies turn cakey instead of fudgy.
- Spread the batter into the prepared pan and bake for 26-28 minutes, until a toothpick inserted in the center comes out with a few moist crumbs.
- Cool completely in the pan, about 1 hour, then lift out using the parchment and cut into 16 squares.
- Melt the white candy melts in the microwave in 20-second bursts, stirring between each, until smooth and pourable.
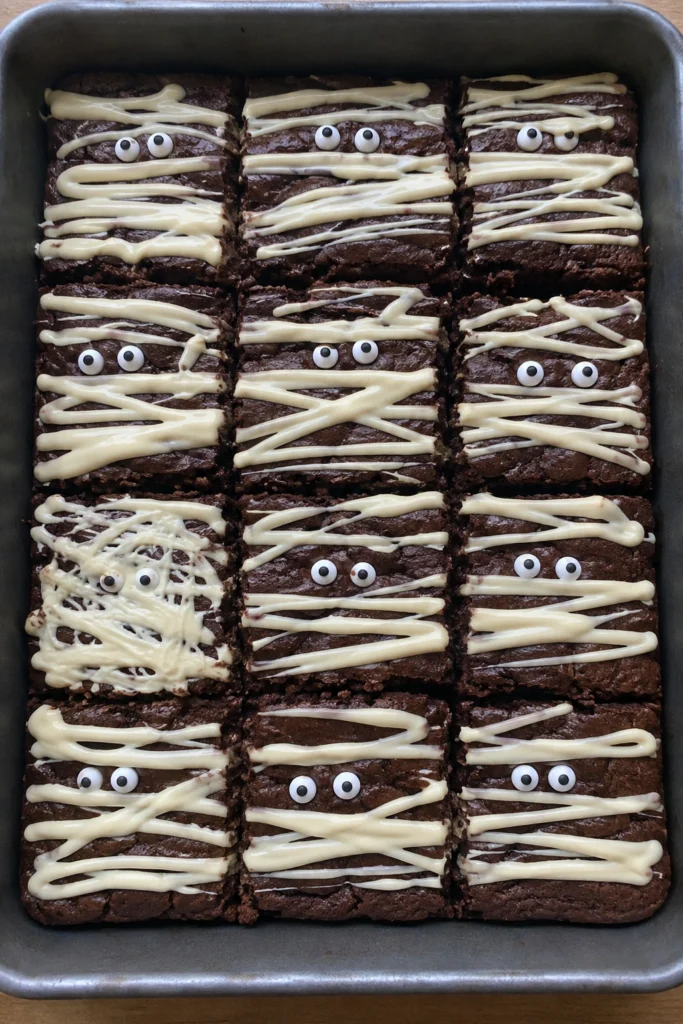
- Drizzle the melted white chocolate back and forth across each brownie in thin strips to look like mummy wrappings, leaving a small gap near the top for the face.
- Press two candy eyes into the gap while the chocolate is still wet, then let everything set at room temperature for about 10 minutes before serving.
Tips for Perfect Mummy Brownies
- Don’t overbake them. Pull the pan the moment a toothpick shows moist crumbs, not a totally clean streak — brownies keep cooking from residual heat and firm up as they cool. It’s the same doneness trick we use for our Pumpkin Chocolate Chip Bars, and it saves more batches than anything else.
- Let them cool all the way before decorating. Warm brownies melt the white chocolate wrapping into a puddle instead of a clean line. An hour on the counter is worth the wait.
- Thin the candy melts if they seize. If your white chocolate turns thick and clumpy instead of smooth, stir in ½ teaspoon of vegetable oil or coconut oil to loosen it back up before drizzling.
Variations
A few easy swaps if you want to change these mummy brownies up: add a handful of mini chocolate chips to the batter for extra richness, swap the white candy melts for dark chocolate “wrapping” if you want a spookier all-chocolate look, or bake them in a mini muffin tin for bite-sized mummies at a party. If you’re planning a whole Halloween dessert table, our Spiderweb Brownies use the same fudgy base with a completely different (and just as easy) design on top.
What to Serve With It
Mummy brownies are rich enough to stand alone with a cold glass of milk, but they’re also right at home on a Halloween dessert spread. Set them next to our Salted Caramel Pumpkin Pie for a table that covers both spooky and cozy fall. A scoop of vanilla ice cream on the side turns any leftover brownie into a fast sundae.
Frequently Asked Questions
Can I make mummy brownies ahead of time? Yes — bake and cool the brownies up to 2 days ahead, then store them undecorated at room temperature in an airtight container. Add the white chocolate wrapping and candy eyes the day you’re serving them so the decoration stays crisp and white.
Can I use a boxed brownie mix instead? You can — bake a 9×13 box mix according to the package, cool completely, then follow the same drizzle-and-eyes decorating steps starting at step 7. The homemade version has a fudgier texture, but a mix works in a pinch.
How do I store leftover brownies? Keep them in an airtight container at room temperature for up to 4 days, or in the fridge for up to a week. Let refrigerated brownies sit out for 10 minutes before serving so the white chocolate isn’t too firm to bite through cleanly.
Can I freeze them? Freeze the plain, undecorated brownies in a single layer, then transfer to a freezer bag for up to 3 months. Thaw at room temperature and decorate right before serving.
Final Thoughts
There’s something so satisfying about a dessert that looks like it took real skill but actually just needs a spoon and a steady drizzle. Mummy brownies hit that sweet spot every single Halloween — they disappear fast at parties and they’re genuinely fun to make with kids.
If you give these a try, I’d love to hear how your mummies turned out. Snap a photo, tag it, or just come back and leave a note in the comments — bringing a little joy to your table is exactly why I do this.
Mummy Brownies
Ingredients
- 1/2 cup unsalted butter, melted
- 1 cup granulated sugar
- 1/3 cup unsweetened cocoa powder
- 2 large eggs
- 1 teaspoon vanilla extract
- 1/4 teaspoon salt
- 1/2 cup all-purpose flour
- 1/4 teaspoon baking powder
- 12 oz white candy melts or white chocolate chips
- 32 mini candy eyes 2 per brownie
Instructions
- Preheat the oven to 350°F (175°C) and line an 8×8-inch pan with parchment paper, leaving a little overhang on two sides to lift the brownies out later.
- Whisk the melted butter and sugar together until glossy, about 1 minute, then whisk in the cocoa powder until smooth.
- Add the eggs one at a time, whisking well after each, then whisk in the vanilla and salt.
- Fold in the flour and baking powder just until no dry streaks remain — a few strokes too many and the brownies turn cakey instead of fudgy.
- Spread the batter into the prepared pan and bake for 26-28 minutes, until a toothpick inserted in the center comes out with a few moist crumbs.
- Cool completely in the pan, about 1 hour, then lift out using the parchment and cut into 16 squares.
- Melt the white candy melts in the microwave in 20-second bursts, stirring between each, until smooth and pourable.
- Drizzle the melted white chocolate back and forth across each brownie in thin strips to look like mummy wrappings, leaving a small gap near the top for the face.
- Press two candy eyes into the gap while the chocolate is still wet, then let everything set at room temperature for about 10 minutes before serving.