
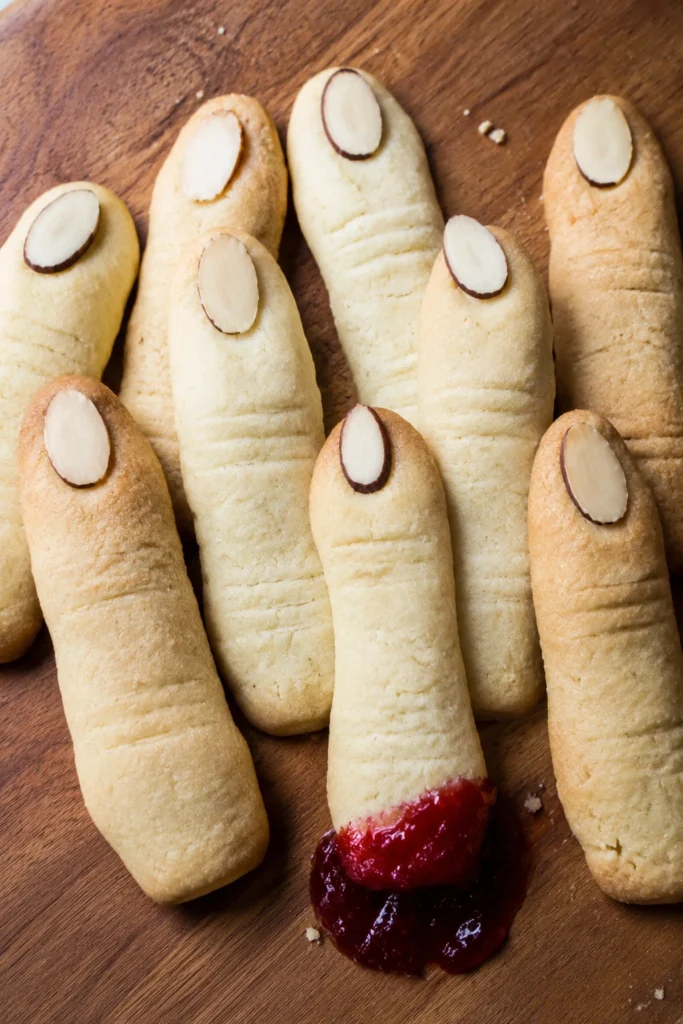
These witch finger cookies are the treat that gets the loudest gasp on any Halloween dessert table. Buttery almond shortbread gets shaped by hand into knobby, wrinkled fingers, tipped with a toasted almond nail and a smear of jammy red “blood” right where it counts. They taste like your favorite shortbread cookie — this one just happens to look like it crawled out of a cauldron.
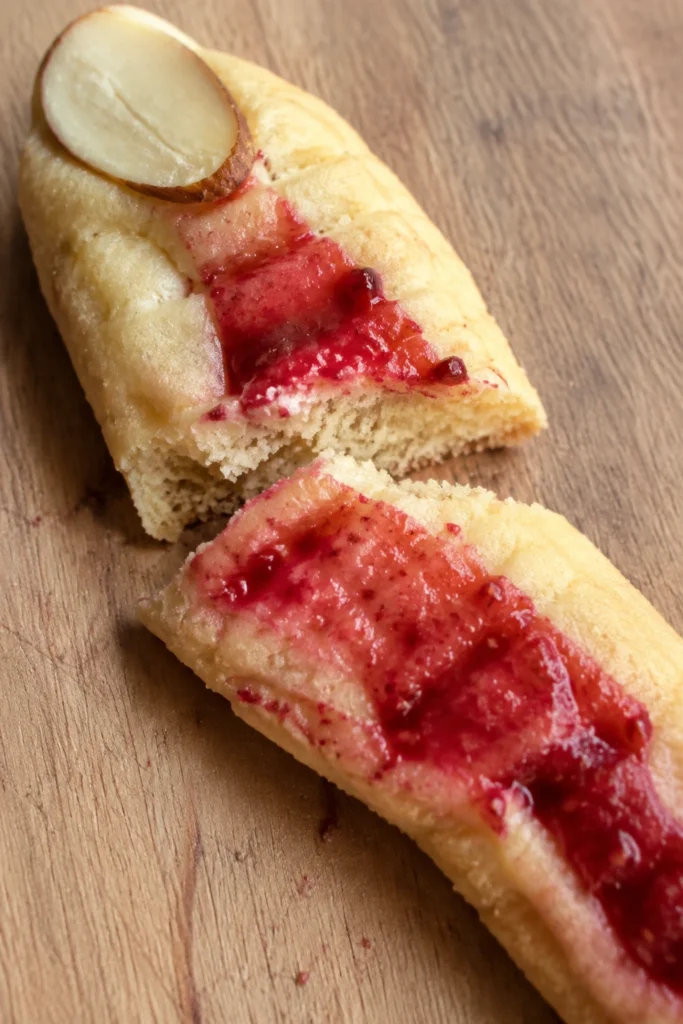
Table of Contents
Why You’ll Love This Witch Finger Cookies Recipe
- One bowl, no fuss: the dough comes together with a hand mixer and a spoon — no special equipment needed.
- Buttery almond flavor: real almond extract and a whole almond “nail” give every bite a toasty, nutty finish.
- A hands-on activity: shaping the fingers is the fun part, and kids love pressing in the nails and scoring the knuckle lines.
If your family already loves our Ghost Sugar Cookies, these creepy fingers are the next Halloween cookie to add to the rotation.
Ingredients You’ll Need
Here’s everything that goes into these witch finger cookies:
- Unsalted butter (1 cup / 2 sticks), softened — the base of a rich, tender shortbread crumb.
- Granulated sugar (3/4 cup) — just enough sweetness so the almond flavor still leads.
- 1 large egg — binds the dough and keeps the fingers from cracking as they bake.
- Almond extract (1 tsp) and vanilla extract (1 tsp) — the almond extract is what makes these taste like a real bakery shortbread.
- All-purpose flour (2 3/4 cups) and salt (1/2 tsp) — spoon and level the flour so the dough doesn’t turn out dry.
- Whole almonds (24), for the nails — press one into the tip of each finger before baking.
- Red jam or gel food coloring, for the “blood” — a small dab under the nail does the trick.
How to Make Witch Finger Cookies
- Cream the butter and sugar together until light and fluffy, about 2-3 minutes.
- Beat in the egg, almond extract, and vanilla extract until smooth.
- Mix in the flour and salt on low speed just until a soft dough forms. Cover and chill 30 minutes.
- Roll small pieces of dough into 3-inch finger shapes, tapering one end, and score 2-3 knuckle lines into each with a paring knife.
- Press a whole almond firmly into the tapered tip for the nail.
- Dab a small amount of jam or red food coloring at the base of the almond so it looks like it’s bleeding.
- Bake at 325°F for 12-14 minutes, until set but still pale — you don’t want any golden color.
- Cool on the pan 5 minutes, then move to a wire rack and add an extra dab of jam once cooled for more “blood.”
Tips for Perfect Witch Finger Cookies
- Keep them pale. Bake just until set — real witch fingers aren’t golden brown, so pull the pan as soon as the bottoms are barely set.
- Chill the dough. Skipping the 30-minute chill makes the dough too soft to hold the finger shape and knuckle lines.
- Press the almond in early. Push the nail in before baking, not after — it holds far better once the cookie firms up in the oven.
Variations
Once you’ve got the classic witch finger cookies down, try one of these spins:
- Green witch fingers: add a drop of green gel food coloring to the dough for a classic witchy tint.
- Chocolate fingers: swap 1/4 cup of the flour for cocoa powder for a chocolate shortbread version.
- Long-nail ghouls: use sliced almonds instead of whole for a flatter, claw-like nail.
- Serve them alongside our Mummy Cupcakes for a two-treat Halloween platter.
What to Serve Witch Finger Cookies With
These cookies are rich enough to stand alone with a glass of cold milk, but they’re even better as part of a spread. Set them next to a bowl of our Graveyard Dirt Cups for a mix of textures — crunchy shortbread next to cool, creamy pudding.
A steaming mug of spiced cider or hot chocolate rounds out the plate for a cozy fall movie night.
Frequently Asked Questions
Can I make witch finger cookies ahead of time? Yes — the dough keeps in the fridge for up to 2 days, or shape the fingers and freeze them unbaked for up to 3 months; bake straight from frozen, adding a minute or two to the bake time.
Do I have to use almonds for the nails? Sliced almonds or even a small piece of white candy melt work if you have a nut allergy in the house — just press it in the same way before baking.
Why did my fingers turn out too soft to shape? The dough is likely too warm — pop it back in the fridge for 10-15 minutes before rolling.
Can I freeze the baked cookies? Yes, baked and cooled cookies freeze well in an airtight container for up to 2 months; thaw at room temperature before adding fresh jam “blood.”
Final Thoughts
Witch finger cookies are proof that a Halloween treat can be genuinely delicious and still get a laugh at the door. Buttery, nutty, and a little bit gruesome — they disappear fast once the bowl hits the table.
Give them a try this October, and don’t be surprised if they become the cookie everyone asks for every year after.
Witch Finger Cookies
Ingredients
- 1 cup unsalted butter, softened (2 sticks) the base of a rich, tender shortbread crumb
- 3/4 cup granulated sugar just enough sweetness so the almond flavor leads
- 1 large egg binds the dough so the fingers don’t crack
- 1 tsp almond extract the key to that real bakery shortbread flavor
- 1 tsp vanilla extract
- 2 3/4 cups all-purpose flour, spooned and leveled
- 1/2 tsp salt
- 24 whole almonds pressed into the tip of each finger as the “nail”
- 2 tbsp strawberry jam or red gel food coloring for the “blood” at the base of the nail
Instructions
- Cream the butter and sugar together until light and fluffy, about 2-3 minutes.
- Beat in the egg, almond extract, and vanilla extract until smooth.
- Mix in the flour and salt on low speed just until a soft dough forms. Cover and chill 30 minutes.
- Roll small pieces of dough into 3-inch finger shapes, tapering one end, and score 2-3 knuckle lines into each with a paring knife.
- Press a whole almond firmly into the tapered tip for the nail.
- Dab a small amount of jam or red food coloring at the base of the almond so it looks like it’s bleeding.
- Bake at 325°F for 12-14 minutes, until set but still pale — you don’t want any golden color.
- Cool on the pan 5 minutes, then move to a wire rack and add an extra dab of jam once cooled for more “blood.”