
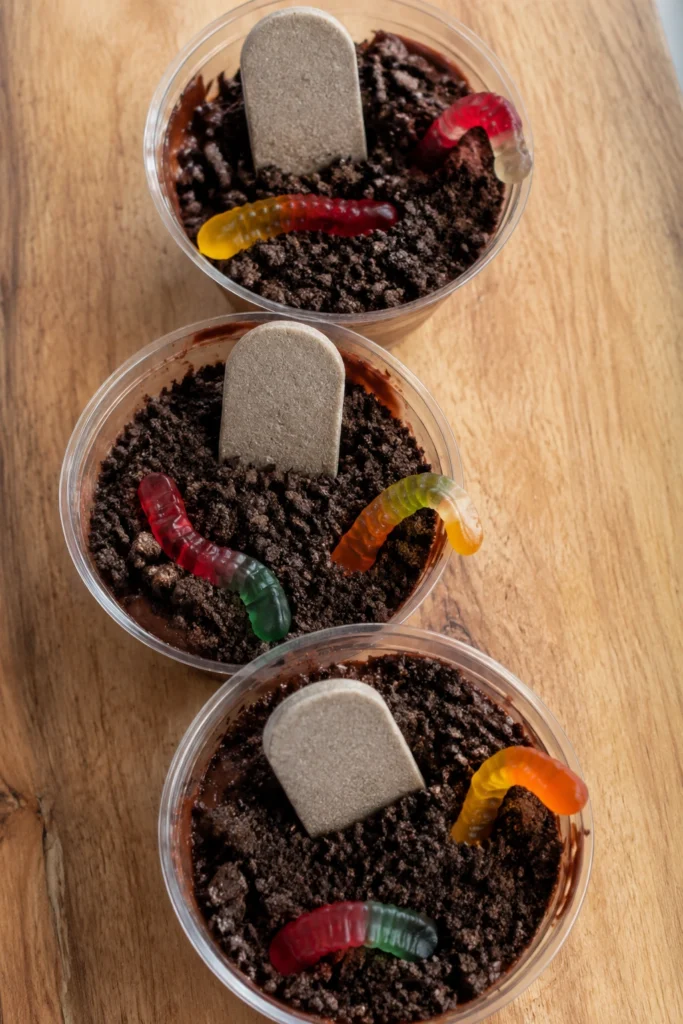
These graveyard dirt cups are the no-bake Halloween dessert that always gets the biggest reaction from kids at the table. Layers of cool chocolate pudding hide under a thick blanket of crushed Oreo “dirt,” with gummy worms wriggling out and little cookie tombstones standing guard on top.
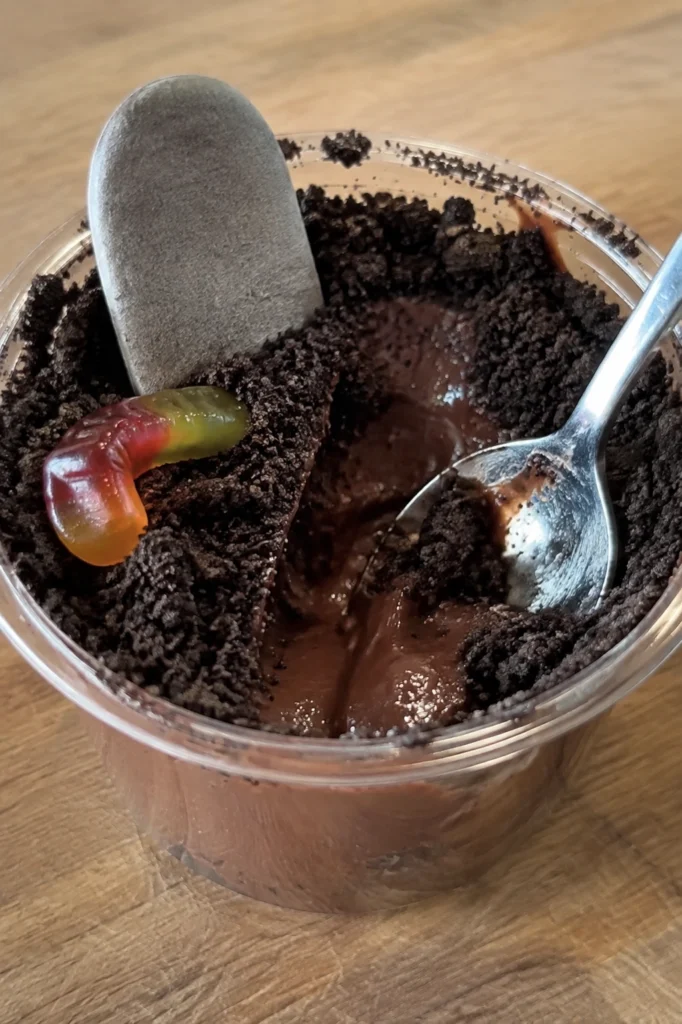
Table of Contents
Why You’ll Love This Graveyard Dirt Cups Recipe
- Completely no-bake: just whisk, layer, and chill — no oven required.
- Make-ahead friendly: the pudding layers can be ready in the fridge days before the party.
- A kids’ favorite: the dirt, worms, and tombstones make this one of the most fun desserts to build together.
For another no-fuss Halloween bake to go with it, our Monster Cookie Bars need just one pan and no chilling.
Ingredients You’ll Need
Here’s everything that goes into these graveyard dirt cups:
- Cold milk and instant chocolate pudding mix — whisked together for the base layer; it thickens in just a couple of minutes.
- Heavy cream, powdered sugar and vanilla — whipped and folded into the pudding for a lighter, mousse-like texture (or sub whipped topping).
- Chocolate sandwich cookies (20) — most get crushed into “dirt,” a few get halved into “tombstones.”
- Gummy worms — pushed into the top layer so they peek out of the dirt.
- White icing (optional) — for piping “RIP” onto the cookie tombstones.
How to Make Graveyard Dirt Cups
- Whisk the cold milk and pudding mix together for 2 minutes until thickened, then chill 5 minutes.
- Whip the heavy cream with the powdered sugar and vanilla to soft peaks (skip this step if using whipped topping).
- Fold half the whipped cream into the pudding to lighten it.
- Crush 16 of the cookies into fine crumbs using a food processor or a zip-top bag and rolling pin; set the remaining 4 aside for tombstones.
- Layer each cup with pudding, a spoonful of cookie crumbs, more pudding, then a thick final layer of crumbs “dirt” on top.
- Push 2 gummy worms into each cup so they peek out of the dirt.
- Halve the reserved cookies and stand them upright in the dirt as tombstones, piping a small “RIP” on each with white icing if desired.
- Chill at least 1 hour before serving.
Tips for Perfect Graveyard Dirt Cups
- Chill the pudding before layering. Warm pudding melts into the whipped cream layer instead of sitting in clean, distinct layers.
- Crush the cookies fine. Small, sandy crumbs look far more like “dirt” than large chunks.
- Add the tombstones last. Pushing the cookie halves in right before serving keeps them standing upright instead of sinking into the pudding.
Variations
Once you’ve made the classic graveyard dirt cups, try one of these twists:
- Vanilla dirt cups: use vanilla pudding and golden sandwich cookies for a lighter “sand” version.
- Individual jars: layer in small mason jars instead of cups for a portable party favor.
- Spider dirt cups: add a plastic or candy spider on top instead of (or alongside) the gummy worms.
- Serve them next to our Mummy Cupcakes for a full spooky dessert spread.
What to Serve Graveyard Dirt Cups With
These cups are rich and creamy, so something crunchy works well alongside — a bowl of our Halloween Chocolate Bark adds a nice textural contrast on the same dessert table.
They’re also a natural fit for a Halloween movie night, served in small cups with spoons ready to go.
Frequently Asked Questions
Can I make graveyard dirt cups ahead of time? Yes — assemble the pudding layers up to 2 days ahead and add the final crumb “dirt,” worms, and tombstones just before serving so everything looks fresh.
Can I use store-bought pudding cups instead of making my own? Yes, that works as a shortcut — just fold in a little whipped cream if you want the same lighter texture.
How do I keep the tombstones from sinking? Make sure the top dirt layer is thick and only slightly chilled, not runny, before you stand the cookie halves up in it.
Are graveyard dirt cups gluten-free? Not as written, since standard sandwich cookies contain wheat — swap in a gluten-free chocolate sandwich cookie to make them gluten-free.
Final Thoughts
Graveyard dirt cups turn a handful of pantry staples into one of the most requested Halloween desserts on the table, and there’s barely any real cooking involved.
Build a batch the next time you need an easy, no-bake treat that still gets a reaction — this one never fails to deliver.
Graveyard Dirt Cups
Ingredients
For the Pudding Layers
- 2 cups cold milk
- 1 box (3.9 oz) instant chocolate pudding mix
- 1 cup heavy cream (or 8 oz whipped topping) whipped to soft peaks and folded into the pudding for a lighter texture
- 2 tbsp powdered sugar if whipping your own cream
- 1/2 tsp vanilla extract
For the Graveyard Topping
- 20 chocolate sandwich cookies, divided 16 crushed for “dirt,” 4 halved for “tombstones”
- 12 gummy worms
- 1 tbsp white icing optional, for piping “RIP” on the tombstones
Instructions
- Whisk the cold milk and pudding mix together for 2 minutes until thickened, then chill 5 minutes.
- Whip the heavy cream with the powdered sugar and vanilla to soft peaks (skip this step if using whipped topping).
- Fold half the whipped cream into the pudding to lighten it.
- Crush 16 of the cookies into fine crumbs using a food processor or a zip-top bag and rolling pin; set the remaining 4 aside for tombstones.
- Layer each cup with pudding, a spoonful of cookie crumbs, more pudding, then a thick final layer of crumbs “dirt” on top.
- Push 2 gummy worms into each cup so they peek out of the dirt.
- Halve the reserved cookies and stand them upright in the dirt as tombstones, piping a small “RIP” on each with white icing if desired.
- Chill at least 1 hour before serving.