Every holiday season needs a batch of perfectly spiced, fragrant Gingerbread Cookies. This recipe delivers the ideal balance: a chewy, tender texture, a deep, rich molasses flavor, and, most importantly, a dough that holds its shape beautifully in the oven. Forget cracked legs and bloated bellies—this is the definitive guide to making no-spread gingerbread cookies that are ideal for cutting out and decorating with your favorite royal icing or glaze.
Gingerbread baking is a holiday tradition, and this recipe leans heavily on a potent mix of ginger, cinnamon, and cloves to create that warming, festive aroma. Unlike softer drop cookies, a great cutout gingerbread recipe requires specific structural stability. We rely on a higher ratio of flour and a mandatory chilling period to lock in the shape, guaranteeing that your intricate stars, trees, and gingerbread people look exactly as they did when you cut them.
Get ready to gather your family, dust off your rolling pin, and fill your cookie tins. These No-Spread Gingerbread Cookies are guaranteed to be the centerpiece of your holiday baking, making the process as fun and stress-free as possible!
Why This Gingerbread Dough Will Not Spread
The difference between a gingerbread house that stands proudly and cookies that melt into one giant sheet is determined by the balance of fat, sugar, and flour. Here is the simple baking science that ensures your cookies keep their shape:
- High Flour-to-Fat Ratio: This recipe uses a higher proportion of flour compared to butter. This restricts the gluten structure and provides density, which prevents the dough from spreading excessively when exposed to heat.
- Cold, Chilled Dough (Non-Negotiable): Chilling the dough solidifies the butter. When the cold dough hits the hot oven, the butter takes longer to melt, allowing the exterior of the cookie to set before the fat has fully spread. This is the single most important step for any cutout cookie.
- The Role of Dark Molasses: Dark molasses provides that signature rich brown color and deep flavor. Because it’s a syrupy liquid, it also contributes to the dough’s chewiness without adding structural weakness, unlike water or milk. We use a reduced amount of liquid to keep the dough stiff.
- Precision Rolling Thickness: Rolling the dough to a uniform thickness (we recommend 1/4 inch) ensures that every cookie bakes evenly and maintains its structure without becoming too dry.
Ingredients
Use the best quality spices you have, as they are the heart of a great gingerbread cookie. Always measure dry ingredients by the scoop-and-level method.
For the No-Spread Gingerbread Cookies
- 3 cups all-purpose flour, scoop and leveled
- 1 teaspoon baking soda
- 1 teaspoon salt
- 1 tablespoon ground ginger
- 1 tablespoon ground cinnamon
- 1/2 teaspoon ground cloves
- 1/2 teaspoon ground nutmeg
- 3/4 cup (1.5 sticks) unsalted butter, softened to room temperature
- 3/4 cup packed light brown sugar
- 1 large egg, at room temperature
- 1/2 cup dark molasses (do not use blackstrap)
- 1 teaspoon pure vanilla extract
For the Topping/Decorating
- Royal Icing or simple powdered sugar glaze
- Festive sprinkles or nonpareils
Step-by-Step Instructions: Mix, Roll, Chill, and Cut
The process for perfect gingerbread involves patience, specifically during the chilling phase. Do not rush this step!
Part 1: Mixing and Initial Chilling (20 Minutes Prep + 2 Hours Chill)
- Combine Dry Ingredients: In a medium bowl, whisk together the flour, baking soda, salt, ginger, cinnamon, cloves, and nutmeg. Ensure the spices are thoroughly distributed. Set aside.
- Cream Butter and Sugar: In a large mixing bowl, beat the softened butter and brown sugar on medium speed until light and fluffy (about 3 minutes).
- Add Wet Ingredients: Beat in the egg, then the molasses and vanilla extract. Mix until just combined.
- Combine Wet and Dry: Gradually add the dry ingredients to the wet mixture on low speed. Mix only until the flour is just combined and a thick, uniform dough forms. Do not overmix.
- Chill Dough (Mandatory): Divide the dough into two equal disks. Wrap each disk tightly in plastic wrap and flatten slightly. Refrigerate for a minimum of 2 hours, or up to 2 days. The dough must be firm and cold before rolling.
Part 2: Rolling and Baking the Cutouts (10-12 Minutes Bake)
- Prep Oven and Pan: Preheat your oven to 350∘F (175∘C). Line two large baking sheets with parchment paper or silicone mats.
- Roll the Dough: Remove one disk of dough from the refrigerator. Place the dough between two large sheets of parchment paper. Roll the dough out evenly to a thickness of 1/4 inch. Rolling between parchment prevents the need for excess flour, which can dry out the cookies.
- Cut Shapes: Use your favorite cookie cutters to cut out shapes. Place the cutouts directly onto the prepared baking sheets, leaving about 1 inch between them.
- Chill the Cutouts (Pro Tip): If the cutouts feel soft or warm, place the baking sheets into the freezer for 10 minutes before baking. This final chill is the ultimate guarantee against spreading.
- Bake: Bake one sheet at a time for 9–12 minutes.
- Check Doneness: The cookies are done when the edges are set and slightly darker, but the centers still look soft. They will firm up considerably as they cool.
- Cool: Let the cookies cool on the baking sheet for 5 minutes before transferring them to a wire rack to cool completely. They must be completely cool before decorating.
Pro Tips for the Ultimate Gingerbread Cookie Success
Mastering the perfect gingerbread cutout involves a few essential, expert-level tricks that guarantee perfect shapes and maximum flavor.
- Do Not Overwork the Dough: After the initial mixing, handle the dough as little as possible. Overworking develops gluten, which makes the dough tough and can increase shrinking and spreading.
- Keep It Cold: Work with small portions of dough at a time. If the dough starts to get sticky or soft while rolling, stop, re-wrap it, and chill it for 15 minutes.
- Re-rolling Scraps: When gathering up scraps to re-roll, combine them gently, form a disk, and chill them for 15–20 minutes before rolling again. Using warm, soft scraps is the number one cause of misshapen cookies.
- Bake Time for Softness: The difference between a soft, tender cookie and a rock-hard one is often just 60 seconds in the oven. When you think they’re done, they probably are. Look for set edges and a soft center—they will continue to cook slightly on the hot pan.
- The Best Decorating Icing: For professional-looking, smooth, and stackable decorations, use royal icing (made with meringue powder). For a quicker, softer decoration, use a simple powdered sugar glaze (powdered sugar mixed with a touch of milk). Do not decorate until the cookies are 100% cooled.
Serving Suggestions and Festive Variations
These Gingerbread Cookies are sturdy enough to stand up to rich decorations and bold enough to be paired with strong holiday drinks.
Decorating Ideas
- Simple Glaze: Drizzle a simple lemon-powdered sugar glaze over the cooled cookies for a quick, bright finish that still allows the cookie flavor to shine.
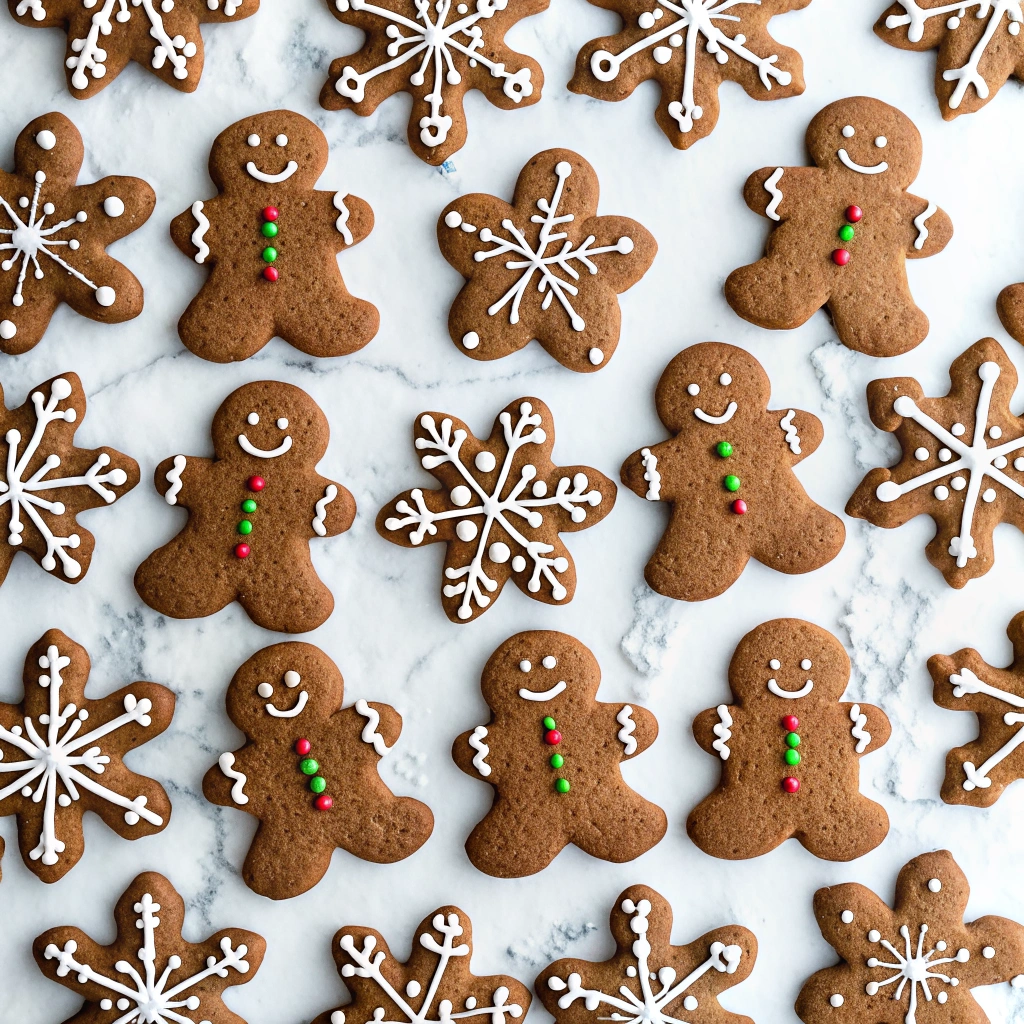
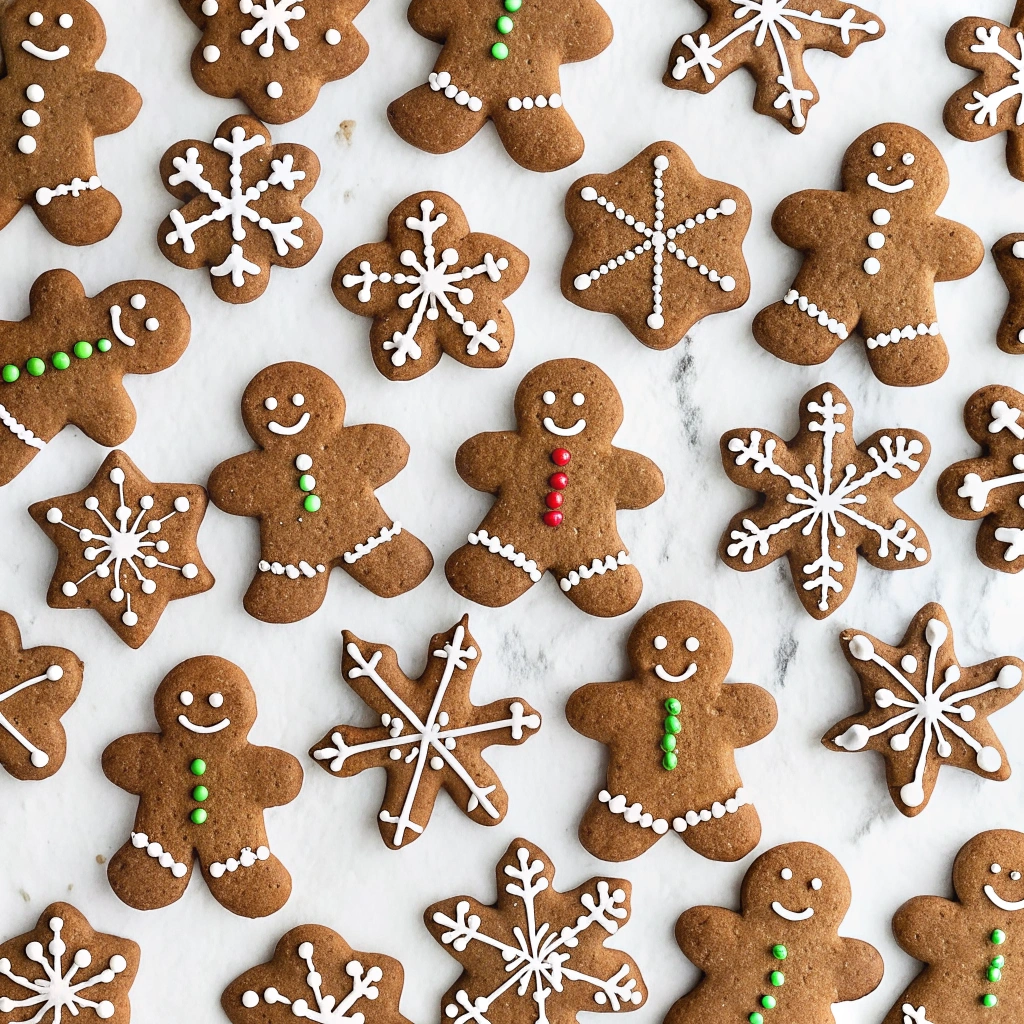
- Classic Icing: Use white royal icing to outline, flood (fill in the outline), and add details like buttons, eyes, and bows to gingerbread people.
- Stained Glass Effect: Before baking, cut a small hole in the center of the dough and fill it with crushed hard candies (like butterscotch or peppermints). As the cookies bake, the candy melts, creating a beautiful “stained glass” window.
- The Ginger Dust Finish: Before the icing or glaze dries, dust the tops lightly with a fine mixture of ground cinnamon and ginger for a beautiful, rustic texture.
Pairing and Gifting
- Hot Beverages: Serve with a classic pairing of hot cocoa, a Mocha Energizer Overnight Oats (for the morning after!), or a mug of warm mulled cider.
- Cookie Swaps: Because they are sturdy and non-spreading, they are perfect for shipping or gifting. Once the icing is fully dry, stack them in tins with parchment paper between the layers.
- Gingerbread House Base: This recipe is structurally sound enough to be used for the walls and roof of a smaller, decorative gingerbread house.
Creative Variations
- Chewier Texture: Replace 1/4 cup of the all-purpose flour with 1/4 cup of fine whole wheat flour. The whole wheat flour absorbs moisture differently, resulting in a slight boost in chewiness.
- Iced Ginger Spice: For extra spice, increase the amount of ginger and cinnamon by 1/2 teaspoon each. For added texture, replace the brown sugar with 3/4 cup of white sugar, which encourages more surface crystallization and a crunchier cookie.
- Orange Zest Brightness: Add 1 teaspoon of freshly grated orange zest to the butter and sugar mixture. Orange pairs beautifully with the classic gingerbread spices.
- The Deep South Version: Add 1/2 teaspoon of ground black pepper to the spice mix. This is a traditional Southern twist that adds a subtle, fiery heat that is delicious with the molasses.
Storing, Freezing, and Making Ahead
This recipe is an ideal make-ahead component for your busy holiday schedule.
Storage
- Un-iced Cookies (Baked): Store completely cooled, un-iced cookies in an airtight container at room temperature for up to 1 week.
- Iced Cookies (Decorated): Once the royal icing is completely hard (usually 12–24 hours), store the decorated cookies in an airtight container at room temperature for up to 2 weeks. Do not stack un-dried cookies!
- Freshness Tip: To keep the cookies extra soft, place a half slice of plain white bread in the container with them; the cookies will absorb the moisture from the bread. Change the bread slice every few days.
Freezing
- Freezing Baked Cookies: Bake the cookies, let them cool completely, and then freeze them (un-iced) in a freezer-safe container for up to 3 months. Thaw overnight at room temperature.
- Freezing the Dough (Highly Recommended): This is the best way to prepare ahead! The wrapped dough disks can be frozen for up to 3 months. Thaw the dough overnight in the refrigerator before rolling, cutting, and baking as instructed.
Frequently Asked Questions
- Why did my gingerbread cookies still spread? The most likely reason is that the dough was not cold enough when it went into the oven. Check these two steps: 1) Did you chill the dough for the full 2 hours? 2) If the dough was warm or sticky after rolling, did you remember to perform the 10-minute freezer chill on the cookie sheet?
- Can I substitute light molasses for dark molasses? Yes, but your cookies will be lighter in color and have a milder flavor. The dark molasses is what provides that deep, rich, classic gingerbread color and robust spice profile.
- How long should I let the cookies cool before decorating? The cookies must be completely cool (room temperature) before you apply any icing or glaze. If the cookies are warm, the icing will melt, run, and lose its shape. Plan on at least 1-2 hours of cooling time.
- Why are my cookies hard and dry? They were over-baked. Next time, pull them out 1-2 minutes sooner, even if they look slightly underdone in the center. They will continue to firm up as they cool on the baking sheet. A hard, dry cookie is one that has lost too much moisture in the oven.
- Is it better to use shortening or butter? For flavor, butter is always better. For guaranteed no-spread results, some bakers use a blend of half butter and half vegetable shortening. Shortening has a higher melting point and 100% fat content (butter is about 80%), making it the ultimate tool against spreading. For this recipe, we stick to butter for flavor but rely on the chilling technique for structure.
These No-Spread Gingerbread Cookies will ensure your holiday baking is both delicious and visually stunning. Happy decorating!
Don’t forget to Pin this no-fail recipe and share your favorite cookie cutter shape in the comments below!
No-Spread Gingerbread Cookies
Equipment
- mixing bowls
- electric mixer
- Rolling Pin
- cookie cutters
- baking sheets
- parchment paper
- piping bags
- oven
Ingredients
- 3 cups all-purpose flour
- 3/4 tsp baking soda
- 1/2 tsp salt
- 1 tbsp ground ginger
- 1 tsp ground cinnamon
- 1/4 tsp ground cloves
- 1/4 tsp ground nutmeg
- 3/4 cup unsalted butter, softened
- 3/4 cup brown sugar
- 2/3 cup molasses
- 1 large egg
- 1 tsp vanilla extract
- royal icing and sprinkles, for decoration
Instructions
- In a medium bowl, whisk together flour, baking soda, salt, ginger, cinnamon, cloves, and nutmeg. Set aside.
- In a large bowl, beat butter and brown sugar until light and fluffy. Add molasses, egg, and vanilla; mix until smooth.
- Gradually add dry ingredients to the wet mixture and mix until combined. Dough should be soft but not sticky.
- Divide dough into two discs, wrap in plastic, and chill for at least 1 hour.
- Preheat oven to 350°F (175°C). Roll chilled dough on a floured surface to 1/4-inch thickness. Cut out desired shapes with cookie cutters.
- Place cookies on parchment-lined baking sheets and bake 8–10 minutes, or until edges are firm but not dark. Cool completely before decorating.
- Decorate cooled cookies with royal icing and sprinkles as desired.