The key to surviving the holiday baking season is finding recipes that deliver huge visual appeal and festive flavor with almost zero stress. While the classics like cutouts and gingersnaps are necessary they often require hours of oven time and chilling.
I needed a solution that was fast fun and could be easily made in large batches for holiday gifting. I wanted a treat that was universally loved ADORABLE and instantly festive.
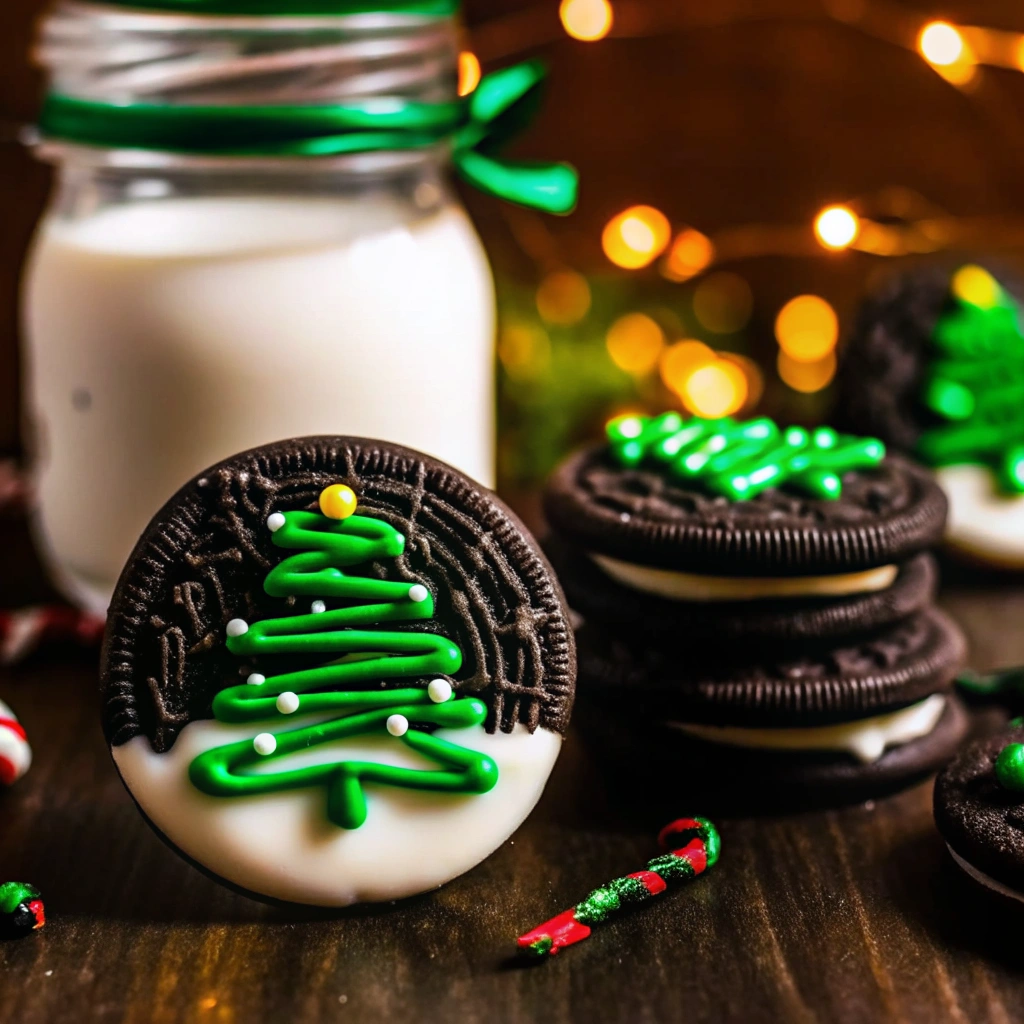
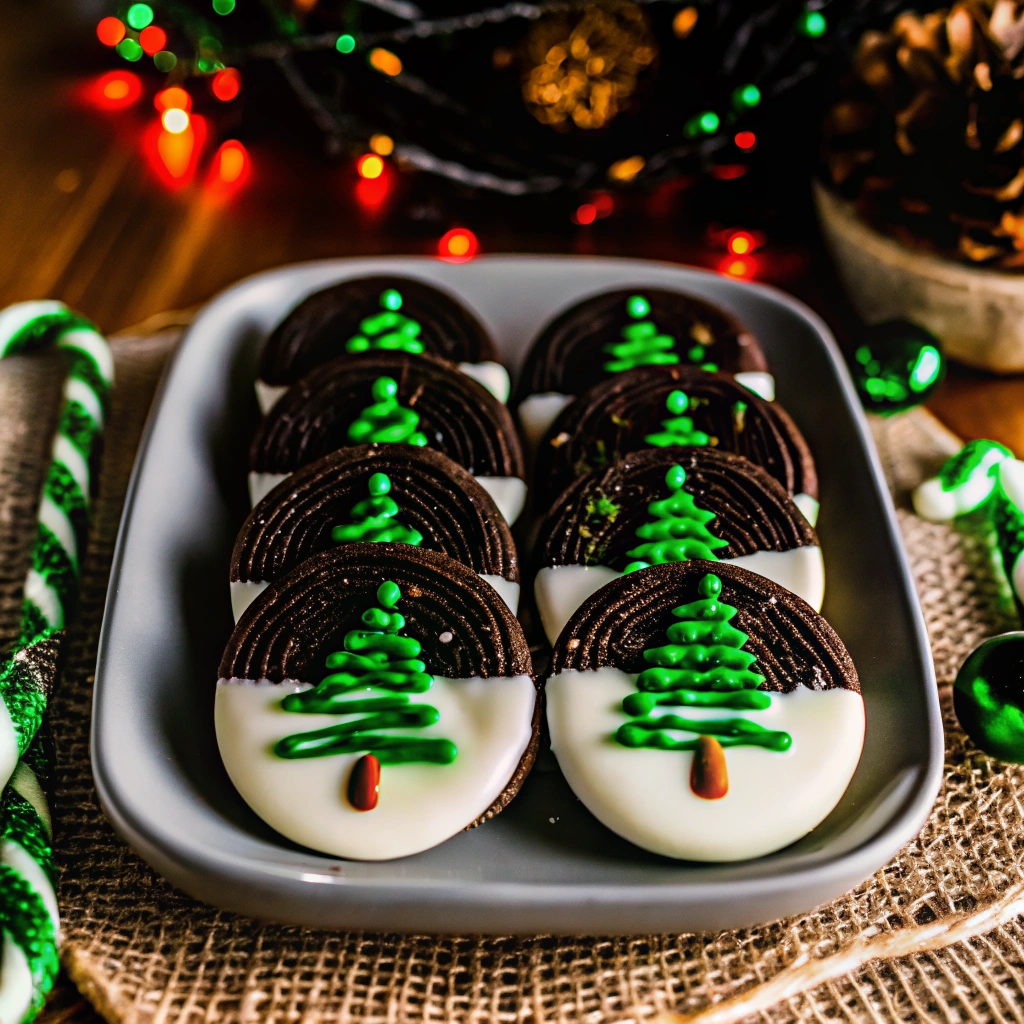
This Christmas Oreos recipe is the definitive answer—an incredibly simple no-bake holiday treat that uses store-bought cookies as the base for a stunning Christmas tree design.
This recipe involves dipping Oreos into melted white chocolate or candy melts decorating with a simple piped green tree and topping with festive sprinkles. It is the ULTIMATE hack for creating beautiful Christmas Cookies without ever turning on the oven. The result is a crisp chocolate cookie coated in sweet creamy vanilla perfect for any platter.
This recipe is a must-pin for anyone searching Christmas Cookies or Christmas Cookies Decorated because it solves the time constraint problem and delivers an ADORABLE easily customized result. If you are looking for the BEST quick dipping recipe for holiday gifting this simple method is your guaranteed winner.
Why You’ll Love These Christmas Oreos
This recipe is a massive holiday success because it capitalizes on the popularity of Oreo cookies and the simplicity of candy dipping.
- The BEST No-Bake Holiday Treat The entire process from melting the chocolate to setting the decorations takes minimal time. This is the BEST no-bake holiday treat solution for busy parents and last-minute holiday needs eliminating the mess and time commitment of traditional baking.
- ADORABLE Christmas Tree Design The simple piped Christmas tree design is charming and easy for even beginner decorators to master. Using green candy melts or tinted white chocolate creates a vivid contrast against the white coating making these cookies instantly ADORABLE and festive.
- Quick Dipping Recipe The method relies on the ease of melting wafers or chocolate in the microwave. This simple quick dipping recipe means no complex temperature control or double boilers are needed allowing you to churn out dozens of cookies quickly.
- Perfect for Holiday Gifting and Freezing These dipped cookies store well at room temperature for up to two weeks and freeze well for up to two months. Their sturdiness and shelf life make them ideal for holiday gifting tins and care packages.
Ingredients and Instructions The Simple Dipping Station
The key to these Christmas Oreos is using the right melting medium for a smooth coat and ensuring the white layer is completely set before decorating the tree.
| Component | Quantity | Notes |
| Oreo Cookies | 12 | Use any favorite flavor traditional mint etc |
| White Chocolate/Wafers | 4 ounces | For dipping the cookie base |
| Green Candy Melts | 2 ounces | Or white chocolate tinted with green gel color |
| Nonpareils | As needed | Rainbow or festive colors for “ornaments” |
| Star/Gold Beads | Small amount | For the top of the tree optional |
| Chocolate Jimmies | Small amount | Optional for the tree trunk |
- Set Up Dipping Station Line a baking sheet with parchment paper. Melt the white chocolate or wafers in a shallow microwave-safe bowl using 30-second intervals and stirring until smooth.
- Dip Cookies Working with one Oreo at a time dip the cookie halfway into the melted white chocolate. Let the excess drip off and place the dipped cookie on the parchment-lined baking sheet. Repeat until all cookies are dipped.
- Harden Coating Mandatory Allow the white chocolate coating to harden completely at room temperature (about 15 minutes). Do not refrigerate as this can cause cracking and moisture beading.
- Prep Green Decorating Once the white coating is set melt the green candy melts until smooth. Transfer the melted green to a piping bag fitted with a small tip (size 1 or 2) or use a small decorating bottle.
- Pipe Christmas Tree Design Pipe the green candies onto the white surface using a zig-zag motion to create the shape of an abstract Christmas tree design.
- Decorate Quickly Immediately after piping the tree sprinkle nonpareils onto the wet lines and affix a star or gold bead to the top. Work quickly as the lines will set fast.
- Set Completely Allow the Christmas Oreos to set completely before serving or packaging.
Step by Step Mastering the Dipping Technique
The challenge with these Christmas Oreos is ensuring a smooth coat without clumping and adhering the decorations perfectly before the candy sets. My early attempts sometimes had a rough coating; I learned to stir frequently during melting.
Here is the detailed human-written guide to mastering this spectacular quick dipping recipe:
- Use Shallow Bowl for Dipping Melt the chocolate or wafers in a shallow wide bowl. This makes it much easier to dip the cookie halfway without submerging the entire thing and allows for a cleaner drip and minimal mess.
- Stir Frequently When Melting Whether using the microwave or a double boiler stir the chocolate often. Stirring redistributes the heat and encourages the remaining pieces to melt smoothly preventing hot spots that can scorch or seize the chocolate.
- Tint White Chocolate Carefully If using white chocolate instead of green melts use oil-based gel food coloring (AmeriColor is a good choice) to tint the chocolate green. Liquid food coloring will cause the chocolate to seize and turn grainy.
- Pipe Trees in Batches Do not pipe all the trees before adding sprinkles. Pipe only 1-2 trees then immediately add the nonpareils and star. If you wait the piped lines will set and the sprinkles will not stick preventing that perfect ADORABLE finish.
- The Optional Jimmie Trunk For a complete Christmas tree design look use a small chocolate jimmie sprinkle affixed to the bottom of the tree as a trunk. Use tweezers or a small spatula to handle the tiny sprinkle easily.
Variations Serving and Storage Tips
This core Christmas Oreos recipe is a perfect template for simple Christmas Cookies decorations.
Delicious Variations to Try
- Peppermint Oreos Use Peppermint Oreos as the base cookie and sprinkle the finished trees with crushed candy canes instead of nonpareils.
- Salted Caramel Oreos Use Salted Caramel Oreos as the base and drizzle a small amount of dark chocolate over the finished trees for extra flavor.
- Full Dip For a cleaner look dip the entire Oreo cookie into the white chocolate instead of just the bottom half.
- Snowflake Design Instead of a tree use blue melting wafers and pipe simple small snowflake designs onto the white background.
Serving Suggestions
These ADORABLE cookies are perfect for:
- Holiday Gifting Package in clear treat bags or classic cookie tins. Their easy stability makes them ideal for shipping.
- Kids Holiday Baking Display Arrange them on a platter with other no-bake holiday treats like pretzel rods or muddy buddies.
- Dessert Platter Use them to add a fun ADORABLE pop of color to a platter of traditional brown and white Christmas Cookies.
Storage and Recipe Notes
| Item | Details |
| Keep Fresh | Store in an airtight container at room temperature up to 2 weeks |
| Freezing Baked | Freeze for up to 2 months thaw in the refrigerator overnight |
| Melting Hack | Use a small shallow bowl for easy dipping |
| Sprinkle Timing | Must add sprinkles immediately to the wet piped lines |
Conclusion Your Most ADORABLE Christmas Cookie
The Christmas Oreos recipe is the perfect blend of simple technique and maximum ADORABLE holiday impact. It’s the BEST no-bake holiday treat that guarantees a quick dipping recipe and a Christmas tree design every time.
By embracing this simple dipping hack you ensure your holiday is filled with creative Christmas Cookies and low-stress holiday gifting.
Pin this quick dipping recipe today and enjoy the BEST ADORABLE Christmas Oreo Cookies
ADORABLE Christmas Oreo Cookies
Equipment
- microwave-safe bowl For melting chocolate or candy wafers.
- Parchment-lined baking sheet For cooling and setting dipped cookies.
- Piping bag or small squeeze bottle Used to pipe green trees.
- spatula or spoon For stirring melted candy.
Ingredients
- 12 Oreo cookies (any flavor)
- 4 ounces white chocolate or candy wafers, melted
- 2 ounces green candy melts or white chocolate tinted with oil-based green gel color
- nonpareils, rainbow or festive colors
- small star or gold bead decorations
- chocolate jimmies (optional, for tree trunks)
Instructions
- Line a baking sheet with parchment paper. In a shallow microwave-safe bowl, melt the white chocolate or wafers in 30-second intervals, stirring after each until completely smooth.
- Dip each Oreo halfway into the melted white chocolate. Let excess drip off, then place on the parchment-lined sheet. Repeat until all cookies are coated.
- Allow the coated cookies to harden completely at room temperature for about 15 minutes. Do not refrigerate, as moisture may cause cracking or beading.
- Melt the green candy melts until smooth. Transfer to a small piping bag fitted with a fine tip or to a squeeze bottle for easy control.
- Pipe zig-zag lines in a triangular shape on each cookie to create a Christmas tree. Immediately top with nonpareils as ornaments and a star or gold bead at the top. Optional: add a chocolate jimmie as the trunk.
- Allow the decorated cookies to set completely before serving or packaging. Store in an airtight container at room temperature.