
When you need St Patrick’s Day treats that are fast, foolproof, and guaranteed to disappear faster than a leprechaun spotting, these St. Patrick’s Day Rice Krispie Bites are your absolute answer. They’re the kind of no-stress, high-reward recipe that makes you look like you put in way more effort than the 15 minutes you actually spent.
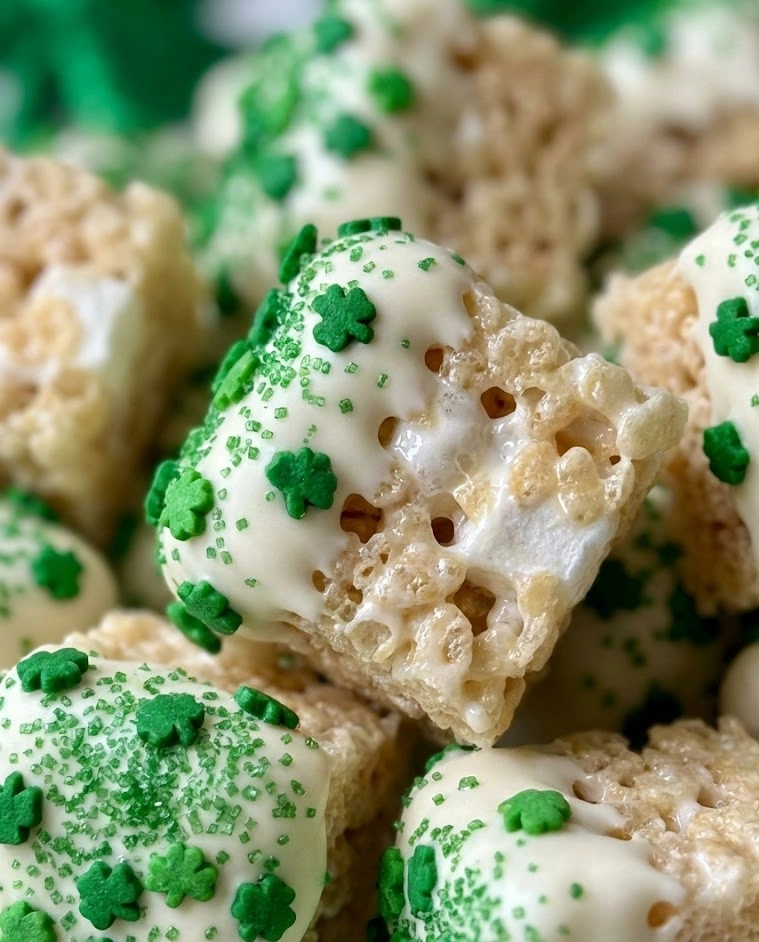
These aren’t just ordinary Rice Krispie treats turned green and called festive. These are bite-sized pieces of nostalgic magic – crispy, marshmallowy, perfectly chewy squares tinted the most vibrant emerald green, studded with festive shamrock sprinkles, and drizzled with golden chocolate that catches the light like leprechaun treasure.
The beauty of these St Patrick’s Day treats lies in their absolute simplicity. Three core ingredients. One pot. Zero baking. Fifteen minutes total. Even the most kitchen-phobic parent or the busiest classroom volunteer can pull these off flawlessly, and kids can help with nearly every step without any safety concerns.
Why You’ll Love These St. Patrick’s Day Rice Krispie Bites
Rice Krispie treats are universally beloved for good reason – they hit that perfect sweet spot between crunchy and chewy, they’re not overly sweet, and they trigger powerful childhood nostalgia in adults while creating new happy memories for kids. Adding the St Patrick’s Day twist makes them feel special and festive without complicating the recipe even slightly.
The speed factor cannot be overstated. From the moment you pull out your pot to the moment you’re cutting finished treats, you’re looking at 15 minutes maximum. No preheating ovens, no waiting for things to rise or bake, no cooling periods that test your patience. Mix, press, cut, done.
These bites are genuinely kid-friendly in every possible way. Kids can help stir, press the mixture into the pan, add sprinkles, and cut the finished treats with a plastic knife. It’s quality family time that ends with something delicious rather than a flour-covered kitchen and frustrated tears.
Budget-conscious celebrators will appreciate that the three main ingredients – Rice Krispies cereal, marshmallows, and butter – cost just a few dollars total and make enough treats to feed a classroom, sports team, or large family gathering. These might be the most economical St Patrick’s Day treats you’ll ever make.
The customization possibilities are endless. Change the colors, swap the sprinkles, add mix-ins, cut them into different shapes, or drizzle with various chocolates. The basic recipe is so reliable that it becomes a blank canvas for whatever festive vision you’re imagining.
Key Ingredients
Rice Krispies Cereal is the essential foundation that gives these treats their signature crispy-chewy texture and distinctive snap-crackle-pop personality. Use the original Rice Krispies rather than generic brands for the most consistent, reliable results – the size and texture of Kellogg’s Rice Krispies creates the perfect structure. You’ll need about 6 cups for a standard batch, which is roughly half a standard-sized box.
Marshmallows melt into the sticky-sweet binder that holds everything together and creates that irresistible chewy texture everyone loves. Use regular-sized white marshmallows, not minis, for the best melting consistency and proper marshmallow-to-cereal ratio. You’ll need a 10-ounce bag, which equals about 40 large marshmallows. Fresh marshmallows are crucial – stale ones won’t melt smoothly and will create hard, difficult-to-chew treats instead of soft, pillowy ones.
Butter adds richness, helps the marshmallows melt smoothly without scorching, and prevents the mixture from sticking to everything it touches. Use real butter, not margarine or spreads, for the best flavor and texture. Salted or unsalted both work perfectly fine. Three tablespoons is the sweet spot that creates treats that are moist and flavorful without being greasy.
Green Gel Food Coloring transforms ordinary white Rice Krispie treats into festive emerald St Patrick’s Day treats that immediately signal the holiday. Gel food coloring is vastly superior to liquid drops because it creates more vibrant color without adding excess moisture that can make treats soggy. Start with just a few drops and add more gradually until you achieve your desired shade of leprechaun green. AmeriColor “Electric Green” or Wilton “Kelly Green” are particularly beautiful shades.
Shamrock Sprinkles add the festive finishing touch that makes these unmistakably St Patrick’s Day treats rather than generic green Rice Krispie squares. Look for shamrock-shaped sprinkles, green jimmies, gold stars, or any combination of green, white, and gold sprinkles. Wilton makes specific St Patrick’s Day sprinkle mixes that are perfect for this application and widely available in March.
Gold Chocolate or Candy Melts (optional) create that pot-of-gold drizzle that elevates these from simple treats to legitimately impressive-looking desserts. Gold candy melts are easier to work with than white chocolate tinted with gold luster dust, and they set up firm at room temperature for clean, beautiful drizzles that don’t smudge.
Vanilla Extract (optional) adds a subtle depth of flavor that makes these taste homemade rather than packaged. Just 1/2 teaspoon stirred into the melted marshmallow mixture makes a surprising difference without changing the texture or appearance.
How to Make St. Patrick’s Day Rice Krispie Bites
Step 1: Line a 9×13-inch baking pan with parchment paper, leaving some overhang on the sides. This overhang becomes handles that make removing the finished treats incredibly easy. Lightly spray the parchment with cooking spray to prevent sticking. Alternatively, you can butter the parchment with a paper towel for the same effect.
Step 2: Measure out 6 cups of Rice Krispies cereal into a very large mixing bowl and set it aside within arm’s reach of your stove. Having the cereal pre-measured means you can work quickly once the marshmallows melt, which is crucial for smooth, evenly coated treats.
Step 3: In a large pot or Dutch oven over low heat, melt 3 tablespoons of butter completely. Swirl the pan occasionally to ensure even melting and prevent the butter from browning. Low heat is essential – rushing this step with high heat will scorch the butter and marshmallows.
Step 4: Add the entire 10-ounce bag of marshmallows to the melted butter. Stir constantly with a wooden spoon or silicone spatula over low heat until the marshmallows are completely melted and the mixture is smooth and glossy. This takes about 3-5 minutes. Don’t rush – lumpy marshmallow mixture creates lumpy treats.
Step 5: Remove the pot from heat immediately once the marshmallows are melted. This is crucial – overheating makes the mixture hard and difficult to work with. Add 1/2 teaspoon vanilla extract if using and stir it in quickly.
Step 6: Add green gel food coloring to the melted marshmallow mixture. Start with just 3-4 drops, stir thoroughly, and assess the color. Add more drops one at a time, stirring well between additions, until you achieve a vibrant leprechaun green. Remember that the color will lighten slightly once you add the cereal, so aim for slightly darker than your target shade.
Step 7: Pour the measured Rice Krispies cereal into the pot with the green marshmallow mixture all at once. Working quickly but gently, fold the cereal into the marshmallow mixture with a greased spatula or wooden spoon until every piece of cereal is evenly coated. The mixture should be uniform green with no white streaks of cereal remaining.
Step 8: Immediately transfer the mixture to your prepared pan while it’s still warm and pliable. Use a greased spatula, your hands lightly coated with butter or cooking spray, or a piece of buttered parchment paper to press the mixture firmly and evenly into the pan. Press firmly enough that the treats hold together well but not so hard that they become dense and hard.
Step 9: While the mixture is still slightly warm and tacky on top, immediately sprinkle your shamrock sprinkles, green jimmies, or gold stars generously over the entire surface. Press them very gently into the surface so they stick securely and won’t fall off when the treats are cut and handled.
Step 10: Allow the treats to cool completely at room temperature for about 30 minutes. Resist the temptation to cut them while warm – warm treats are sticky and won’t cut cleanly. If you’re in a hurry, you can refrigerate for 15 minutes to speed up the setting process.
Step 11: Once completely cool and set, use the parchment paper overhang to lift the entire sheet of treats out of the pan and onto a cutting board. This makes cutting infinitely easier and prevents scratching your pan with the knife.
Step 12: Using a sharp knife lightly greased with cooking spray or butter, cut the treats into squares or rectangles. For traditional Rice Krispie treat size, cut into 24 squares (6 rows by 4 rows). For bite-sized pieces perfect for parties, cut smaller – 48 mini squares work beautifully.
Step 13: If adding the optional gold chocolate drizzle, melt gold candy melts according to package directions until smooth and fluid. Transfer to a piping bag or zip-top bag with a tiny corner snipped off, then drizzle thin streams back and forth across the cut treats in a decorative pattern. Let the drizzle set for about 10 minutes before serving or packaging.

Variations & Tips
Rainbow Layers: Divide the marshmallow mixture into three portions and tint one green, one orange, and one purple (or any rainbow color combination). Press each layer into the pan separately, creating a striped rainbow effect that’s stunning when cut. This takes a few extra minutes but the visual impact is spectacular.
Chocolate Chip Addition: Stir 1 cup of mini chocolate chips into the cereal mixture right before pressing it into the pan. The chocolate adds richness and makes these St Patrick’s Day treats feel more indulgent. Green mint chips are especially festive for the holiday.
Lucky Charms Remix: Replace half the Rice Krispies with Lucky Charms cereal for a more whimsical, colorful version that incorporates those iconic marshmallow shapes. Kids go absolutely wild for this variation.
Gluten-Free Version: Use certified gluten-free Rice Krispies and verify that your marshmallows and sprinkles are gluten-free. The texture and appearance will be identical to the traditional version, making these accessible to guests with celiac disease or gluten sensitivity.
Shamrock Shapes: Instead of cutting into squares, use a shamrock-shaped cookie cutter to create individual shamrock treats. Press cookie cutters firmly through the cooled treat sheet, then carefully lift out each shamrock. The scraps can be crumbled over ice cream or eaten as delicious “mistakes.”
Peanut Butter Swirl: Before the mixture sets, dollop small spoonfuls of creamy peanut butter randomly across the surface and swirl gently with a knife for a marbled effect. The peanut butter adds protein and creates a flavor combination that’s incredibly addictive.
White Chocolate Dipped: Instead of drizzling, dip one entire edge of each cut square into melted white chocolate, then immediately into green or gold sanding sugar before the chocolate sets. This creates an elegant, bakery-style finish.
Mint Chocolate Version: Add 1/2 teaspoon peppermint extract along with the green food coloring for minty green treats that taste like Girl Scout Thin Mints in Rice Krispie form. Drizzle with dark chocolate instead of gold for a sophisticated flavor profile.
Pro Tip – The Pressing Technique: The single biggest mistake people make is pressing the mixture too firmly into the pan, creating hard, dense treats that are difficult to bite through. Use a light touch – the treats should feel fluffy and yielding when you press on them, not rock-hard. Buttered hands or a buttered piece of parchment paper makes pressing easier and prevents sticking.
Avoiding Sticky Hands: Keep a bowl of cold water nearby while working with the warm mixture. Dip your hands in the cold water and shake off the excess before pressing the treats into the pan. The cold water prevents sticking far better than oil or butter alone.
Leftovers & Storage
St. Patrick’s Day Rice Krispie Bites stay fresh and delicious longer than many other St Patrick’s Day treats, making them exceptional for advance preparation and stress-free entertaining. The key is protecting them from air exposure, which causes them to dry out and lose their signature chewiness.
Store cut treats in an airtight container at room temperature for up to 3 days for optimal texture. Layer them with parchment or wax paper between each level if stacking to prevent them from sticking together. Keep the container away from direct sunlight and heat, which can soften the treats and cause the sprinkles to bleed color.
These treats technically last up to a week at room temperature, but their texture gradually becomes firmer and less pleasantly chewy after the third day. For the absolute best eating experience, plan to serve them within 2-3 days of making them.
Avoid refrigerating Rice Krispie treats unless absolutely necessary due to extreme heat or humidity. Cold temperatures make them unpleasantly hard and firm. If you must refrigerate, let them come to room temperature for at least 30 minutes before serving – they’ll soften considerably as they warm.
Freezing works beautifully for these treats and extends their life to up to 6 weeks. Wrap individual squares tightly in plastic wrap, then place the wrapped squares in a freezer bag with all air pressed out. To thaw, simply let them sit at room temperature for 30 minutes. The texture after freezing is virtually identical to fresh.
For gifting or transporting to parties, wrap individual treats in clear cellophane bags tied with green ribbon, or arrange them in a decorative tin lined with festive tissue paper. They travel beautifully without special equipment or temperature control, making them ideal for classroom parties, office celebrations, or potluck contributions.
If your treats become too hard after a day or two, you can revive them slightly by placing them in an airtight container with a slice of fresh bread overnight. The moisture from the bread will transfer to the treats, softening them just enough to restore some of their original texture. Remove the bread in the morning before it gets moldy.
Leftover uncut treats can be rewarmed slightly in the microwave for 5-10 seconds, then re-pressed and re-cut if you’re unhappy with the initial cutting job. The brief warmth makes them pliable again without melting them completely.
Create a stunning party presentation by arranging the cut squares on a platter lined with green tissue paper or a shamrock-patterned napkin. Add chocolate gold coins scattered around the treats, small pots of gold made from black paper cups filled with yellow candies, or rainbow decorations made from colored fruit leather or fondant for a complete leprechaun-approved display.
Package individual treats in clear bags with custom labels that say “Lucky Bites” or “Leprechaun Snacks” for adorable party favors that kids will be thrilled to take home. Add a small shamrock sticker to seal each bag and you’ve got professional-looking treats that cost pennies to make.
These St. Patrick’s Day Rice Krispie Bites prove once and for all that the very best St Patrick’s Day treats don’t require culinary expertise, specialized equipment, or hours of your precious time. They just require the simplest pantry ingredients, a pot, and the willingness to embrace the joy of easy, festive cooking that brings smiles to everyone lucky enough to grab one before they disappear!
St. Patrick’s Day Rice Krispie Bites
Ingredients
Equipment
Method
- Line a 9×13-inch pan with parchment paper and lightly grease it.
- Measure 6 cups of Rice Krispies cereal into a large bowl and set aside.
- Melt butter in a large pot over low heat.
- Add marshmallows and stir constantly until completely melted and smooth.
- Remove from heat and stir in vanilla extract if using.
- Add green gel food coloring gradually, stirring until desired shade is reached.
- Fold in Rice Krispies cereal until evenly coated.
- Press mixture gently and evenly into prepared pan without compacting too firmly.
- Immediately sprinkle shamrock or green and gold sprinkles over the top and press lightly to adhere.
- Allow to cool at room temperature for about 30 minutes until fully set.
- Lift from pan using parchment overhang and cut into squares.
- If desired, melt gold candy melts and drizzle decoratively over cut squares. Let set before serving.