Ever search for low fodmap crockpot recipes because your stomach just can’t handle another bland meal? Yeah, I’ve been there. Shopping for folks with IBS, or just a finicky gut, can be wild, right? You want simple dinners, but so many recipes sneak in sneaky ingredients. These low fodmap crockpot recipes became my life-saver — zero hassle, just dump stuff in and (this part’s magic) walk away. My family even likes these, which is rare! Popular Low-FODMAP Slow-Cooker Meal Recipes So, let’s jump straight in. I collected my seven go-to low fodmap crockpot recipes for those busy nights when energy is just… nope. 1. Slow Cooker Chicken and Carrots This comforting dish is as easy …
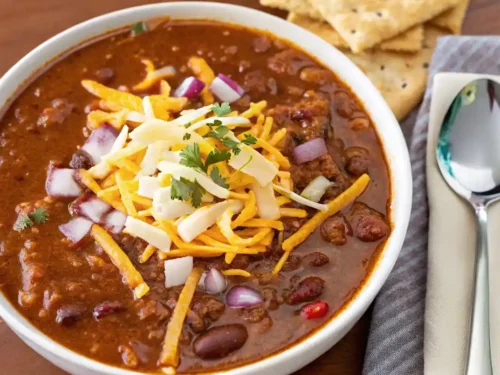
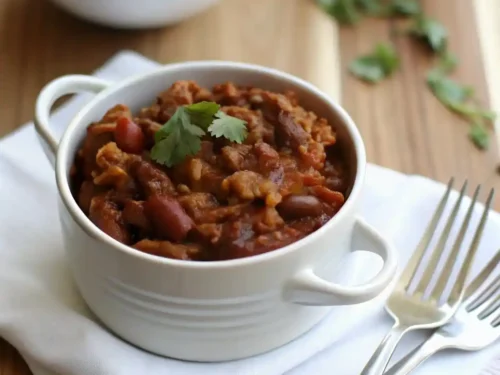
So this keto chili recipe saved my weekday dinners. For real. One week, I was stressed out, trying to stick to my low-carb goals, but everyone else in the house, of course, was whining about wanting regular chili. Keto chili recipe for the win! I needed something bold, super easy, and not loaded with sugar. Plus, ideally, no one notices I’m sneaking in less carbs. Well, let me tell you, this one delivers big on flavor, and you seriously won’t miss the beans. Yup, you heard me. No beans. But still seriously hearty and delicious. How do you make keto beef chili? Okay, here’s how it goes. You start with a big pot. Grab some ground beef, cook it up until it’s browned. Don’t rush this part, because that’s where the magic happens flavor-wise. I sometimes add a tad of chopped onions (not too much, onions have carbs, dang it), and a couple of chopped green bell peppers. Once that’s sweated out and smells kitchen-filling amazing, I dump in garlic, chili powder, smoked paprika, a shake of cumin, and whatever hot spice I’m feeling brave enough to handle. Next, tomato paste goes in, a can of diced tomatoes, and a cup of beef broth for that nice, rich flavor. Let it all simmer away. I give it at least 30 minutes to thicken, but if you forget about it for an hour? Even better. Oh, and I almost forgot—sometimes I sneak in a handful of chopped zucchini for extra bulk. Kids have never noticed. Top-secret stuff. I tried this keto chili recipe for a football party, and everyone was shocked it was low-carb! Didn’t miss the beans at all. So good! – Jamie, Tennessee Ingredients to make keto chili Here’s what you need. Nothing fancy. No weird powders or expensive substitutes. Just tasty stuff right from your local market. That’s it. Simple, right? If you want to get all fancy, some folks toss in a splash of hot sauce or a pinch of cinnamon (I thought this was weird, but surprisingly good!). Tips to make the best recipe Here’s where things get fun. My top tip for anyone making keto chili recipe: brown that beef hard. Like, almost let it get crispy on the edges. That crust is Big Flavor. Don’t drown your pot in tomatoes, or it’ll get watery and meh—let it simmer ‘til thick. Don’t go nuts on onion if low-carb’s your goal. I’ve tried skipping it altogether with enough spices, and no one complained. Remember—season, taste, and then season again before serving because spices mellow as they cook. And oh, do not skip letting it sit a little before digging in. Flavors need a tiny nap together—honestly, leftovers the next day hit restaurant-level good. For real. If you want a thicker chili, grab a bit of shredded cheese and stir it through at the end. Super trick, totally works. What do you serve with keto chili? Got your keto chili recipe bubbling and ready? Here’s the fun part: what to serve on the side, because, let’s be honest, it’s about the whole experience. …
Ever get stuck searching for a recipe for chili mac that isn’t complicated, doesn’t require a chef’s hat, and still tastes better than what you find in a box? Me too. Honestly, there are nights when you want dinner to soothe your soul without making a disaster zone out of your kitchen. So, if you’re after a foolproof recipe for chili mac that actually delivers the thick, cheesy, bold flavor combo of your dreams (and doesn’t take eons to make) – trust me, this one’s my go-to after a long workday. Ready to fix up dinner without a culinary breakdown? You’re in the right spot. How to Make It Okay, let’s stop the anxiety and get straight to the stuff you need (and don’t need fancy gadgets for either). Grab a big ol’ skillet or Dutch oven. A heavy bottom pan helps, but if all you’ve got is a plain pot, hey, it’ll do. Brown about a pound of ground beef or turkey – you don’t have to fuss over perfect crumbles, just stir and cook until it isn’t pink anymore. Toss in diced onion (rough chunks work), a little garlic, salt, and chili powder. Add a can of kidney beans, a can of diced tomatoes, and two cups of beef broth. Here’s the wild part: pour in the dry elbow macaroni straight outta the box. Bring this glorious mess to a simmer. Give it a stir every so often while it cooks – I’ve had mine stick before, so don’t just wander off. Once the noodles are toothsome (tender but not mush), kill the heat. Cover with a heap of shredded cheddar. Let it melt, stir again, and voila. It looks rustic. Smells spicy. Tastes like you aced dinner without trying that hard. “Seriously, your recipe for chili mac got my picky nephew to ask for seconds. I added extra cheese, and he even packed the leftovers for lunch. Total win at our house.” – Jamie W., Albany, NY Make-Ahead Methods Life doesn’t wait for you to finish dinner, right? So if you need to prep in advance, here’s how I do it without overcooked noodles or sad mush. Cook your meat, onions, and spices as usual. Add tomatoes, beans, and broth, then let the mixture cool. Store it in the fridge for up to two days. When it’s mealtime, bring the chili mix to a gentle boil, dump in the dry macaroni, and finish as normal. That way, the noodles cook fresh, not soggy from hanging out in liquid too long. For freezing, just leave out the noodles and cheese. Freeze the chili base in a container or freezer bag (saves freezer space). Reheat on the stove, stir in the noodles, cook through, and add cheese at the end. Seriously, this approach keeps everything tasting like you made it the same day. Pro Tips Alright, after making this recipe for chili mac, like, hundreds of times (yes, I exaggerate… kind of), I’ve discovered a couple tips I swear by. First, use sharp cheddar for maximum flavor. Don’t waste your money on pre-shredded cheese unless you like powdery stuff. Also, don’t skip the chili powder. If you like a bit of a kick, a pinch of cayenne or hot sauce will wake your taste buds right up. If the broth level seems too low once the noodles are added, pour in a splash more water or stock – better soupy than burnt. Oh, and if you ever forget to stir and end up with a crispy layer on the bottom, just call it “Texas-style” and pretend it was intentional. Believe me, sometimes that toasty bit is the best part. Storage …
white chicken chili recipe can seriously rescue a weeknight that’s gone sideways. Maybe you got stuck in traffic or you remembered, yup, you’ve promised to bring dinner to a friend. The same old soup gets boring. Plus, not everyone wants something spicy and red. If you need something comforting, hearty, and that honestly feels a little impressive (without much sweat), this is the one that’ll get rave reviews from even the fussy folks. What Ingredients Go into White Chicken Chili? Let’s talk about what actually goes into this delightful bowl. The white chicken chili recipe I use is cozy yet not fussy. Most stuff you already have at home, unless it’s one of those “my fridge is sad and empty” weeks. Here’s what you’ll need: Everyone’s pantry is different, so no need to panic if you’re missing one thing. Improvise a little; it’ll turn out tasty. I tried this recipe on a chilly fall evening, and it was a total game-changer. My picky teen even asked for seconds, and that never happens! — Jess K. How to Make White Chicken Chili Okay, here’s where the magic happens, and honestly? You can’t really mess this up. I mean, unless you forget to stir it and let it burn (been there, not fun). Here’s the process: First, get a big pot or Dutch oven. Sauté your onions in a splash of oil until they’re all soft and cozy. Toss in the garlic for a minute, just long enough to make your kitchen smell like heaven. Now, dump in your green chiles, spices, and stir like you mean it. Next, add the chicken, beans, corn, chicken broth, and bring this whole lovely mess to a gentle simmer. Let it bubble for about 15–20 minutes. You want the flavors to, you know, really get to know each other. Now comes the decadent part. Stir in cream cheese or sour cream until it’s all creamy. Give it another few minutes on low. If it gets too thick, splash in a bit of broth. Boom. You’re basically done. Taste for salt. I always add more than I think I should (my grandma would roll her eyes). Grab some bowls and dig in. Recipe Variations So, here’s where it gets fun. The white chicken chili recipe is super flexible — I mean, it almost feels like cheating how easy it is to jazz it up. If you like heat, throw in extra jalapeños or a pinch of cayenne pepper. Sometimes I toss in roasted corn for a smokier vibe. If you’ve got leftover turkey, use that and call it a “Thanksgiving remix” (it’s so good for leftovers). Vegetarian friend coming over? Skip the chicken, add another can of white beans or some diced mushrooms for that meaty texture. You can even toss in spinach at the end for a little color and, well, vitamins. More of a “throw everything in the slow cooker and forget it” type? This recipe does fantastic in a crockpot. I won’t judge if you use pre-cooked chicken, or honestly, even canned. If you want it super thick, a handful of crushed tortilla chips at the end is a weirdly genius move. …
So, the frito chili pie recipe. I can’t tell you how many times this dish has swooped in to save dinner at my place. Picture this: everything’s chaos, everyone’s starving, you’ve got exactly 20 minutes and basically zero motivation to wash more dishes. Sound familiar? Friends, this is THAT recipe. Crunchy, cheesy, saucy. Seriously, even picky eaters look up and go, “Yup, more, please.” Let’s get into it. Reasons you’ll love this recipe Honestly, if you haven’t made a frito chili pie recipe before, I have two words: life changing. There’s just something about mixing Fritos with chili and cheese that feels like breaking the rules—in a good way. You can throw it together last minute, especially when time is slipping through your fingers faster than a slipping kitten. Cleanup? Hardly any. It’s great for game days, movie nights, or just when you’re fed up with boring dinners. Every single bite smacks of comfort food, the kind that makes you forget you even had a long day. No fancy skills needed either, which is a huge relief. Teens and hungry grown-ups alike will clear their plates before you even sit down. “This is my family’s hands-down favorite for Friday nights. Even my chili-hating kiddo gobbles it up!” — Jess L. Frito Pie Ingredients You just need a handful of basics for this frito chili pie recipe: Substitutions for This Easy Frito Pie Not feeling those exact ingredients? Maybe you’re missing something or want to shake things up. Swap canned chili with homemade chili if you’ve got leftover (honestly, that’s next level). No cheddar? Use Monterey Jack or even pepper Jack for some heat. Not a fan of onions? Red ones work nicely or skip them altogether. If you want to make it vegetarian, pick veggie chili. I even saw someone toss in BBQ beef—wasn’t really my thing, but the folks at the party inhaled it. You honestly can’t mess this up, unless you forget the Fritos. That’s the only sin here. What Are Some Toppings For Frito Pie? I think this is where it gets really fun. Like, just let everyone pile on whatever makes them happy. Got leftover jalapeños in the fridge? Use them. Tomatoes? Slice ’em thin. Here are a few classic (and random) toppings I love fiddling with: What to Serve with Frito Pie Now, truth be told, frito chili pie recipe honestly stands on its own. I mean, you get your crunch, your chili, the cheese pull. But if you’re, say, feeding a crowd or just want more food, here are some pairing ideas: Serve with crisp salad (Caesar or even a bagged one, no judgment—fast is best sometimes) to offset all the heartiness. Cornbread is another winner, especially when you need to stretch the meal a bit. Sometimes I put out a big thing of pickles or sliced cucumbers. Sounds weird? Maybe, but that fresh crunch is magic with chili and cheese. Chips and guac are a happy go-to if you want to lean all the way into party mode. Common Questions Q: Can you make frito chili pie recipe ahead of time? A: You can! Just keep everything separate and assemble before serving so the chips stay crispy. …
So, let’s talk about the quick and easy chili recipe you can make tonight. You know those evenings when you’re starving (possibly hangry) and you just want something warm, filling, and—most importantly—fast? Well, I’ve been there more times than I’d like to admit. Cooking a giant, complicated meal is usually the last thing on my mind after a long day. So I wanted to share this game-changer that’ll make your weeknights a heck of a lot easier… and tastier. This chili isn’t fussy, but it tastes like you slaved all day (everyone will think you bought it from a five-star restaurant, but you and I know better). Homemade Chili Ingredients I refuse to overcomplicate things. You probably have most of these ingredients just hanging out in your kitchen already. Seriously, do a quick pantry check. Start with one pound of ground beef. Or turkey, if you’re feeling like switching things up. Then grab a can of kidney beans (rinsed), a can of black beans (also rinsed), and a can of corn. You want some chunky tomatoes? Yep, toss those in—one standard 14-ounce can works. Chop up a small onion, grab two cloves of garlic, and don’t forget the chili powder. My secret? Toss in a half teaspoon of cumin and a cheeky dash of smoked paprika. Oh—and salt and pepper. Basic but absolutely crucial. The best part about this quick and easy chili recipe: it’s super forgiving if you’re missing one or two things. I made this on a Tuesday night with whatever was left in my fridge and, honestly, my kids asked for seconds. Literal miracle. How Do You Make Homemade Chili? Okay, here’s where things get deliciously simple. Throw the beef in a big pot and brown it over medium heat. Don’t rush, let it get nice and crumbly. Drain off the fat—nobody wants greasy chili. Now, toss in your chopped onion and garlic. Let those soften for about two to three minutes. Your kitchen is basically heaven at this point, right? Dump in your beans, corn, and tomatoes. Stir everything together, then sprinkle over all your spices. Yes, the chili powder, cumin, and that beautiful smoked paprika. Stir again. Add about a cup of water (or broth, if you’re feeling fancy) to loosen things up. Bring the whole fragrant pot to a simmer, lid slightly askew. Stir every now and then. About 20 minutes and—boom—it’s done. Not kidding. This entire quick and easy chili recipe takes less than half an hour, start to finish. You hungry yet? Customize Your Easy Chili Recipe Look, this chili is basically your new weeknight canvas. If you’re vegetarian, leave out the meat and maybe double the beans or toss in some lentils. More veggies? Dice up a bell pepper or zucchini. I add sweet potato sometimes (don’t judge until you try it). Wanna put your own spin on the quick and easy chili recipe? Top it with shredded cheddar, sour cream, or even some crunchy tortilla chips. My neighbor once put pineapple salsa on hers—unexpected but kinda genius? Try hot sauce at the end for extra personality. You get the point: you do you, boo. Don’t overthink it. This is comfort food, not rocket science. …
Ever wrestle with your salt shaker, feeling like you might never get that perfect savory chili without it? Searching for the magic low sodium chili recipe that actually tastes like “real” chili, not bland bean soup? Look, you’re not the only one. I had to figure all this out myself when my doc said to cut back on salt, and let me tell ya, my family’s chili nights were teetering on disaster. But after way too many flavorless dinners, I finally nailed a delicious low sodium chili recipe that even picky eaters ask for. Seriously, if you’re after a hearty, flavorful batch that’s healthy, low-key to make, and won’t leave you missing the salt, you’re in exactly the right spot. What Makes This Chili Low Sodium? This isn’t just regular chili with salt yanked out. The trick to a solid low sodium chili recipe is smart swaps and keeping sneaky sodium outta the pot. I’m talking canned tomatoes with no salt, rinsed beans (seriously, rinse those babies well), and skipping the bouillon or salty broth cubes. And, maybe a smidge controversial, but lay off the cheese and salty snacky toppings. Instead, we dial up natural flavor from spices, aromatics, and good veggies. Chili powder, cumin, smoked paprika… even a dash of cocoa powder. You’re in control, and that’s honestly the best thing about this approach. Saves your taste buds, your blood pressure (big win), and still delivers that warm, zippy chili bowl you want to curl up with. Oh, and not even kidding: friends have eaten this at my place and never even noticed the salt was gone until I told them. Gave me a little “chef high five” moment, not gonna lie. “I don’t even miss the salt. This is five-star restaurant chili, honest!” – text from my neighbor Belinda. (She always tells it straight.) Selecting and Substituting Ingredients There’s no shame in grabbing what you have on hand, but for this low sodium chili recipe, a bit of planning helps. Go for no-salt-added tomatoes. If you use canned beans, rinse and drain ‘em. That’s a pro move for hacking out extra sodium that you won’t even miss. Fresh veggies are your best pals here: onions, bell peppers, maybe even some carrots for a hint of sweetness. When it comes to the protein, ground turkey or lean beef is my go-to, but you can go vegetarian and throw in lentils or extra beans. Yup, super flexible. If you’re used to bouillon cubes, well, skip ‘em. If you still want that extra umami kick, a splash of salt-free tomato juice or even a little low-sodium soy sauce (but keep it minimal) can seriously work wonders. And whatever you do, smell those spices before they hit the pot. Trust me, it wakes ‘em up. How to Enhance Flavor in Low-Sodium Chili Right, so without a salt avalanche, how do you get those deep flavors? The trick is layering spices and giving things time to cook down. Sauté your onions and garlic first until they’re crazy fragrant. Add cumin, smoked paprika, chili powder, a pinch of oregano, and maybe—hear me out—a bit of cocoa powder. It won’t taste like dessert, pinky promise, but it seriously boosts depth. Also, let your chili simmer once everything’s in the pot. Even an extra 30 minutes on a low bubble brings out way more flavor than you’d guess. And don’t be afraid to play. A splash of lime juice, a couple dashes of vinegar, or some diced green chiles can totally transform a “meh” pot into “dang, that’s good.” If you really want an epic finish, a sprinkle of fresh cilantro right before serving knocks it out of the park. How to Store and Reheat Leftovers First off, chili keeps like a champ. I usually make a big batch so I’ve got lunch through the workweek (or a last-minute dinner). Let your chili cool off before popping it in the fridge. Mason jars, or just whatever containers you’ve got, work fine. …
Texas chili recipe lovers, listen up. You ever throw a get-together and think, “Just once, I want to see folks go back for seconds. Maybe thirds. Maybe lick-their-bowl clean”? It happens to me every single time I use my favorite texas chili recipe. See, regular chili just… doesn’t have that Texas magic. Friends argue over beans, spice levels, even toppings, but once the first spoonful hits the table, silence and smiles. If you’re searching for a recipe that truly delivers on bold flavor, hearty satisfaction, and “Did you make this from scratch?” incredulity, you’re in the right spot. What is Texas Chili? Big debate here. Texas chili isn’t just any bowl of chili. It’s the OG. The classic. If you grew up in Texas, you know it’s serious business. Forget beans. Purists consider ‘em a sin. This is all about the beef, the deep, smoky spices, and a rich, slightly thick gravy. I once heard a neighbor at a tailgate say, “If you see beans, run.” Maybe a bit dramatic, but you get the idea. Another weird but true thing — Texas chili is spicy, but not just heat for heat’s sake. The peppers give it layers. I use a combo of dried chilies, fresh jalapeños, and a little smoked paprika for oomph. Even folks who “can’t do spicy” just keep eating it anyway. You might notice there isn’t tomato in excess, either. Some squeeze in a dab of tomato paste, but that’s about it. Oh, and it’s always served proudly, straight-up, no fuss. “I’ve lived in Texas my whole life, and this chili nails the flavors I grew up with. No beans, just lots of love and boldness!” — Robbie Q. How to Make Texas Chili Okay, you ready? Don’t wear white while cooking this, by the way. The process is actually simple, just takes a little patience and stirring. Here’s what works for me. First, gather all your chili fixings ahead. It saves you from panic-searching for the cumin in your dark cupboard (learned that the hard way). Start by searing cubed beef until it’s super brown on all sides. This step matters, trust me. More browning, more flavor. Now you add onions and cook until they’re soft and golden. Add diced garlic, toss in chili powder, ground cumin, a touch of cayenne, smoked paprika, and salt. Coat all your beefy bits. Pour in a smidge of beef broth, scrape those crispy bits off the pan, add chopped jalapeños, a splash of coffee or beer (yep, that’s the kicker for depth), and let it all bubble. Lower the heat. Simmer. Stir. Walk away for a bit but not for too long. Give it a taste after an hour, adjust seasoning if you want, and let those flavors settle in. The longer it cooks, the deeper it gets. Sometimes, I swear, it gets better each time you reheat it. Key Ingredients in Texas Chili You’ll see a few things show up again and again in a texas chili recipe. Some folks guard their ingredient list like pirate gold, but I’ve got no secrets. This is what makes the chili shine: Serving Suggestions Want to turn your texas chili recipe into a five-star event? Here’s how I like to take it from “Oh, that’s good” to “I’m texting my mom for your recipe.” Storage and Make-Ahead Tips …
Let’s be real for a second. Every time I mention a vegan chili recipe, someone rolls their eyes and says it can’t possibly hit the spot. But here’s the thing: craving something hearty, cozy, and mega-flavorful that’s also nourishing? Been there. There’s always that one cold night when you want comfort food but not a heavy crash afterward. Well, friends, this vegan chili recipe is my go-to “I-don’t-miss-the-meat” answer. Trust me, even skeptics have gone in for seconds. 5 Secrets to Incredible Vegan Chili Alright, let’s break it down because I’ve had my fair share of disasters before nailing this. First off, don’t just toss in veggies and pray for magic. The real flavor comes from building layers. Start by cooking onions and garlic slow and steady. Don’t rush it. Next, the right mix of beans gives you that “real chili” texture. I mix black, kidney, and sometimes pinto for a bite that’s almost meaty (I said almost, don’t @ me). Another thing, don’t skimp on spices! Bright chili powder plus smoky cumin and a dash of cocoa—yes, cocoa—take things up a notch. Let it simmer. The longer, the better. It thickens, gets richer, and actually tastes even better the next day (which I love for meal-prep). Last tip? Add something tangy at the end, like a splash of lime juice or a hit of vinegar. It wakes up the flavors and gives it pop. “As someone who doubted vegan chili, I was shocked at how satisfying this was. It’s now a staple!” — Jessie P. How to Make the Best Vegan Chili Recipe Ready? Get your game face on! For me, this vegan chili recipe starts with a big pot and a generous drizzle of olive oil. I toss in chopped onions, garlic, and sometimes a stray carrot or bell pepper if I’m feeling wild. I cook it till things look cozy and the kitchen smells like dinner. Then, in go your spices—think chili powder, cumin, a pinch of smoked paprika, and just a tiny bit of cinnamon if you dare. Stir that up. Next, dump in diced tomatoes (canned is fine), a scoop of tomato paste, and your beans (pre-cooked or canned). Add veggie broth till everything’s swimming just right, and simmer low and slow. Honestly, keep tasting as you go! I’ll toss in corn or a handful of chopped greens at the end if I need extra color. Once it’s all thick, taste for salt, maybe hit it with lime or vinegar, and boom—it’s ready. I’ve messed this up before, so if it’s too thick, just splash in a little more broth. Too thin? Simmer longer uncovered. Done. Tips for Making This Recipe Don’t overthink it, but these will save your dinner: How to Make Homemade Chili Powder Oh, so you want superstar chili? Store-bought’s fine, but homemade chili powder makes everything way punchier. Grab dried chilies—ancho or guajillo are my favorites—pull off the stems and seeds, toast ’em in a dry skillet till fragrant (that smell, whew). Once cool, blend the chilies up with cumin seeds, dried oregano, and a little garlic powder. Honestly, I never measure—it’s a vibe thing. Store what’s left in a jar so you’re ready for next time. You’ll notice the taste—way bolder, more nuanced (maybe even a hint of chocolatey depth, crazy as that sounds). Feels a little fancy, but it’s dirt simple. My friends always demand the recipe when I do it this way. Ways to Serve Chili …
If you’ve ever found yourself staring at the fridge, tired after a marathon workday and craving comfort food (yeah, I’ve been there too) — the classic chili and noodles recipe seriously saves the evening. You know that moment when you’re so hungry you might just chew on plain bread? Why not treat yourself to a bowl packed with hearty chili AND cozy noodles? It’s filling, it warms you from the inside, and honestly, it might just beat takeout on a cold night. Not kidding. Plus, there are a million ways to make it your own. What Noodles for Chili Alright, let’s just get the big noodle question out of the way, because I’ve tried dozens. Every family’s got their favorite, but here’s the scoop: egg noodles are what most folks toss in their chili and noodles recipe. They’re sturdy, cozy, and soak up the flavor like nobody’s business. Sometimes I’ll go rogue and toss in spaghetti or elbow macaroni if that’s all I’ve got. Use what’s in your pantry, honestly. The key thing is you want a noodle that won’t turn to complete mush — we’ve all had sad, soggy pasta and it’s a disaster. Quick tip: cook noodles in a separate pot, drain, then ladle chili right over. Keeps the noodles from soaking up all the broth and going gluey. (I learned the hard way, trust me.) If you want the “comfort food of my Midwest childhood” vibe, always egg noodles. Feeling wild? Add broken-up lasagna sheets — makes it so homey. And hey, gluten-free, whole wheat, whatever you dig, it all works here. What Meat for Chili Let me be blunt. The meat MAKES the chili and noodles recipe, if you ask me. Ground beef is the go-to; it browns up quick and gives you that deep, savory flavor everybody expects. Sometimes I’ll mix it up and use ground turkey or even a little leftover steak chopped up (leftovers, for the win). If you wanna keep things lean, turkey or chicken are top picks. Pork? Sure, why not! Occasionally I’ll grab a combo pack — half beef, half pork — just to shake it up. Vegetarian? Canned lentils or crumbled tofu step in and hold their own, but the classic has to be beef. Don’t forget, whatever you use, make sure to brown it well for big flavor. This isn’t the time to skimp — let the edges get crispy for that five-star restaurant flavor at home. Will Chili Thicken as it Cooks? Honestly, this surprised me the first time I made it (I totally forgot to add extra liquid and ended up with chili “goop”). Yup, chili thickens as it cooks, especially if you’re simmering with the lid off. The longer it bubbles, the thicker — and richer — it gets. Some people love it super chunky, others like a soupier vibe. Just keep an eye on the pot. Too thick? Splash in a little broth. Too thin? Let it simmer a little longer (no need to overthink it). If you add noodles to the chili, remember they’ll soak up moisture, so sometimes I cook mine with a bit of extra tomato juice. Oh, and don’t stress if it isn’t perfect. Perfection is overrated for chili and noodles recipe nights. What Goes in Chili? Ingredients Most Commonly Used for Chili Recipes Everyone’s grandma has a secret ingredient, but some things are classic. Here’s what almost always ends up in my chili and noodles recipe: Seriously, you can riff on this like a jazz solo. Sweet corn, carrots, even cocoa powder or cinnamon if you wanna go wild. Use what you love, skip what you don’t. Serving Suggestions Ingredient Why It Works …