
When you want St Patrick’s Day treats that genuinely wow a crowd with minimal effort on your part, this Brownie Mint Trifle is your secret weapon. It’s the kind of show-stopping dessert that makes people stop mid-conversation to admire it through the glass bowl before diving in with serving spoons, and yet it comes together easier than most layer cakes.
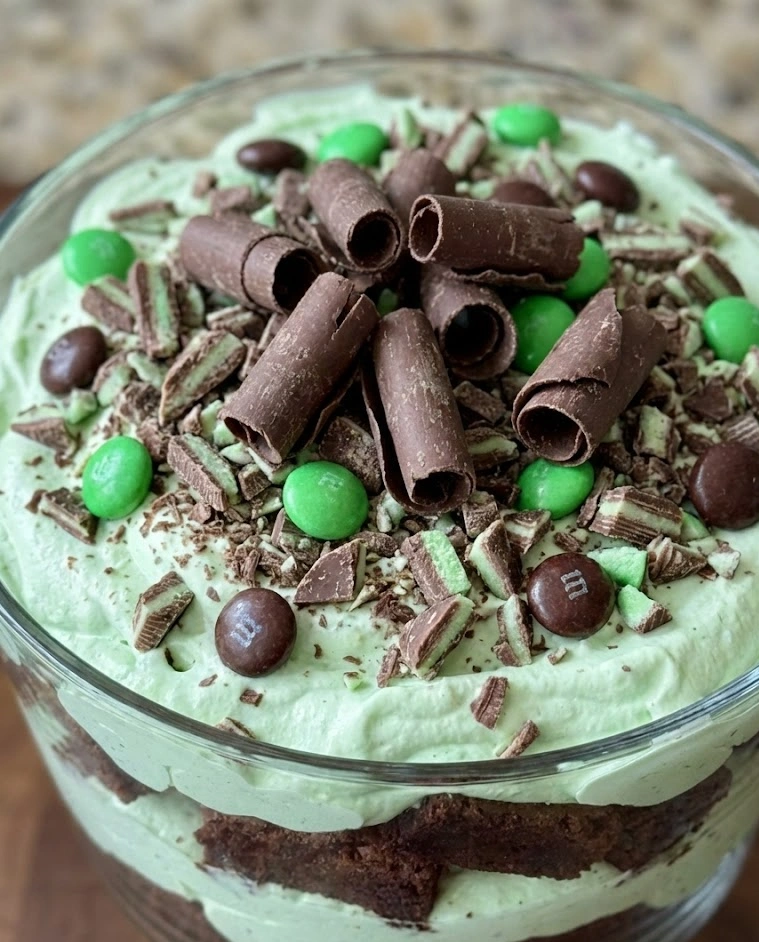
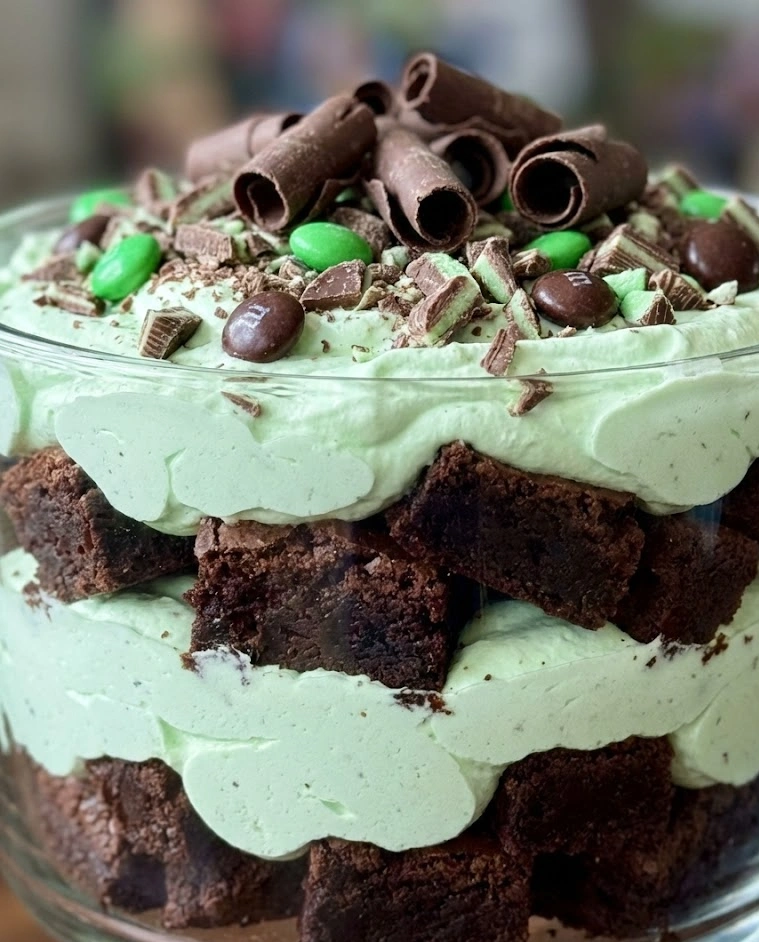
Picture this: layers of rich, fudgy chocolate brownies, smooth and creamy mint-flavored pudding that’s the most gorgeous pale green, clouds of freshly whipped cream, and a generous scattering of crushed Andes mints adding crunch and intense chocolate-mint flavor throughout. Every spoonful delivers multiple textures and flavors in one perfect, harmonious bite.
The magic of trifles as St Patrick’s Day treats lies in how they look impossibly impressive while being genuinely foolproof. There’s no precise assembly required, no frosting to smooth perfectly, no structural engineering needed. You literally just layer ingredients in a pretty bowl and let the glass walls do all the visual work for you.
Why You’ll Love This Brownie Mint Trifle
This dessert delivers genuine showstopper status without requiring any specialized baking skills beyond making brownies – and you can even use boxed brownie mix if you want. The trifle format is forgiving and accessible to bakers of all levels, from complete beginners to experienced home cooks.
The mint and chocolate combination is universally beloved and feels perfectly appropriate for St Patrick’s Day without relying on artificial flavoring or overwhelming mintiness. It’s sophisticated enough for adults while still being sweet and fun enough that kids love it too.
Make-ahead potential is where trifles truly shine. Assemble this beauty the night before your celebration and let it chill overnight in the refrigerator. The flavors meld beautifully, the brownies soften slightly from the pudding and cream, and you wake up on St Patrick’s Day with a completely finished dessert waiting in your fridge.
This trifle feeds a genuine crowd – 12-16 people easily – making it perfect for potlucks, family gatherings, or office celebrations. The large format means fewer individual servings to prepare compared to cupcakes or cookies, yet everyone gets a generous portion of multi-layered deliciousness.
Budget-wise, trifles are remarkably economical. A box of brownie mix, instant pudding, whipping cream, and some Andes mints create a dessert that looks and tastes like it cost significantly more than the few dollars you actually spent.
Key Ingredients
Fudgy Brownies form the rich, chocolatey foundation of this trifle and provide essential structure between the creamy layers. You can absolutely bake brownies from scratch using your favorite recipe, but a boxed brownie mix like Ghirardelli or Betty Crocker works beautifully and saves significant time. Prepare the brownies according to package directions in a 9×13-inch pan. The key is making them fudgy rather than cakey – underbake them slightly if needed to achieve that dense, moist texture that works perfectly in trifles.
Instant Vanilla Pudding Mix creates the creamy, silky pudding layer that brings moisture and smooth texture to contrast with the dense brownies. Use two boxes of instant vanilla pudding (the smaller 3.4-ounce size) and prepare according to package directions. Instant pudding sets up quickly, which is crucial for trifle assembly – cooked pudding would take too long to set and complicate the process unnecessarily.
Whole Milk is what you’ll use to prepare the instant pudding, and whole milk creates the richest, creamiest result. You’ll need about 4 cups total for two boxes of pudding. Don’t use skim or low-fat milk – the reduced fat content creates thinner, less luxurious pudding that doesn’t layer as beautifully or taste as indulgent.
Peppermint Extract transforms ordinary vanilla pudding into mint pudding with just 1/2 to 1 teaspoon added to the prepared pudding mixture. Start with less and add more to taste – peppermint extract is potent, and you want refreshing mint flavor without overwhelming chemical mintiness. Pure peppermint extract tastes better than imitation, though both work.
Green Gel Food Coloring tints the vanilla pudding that gorgeous pale mint green that makes these St Patrick’s Day treats so festive and visually appealing. Use gel coloring rather than liquid for the most control and vibrant color without adding excess moisture. Just a few drops create beautiful pastel mint green – don’t go too dark or it looks artificial rather than appetizing.
Heavy Whipping Cream gets whipped into fluffy clouds that layer throughout the trifle and create those beautiful white stripes you see through the glass. You’ll need 2-3 cups of heavy cream depending on how generous you are with the whipped cream layers. Heavy cream is essential – “whipping cream” with lower fat content won’t whip to stiff peaks and will deflate quickly.
Powdered Sugar sweetens the whipped cream to just the right level and helps stabilize it so it holds its structure for days in the trifle. You’ll need about 1/4 cup for 2 cups of heavy cream. The powdered sugar dissolves instantly into the cream, unlike granulated sugar which would remain gritty.
Vanilla Extract adds depth and warmth to the whipped cream and makes it taste homemade rather than bland. Just 1 teaspoon in the whipped cream makes a noticeable difference. Always use pure vanilla extract in whipped cream where the flavor is prominent enough to notice the difference from imitation.
Andes Mints are the iconic chocolate-mint candies that provide intense flavor bursts and satisfying crunch throughout the trifle. You’ll need about 1.5 to 2 cups of chopped Andes mints – roughly two bags of the individually wrapped candies. Unwrap them all before you start assembling (tedious but necessary), then chop them coarsely. Some pieces should be chunky for texture while others are finer for even distribution.
Chocolate Shavings or Cocoa Powder (optional) makes a beautiful finishing touch on top of the final whipped cream layer. Use a vegetable peeler to create chocolate curls from a chocolate bar, or simply dust the top with unsweetened cocoa powder for elegant contrast against the white cream.
How to Make Brownie Mint Trifle
Step 1: Bake your brownies according to the package directions in a 9×13-inch pan lined with parchment paper for easy removal. Aim for slightly fudgy, underdone brownies rather than cakey, fully-set ones – they should pass the toothpick test with a few moist crumbs clinging. Let the brownies cool completely to room temperature, then cut them into 1-inch cubes. You should have about 6-7 cups of brownie cubes.
Step 2: While the brownies cool, prepare your mint pudding. In a large bowl, whisk together two boxes of instant vanilla pudding mix with 4 cups of cold whole milk for about 2 minutes until the mixture thickens noticeably. The pudding should be smooth and starting to set but still pourable.
Step 3: Add 1/2 teaspoon peppermint extract to the pudding and whisk it in thoroughly. Taste the pudding – if you want more mint flavor, add another 1/4 teaspoon at a time until it reaches your preferred intensity. Remember that the mint flavor will mellow slightly once combined with brownies and whipped cream.
Step 4: Add 4-6 drops of green gel food coloring to the pudding and whisk until the color is evenly distributed and you’ve achieved a beautiful pale mint green. Add more coloring one drop at a time if you want deeper color, but aim for soft, appetizing pastel rather than neon green.
Step 5: Cover the mint pudding with plastic wrap pressed directly against the surface to prevent a skin from forming, and refrigerate while you prepare the whipped cream. The pudding needs to set completely firm before assembly, which takes about 30 minutes in the refrigerator.
Step 6: Make your stabilized whipped cream by beating 2 cups of heavy whipping cream in a large bowl with an electric mixer on medium speed until it begins to thicken. Add 1/4 cup powdered sugar and 1 teaspoon vanilla extract, then increase speed to high and beat until stiff peaks form. The cream should hold its shape when you lift the beaters and look thick, glossy, and cloud-like.
Step 7: Unwrap and coarsely chop about 1.5 to 2 cups of Andes mints. Aim for a variety of sizes – some larger chunks and some finer pieces. Set aside about 1/4 cup of the finest pieces for garnishing the top, and keep the rest for layering.
Step 8: Now comes the fun part – assembly! Start by placing about one-third of your brownie cubes in the bottom of a large trifle bowl or clear glass serving bowl (about 3-4 quart capacity). Press them down gently to create an even layer that covers the bottom.
Step 9: Spoon about one-third of the mint pudding over the brownie layer, spreading it gently to the edges with a spatula. The pudding should fill in the gaps between brownie pieces and create a smooth layer you can see through the glass.
Step 10: Add about one-third of the whipped cream over the pudding layer, spreading it gently to the edges. Sprinkle about one-third of the chopped Andes mints over the whipped cream layer, creating a colorful, crunchy stripe you can see through the glass sides.
Step 11: Repeat the layering process two more times – brownies, pudding, whipped cream, Andes mints – until you’ve used all your components and the trifle bowl is beautifully filled with visible layers. Your final layer should be whipped cream on top for the prettiest presentation.
Step 12: Garnish the top whipped cream layer with the reserved finely chopped Andes mints, creating an attractive pattern or simply scattering them across the surface. Add chocolate shavings or a light dusting of cocoa powder if using for extra elegance.
Step 13: Cover the trifle loosely with plastic wrap and refrigerate for at least 4 hours, or preferably overnight, before serving. This chilling time allows the flavors to meld and the brownies to soften slightly from absorbing moisture from the pudding and cream, creating the perfect spoonable texture.
Step 14: When ready to serve, use a large serving spoon to scoop straight down through all the layers, making sure each portion contains every element. The cross-section on each plate should show all the beautiful layers you created.
Variations & Tips
Bailey’s Irish Cream Version: Add 2-3 tablespoons of Bailey’s Irish Cream to the pudding along with the peppermint extract for an adults-only trifle with authentic Irish spirit. The Bailey’s adds depth and richness that elevates the entire dessert.
Oreo Addition: Crush about 15 Oreo cookies and create an additional layer between the brownies and pudding. The cookies add extra chocolate intensity and textural variety that Oreo lovers go absolutely wild for.
Chocolate Pudding Layer: Instead of mint pudding, use chocolate pudding for double chocolate intensity, then add the peppermint flavor to the whipped cream instead. This creates a different flavor distribution that’s equally delicious.
Individual Trifles: Instead of one large trifle, assemble individual servings in clear plastic cups, wine glasses, or mason jars for portion-controlled desserts perfect for parties. Each person gets their own gorgeous mini trifle.
Grasshopper Pie Variation: Add 2 tablespoons of crème de menthe liqueur and 2 tablespoons of crème de cacao to the pudding for an authentic Grasshopper cocktail flavor profile. This sophisticated version tastes like the classic drink in dessert form.
Gluten-Free Adaptation: Use a gluten-free brownie mix and verify that your pudding mix and Andes mints are certified gluten-free. The trifle will be virtually identical in appearance and flavor, making it accessible to guests with celiac disease.
Mint Chip Ice Cream Layer: Replace the pudding layer with softened mint chocolate chip ice cream for a frozen trifle variation. You’ll need to work quickly during assembly and keep the trifle frozen until serving time.
Cookie Layer Addition: Add a layer of crushed Thin Mint Girl Scout Cookies or Grasshopper cookies between the brownies and pudding for even more mint-chocolate intensity and an additional textural element.
Pro Tip – The Glass Bowl Matters: Invest in a proper trifle bowl with straight sides if you make trifles regularly. The straight sides show off your layers beautifully, while bowls with curved sides distort the appearance and make layering more difficult. A straight-sided glass bowl from any kitchen store works perfectly.
Preventing Soggy Brownies: If you’re worried about the brownies becoming too soft and cake-like, bake them on the fudgier side and allow the trifle to chill for only 4-6 hours rather than overnight. The layers will still meld but the brownies retain more structural integrity.
Leftovers & Storage
Brownie Mint Trifle stores exceptionally well and actually improves over the first 24 hours as the components soften and meld together. This makes it one of the most reliably make-ahead St Patrick’s Day treats you can prepare.
Store the trifle covered tightly with plastic wrap in the refrigerator for up to 4 days. The whipped cream remains stable thanks to the powdered sugar, and the mint pudding acts as a moisture barrier that keeps the brownies from becoming waterlogged. Keep the trifle away from strongly scented foods in the refrigerator, as the whipped cream can absorb odors.
Never freeze trifle with whipped cream and pudding layers – the texture becomes watery and separated when thawed, completely ruining the beautiful layers you worked to create. If you must freeze components, freeze only the baked brownies (unfrosted and unassembled) for up to 3 months.
Cover the trifle carefully to prevent the plastic wrap from touching the top whipped cream layer and destroying your beautiful garnish. Insert a few toothpicks into the whipped cream to create a tent that holds the plastic wrap up and away from the surface.
For transporting this trifle to potlucks or parties, keep it refrigerated until the last possible moment, then transport in a cooler with ice packs if the drive is longer than 20 minutes. Trifles are remarkably stable during transport since everything is contained in one bowl.
Serve trifle with a large serving spoon and encourage guests to scoop straight down through all the layers rather than taking from the top only. This ensures everyone gets the full experience of every layer in each serving rather than some people getting only brownies and others only cream.
Leftover trifle actually makes a delicious breakfast (don’t judge) or midnight snack. The brownie pieces soften to almost cake-like texture, the pudding becomes extra creamy, and the whole thing tastes like the world’s most indulgent parfait.
If the whipped cream starts to weep or separate after a few days (unlikely but possible in very humid conditions), simply stir the top layer gently with a spoon to redistribute any liquid and serve immediately. The flavor remains excellent even if the appearance isn’t quite as pristine.
Individual servings can be scooped into airtight containers for portable lunches or snacks throughout the week. The trifle holds together surprisingly well even when portioned, maintaining its layered integrity in individual containers.
Create a dramatic serving presentation by placing the trifle bowl on a cake stand or elevated platter surrounded by scattered Andes mints, chocolate gold coins, or small shamrock decorations. The elevated presentation makes it the centerpiece of your dessert table.
Leftover components store separately too – extra brownies freeze beautifully, leftover pudding keeps for a week in the fridge, and whipped cream lasts 2-3 days. If you end up with excess, consider making mini trifles in glasses to use up the components creatively.
This Brownie Mint Trifle proves definitively that the very best St Patrick’s Day treats don’t require professional pastry skills or hours of complicated assembly. They just require good ingredients, a pretty bowl, and the confidence to layer fearlessly. Make this once and it will become your signature showstopper dessert for every March celebration – the one everyone requests, the one that disappears first, and the one that makes you look like an absolute baking genius while secretly knowing just how easy it actually was!
Brownie Mint Trifle
Ingredients
Equipment
Method
- Bake brownies in a 9×13-inch pan according to directions. Cool completely and cut into 1-inch cubes.
- Whisk instant pudding mix with whole milk for 2 minutes until thickened.
- Stir in peppermint extract and green food coloring until mint-flavored and pale green. Refrigerate 30 minutes to set.
- Beat heavy cream until thickened. Add powdered sugar and vanilla extract, beating until stiff peaks form.
- Coarsely chop Andes mints and reserve some for garnish.
- Layer one-third of brownie cubes in bottom of trifle bowl.
- Spread one-third of mint pudding over brownies.
- Spread one-third of whipped cream over pudding and sprinkle with chopped Andes mints.
- Repeat layers two more times, ending with whipped cream on top.
- Garnish with reserved Andes mints and optional chocolate shavings. Refrigerate at least 4 hours before serving.