

Want that stunning, deep red cookie with the gorgeous “crinkle” effect that looks like it came from a fancy bakery? These Red Velvet Crinkle Cookies are so easy to make and look incredibly professional on a Christmas cookie tray. Seriously, people will think you spent hours perfecting these beauties!
Here’s our simple secret: we start with a box of red velvet cake mix! Yes, you read that right. This shortcut makes them unbelievably soft, chewy, and foolproof every single time—even if you’re not an experienced baker. No complicated ingredient lists, no fussy techniques, just gorgeous, delicious cookies that taste like red velvet cake in cookie form. The rich cocoa flavor, that signature “red velvet” tang, and the moist, almost brownie-like texture are all there, wrapped up in a stunning red and white package.
These are the ultimate festive cookie for a party or gift box. They photograph beautifully (hello, Pinterest!), they taste amazing, and best of all, they’re ridiculously easy to make. Let’s get baking!
Why You’ll Be Making These on Repeat This Holiday
Once you make these Red Velvet Crinkle Cookies, I promise they’ll become a permanent fixture on your holiday baking rotation. Here’s why:
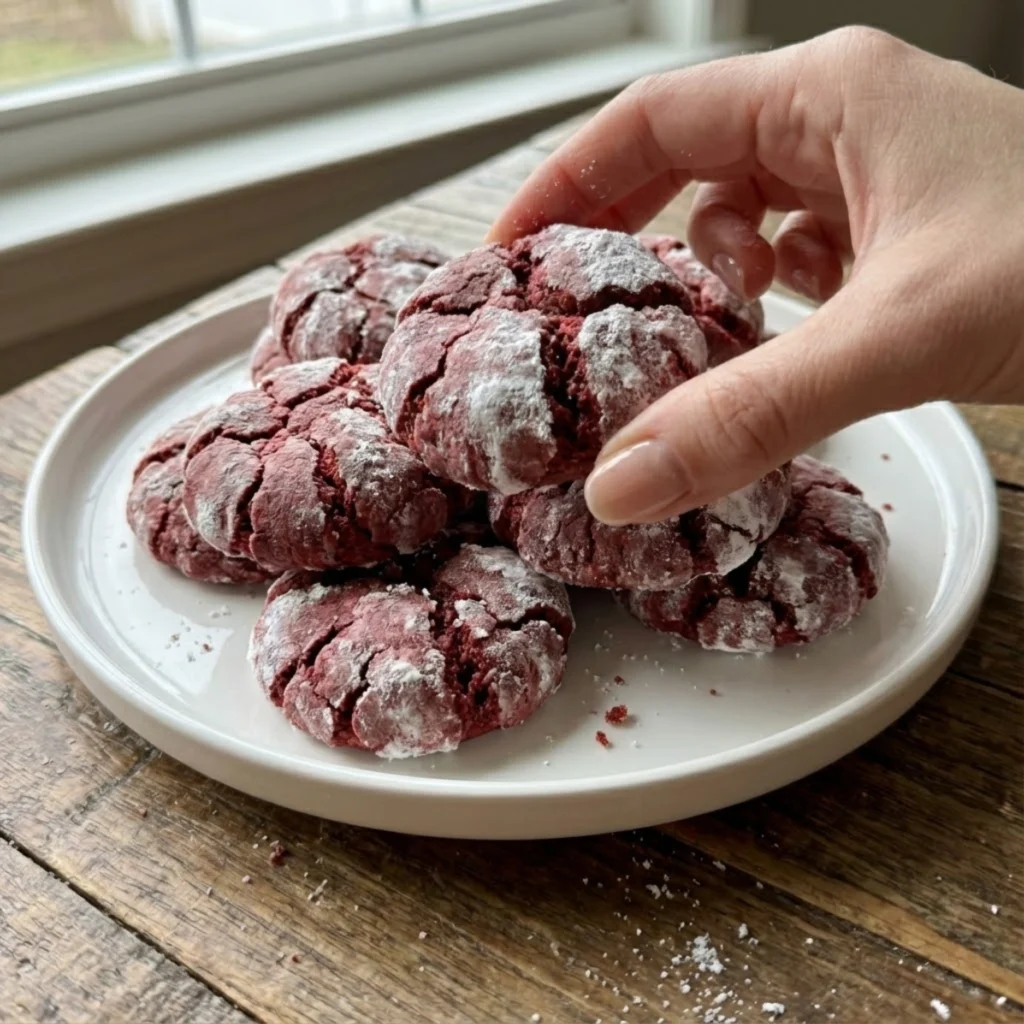
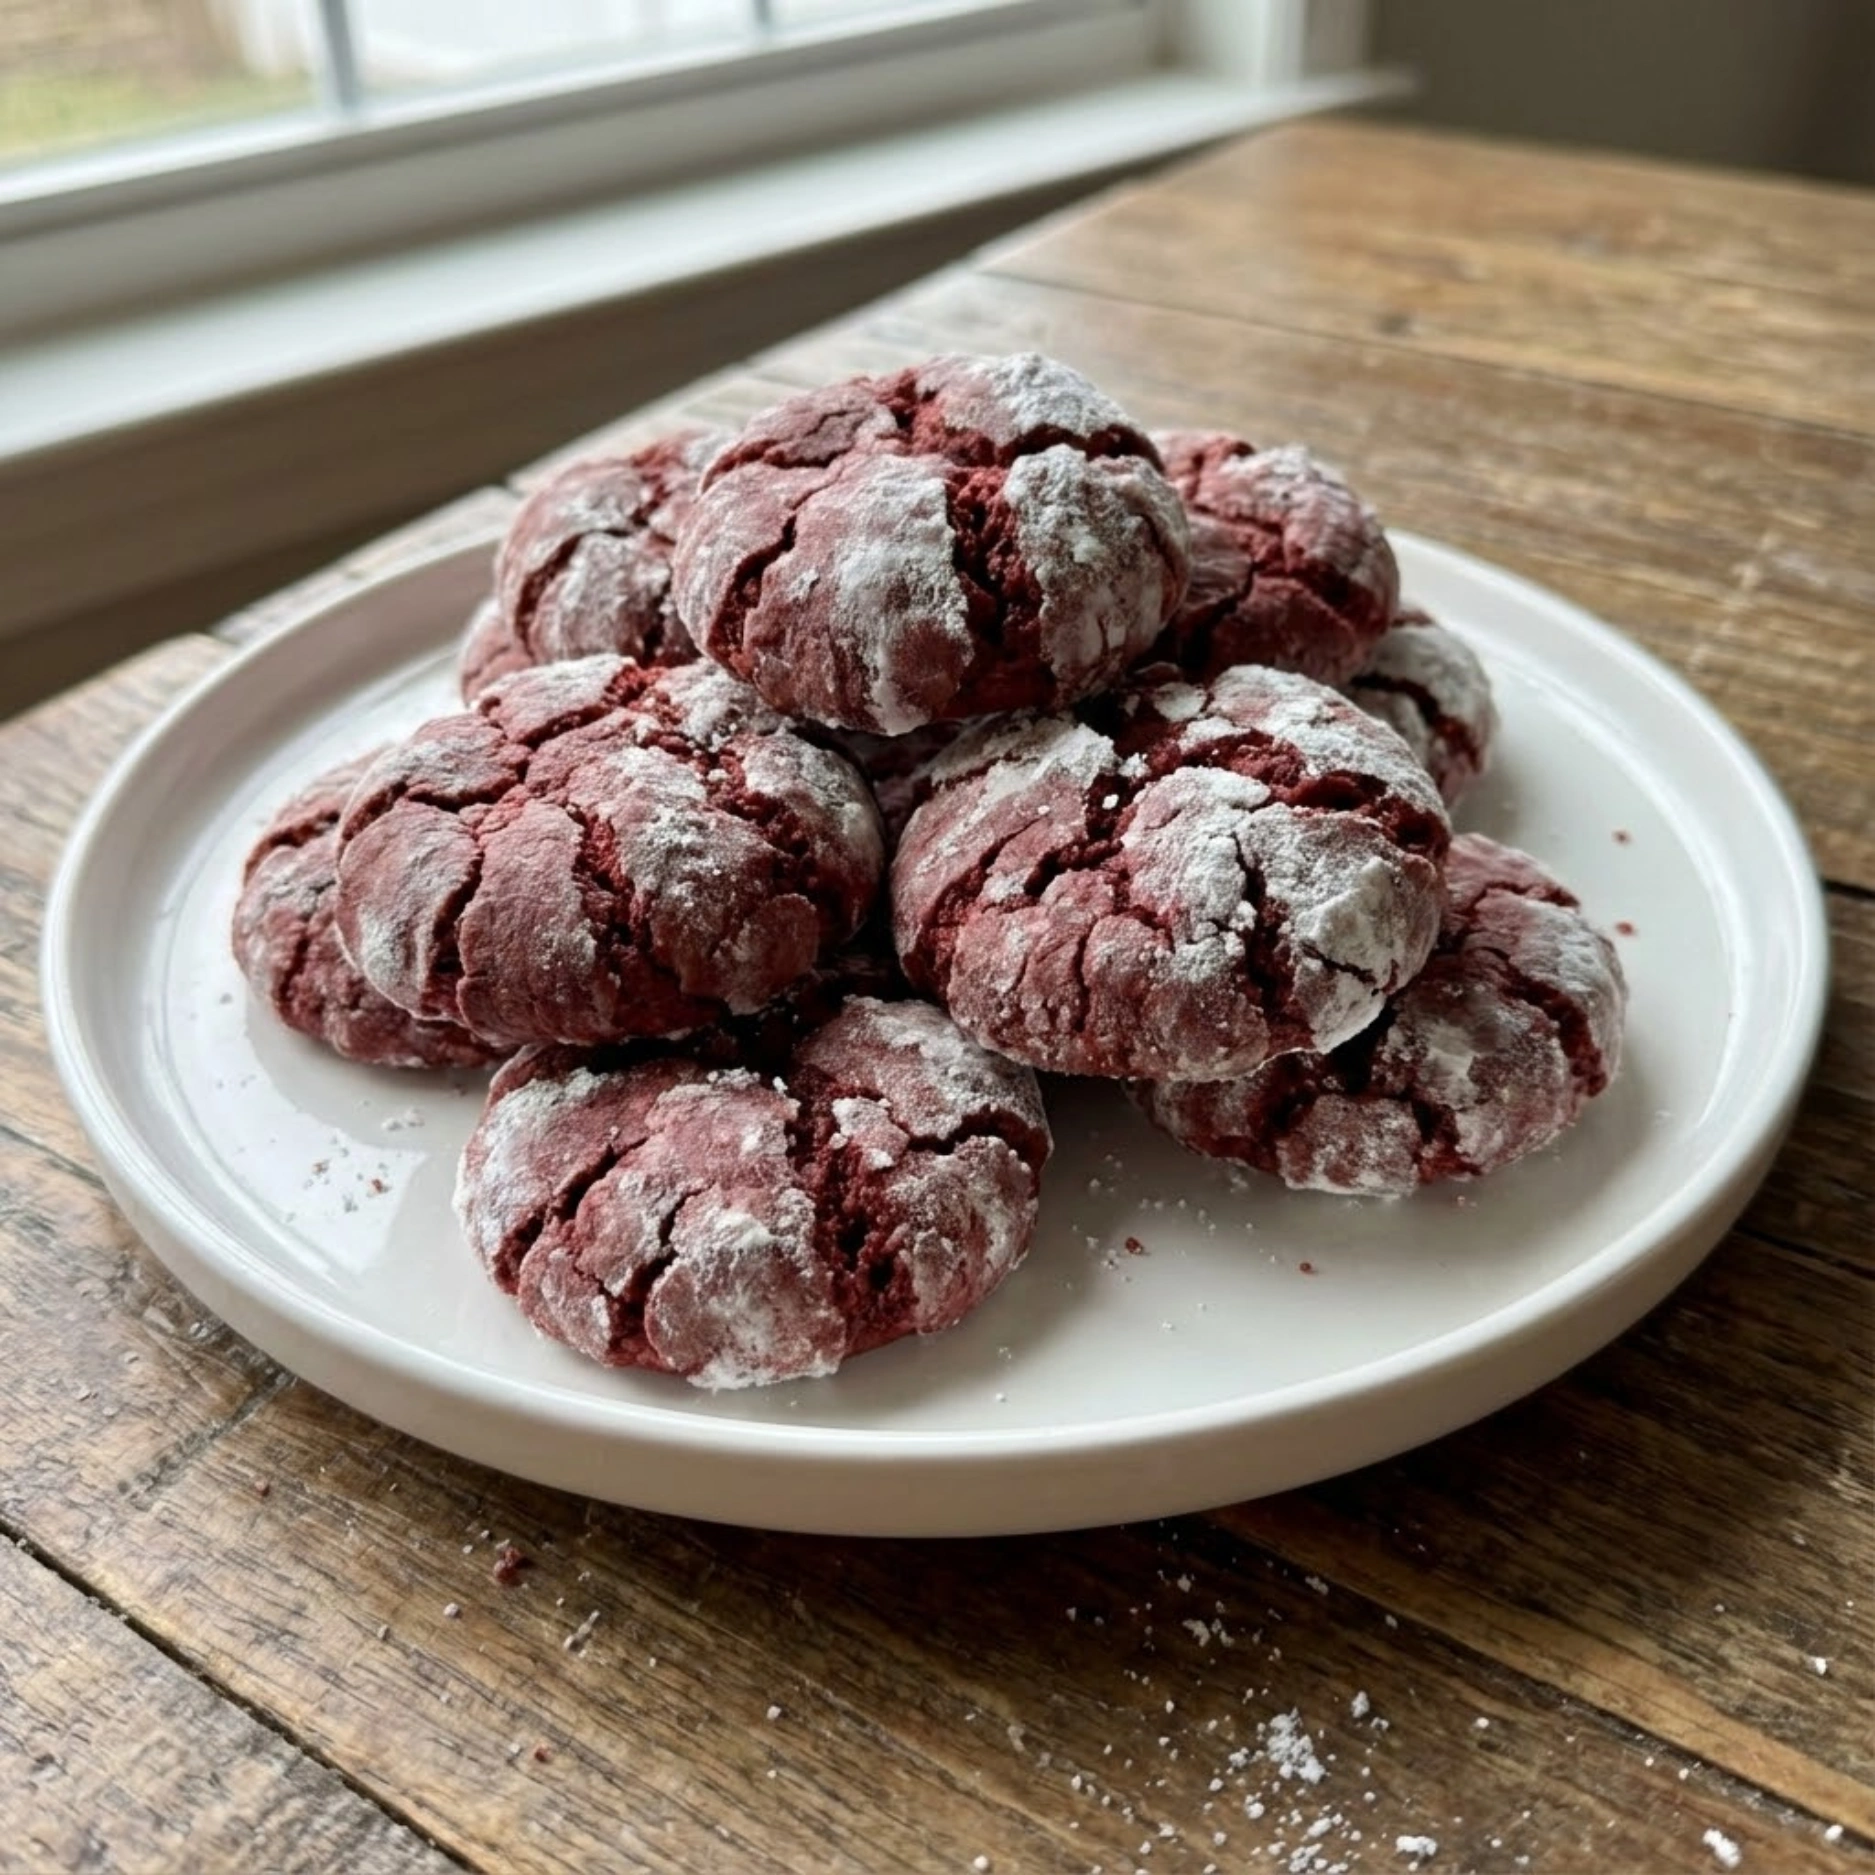
That stunning red and white contrast. Can we just talk about how gorgeous these cookies are? The deep, vibrant red peeking through a snowy coating of powdered sugar creates the most eye-catching, festive look. They practically scream “Christmas!” without you having to do any fancy decorating. Line them up on a cookie platter next to traditional brown gingerbread or golden sugar cookies, and these red beauties will steal the show every single time. They’re Instagram gold, Pinterest perfection, and the kind of cookie that makes people say “Wow, you made these?!”
SO easy with only 4-5 ingredients! This is the beauty of using a cake mix as your base. You don’t need to measure out ten different dry ingredients or worry about whether your ratios are correct—the mix does all that work for you. Just add eggs, oil (or melted butter), and you’ve got your dough. Then it’s all about the powdered sugar coating. That’s it! If you can stir and roll dough into balls, you can make these cookies. This is one of those recipes that makes you look like a baking genius with minimal effort.
Incredibly soft, moist, and brownie-like texture. The cake mix creates this amazingly tender, almost fudgy cookie that stays soft for days. They have that satisfying, slightly chewy bite that reminds you of a good brownie, but with that distinctive red velvet flavor profile—a hint of chocolate, a subtle tanginess, and just the right amount of sweetness. They’re the kind of cookie you can’t eat just one of.
A guaranteed crowd-pleaser. I’ve never met anyone who doesn’t love these cookies. Kids are mesmerized by the bright red color, adults appreciate the sophisticated red velvet flavor, and everyone loves how pretty they look. They’re perfect for cookie exchanges, holiday parties, teacher gifts, or just keeping around the house for when guests drop by. Trust me, make a double batch—they disappear fast!
What You’ll Need (It’s a Short List!)
The ingredient list for these cookies is so short, you probably have everything on hand right now. Here’s what you need:
Red Velvet Cake Mix – This is the star of the show! One standard box (usually 15-16 oz) is all you need. The cake mix provides the red velvet flavor, the gorgeous color, and the perfect texture. We’ll talk about brand recommendations in the FAQs, but honestly, most brands work great.
Eggs – You’ll need 2 large eggs to bind everything together and give the cookies structure.
Oil or melted butter – About ½ cup. Oil makes for slightly softer, more tender cookies, while melted butter adds a richer flavor. Both work beautifully, so use whichever you prefer!
Powdered sugar – This is what creates that beautiful white, crackled coating. You’ll need about 1-1½ cups for rolling.
Optional: Granulated sugar – This is the secret to getting those perfect, dramatic crinkles! More on that in the next section.
That’s it! Five ingredients (or four if you skip the granulated sugar step, though I highly recommend it). No flour measuring, no cocoa powder, no cream of tartar—the cake mix has everything built in.
If you’re building out your holiday cookie collection, these pair beautifully with classics like our Soft Sugar Cookies for a nice variety on your Christmas dessert table!
How to Get the Perfect “Crinkle” Effect (It’s Easy!)
The crinkle effect is what makes these cookies so special and bakery-worthy, so let’s make sure you nail it! Here are the three essential tips:
Tip 1: You MUST chill the dough.
This is non-negotiable, friends! Chilling the dough is absolutely key to getting those gorgeous crinkles. When cold dough hits the hot oven, the outside sets quickly while the inside continues to spread and rise, creating those beautiful cracks in the powdered sugar coating. If you skip the chilling step, your cookies will spread too much, and you’ll lose that dramatic crinkle effect. Plan to chill your dough for at least 2 hours, or even overnight if you want to prep ahead. I know it’s hard to wait, but trust me—it’s worth it!
Tip 2: Roll in granulated sugar FIRST, then powdered sugar.
Here’s the pro secret that takes these cookies from good to absolutely stunning: the double-sugar roll! First, roll your chilled dough balls in regular granulated sugar, then generously coat them in powdered sugar. Why does this work? The granulated sugar creates a barrier that helps the powdered sugar coating crack more dramatically as the cookie bakes. It also adds a slight crunch and helps the powdered sugar adhere better. This extra step makes such a difference in how pronounced your crinkles will be. You’ll get those gorgeous, deep cracks that look professionally done.
Tip 3: Be generous with the powdered sugar coating.
Don’t be shy here! You want a thick, generous coating of powdered sugar on each cookie—think “snowball” level of coverage. Roll each dough ball around until it’s completely white and heavily coated. If the coating looks thin or you can see red peeking through, add more powdered sugar. That thick coating is what creates the beautiful white background for your dramatic red crinkles. Some of it will melt into the cookie as it bakes (that’s normal!), but you want to start with plenty so there’s still a nice white coating after baking.
Making Your Red Velvet Cookies (Step-by-Step)
Ready to make some cookie magic? This process is so simple, you’ll be amazed at how professional the results look!
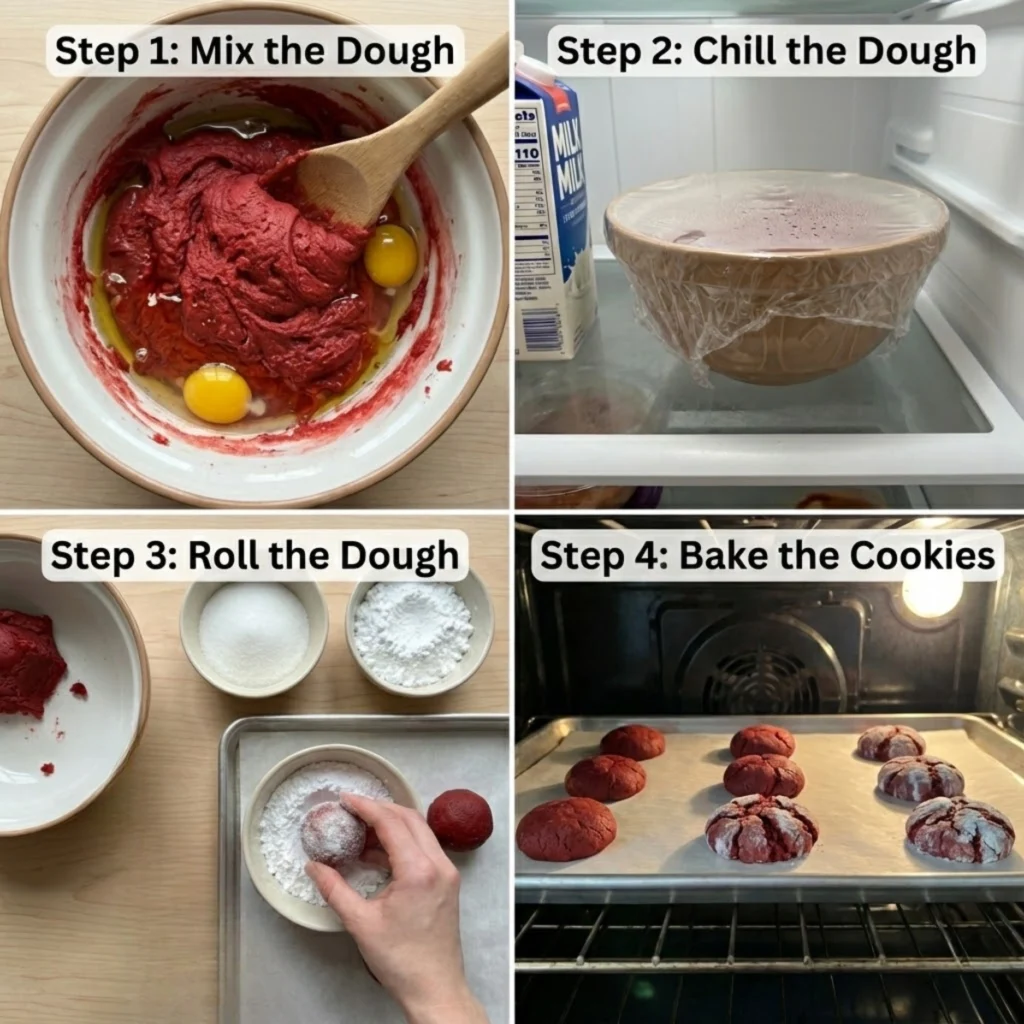
Step 1: Mix the (Very Simple) Dough
In a large bowl, combine your red velvet cake mix, eggs, and oil (or melted butter). Use an electric mixer or just stir by hand with a sturdy spoon until everything is well combined and you have a thick, slightly sticky dough. It will be much softer and stickier than typical cookie dough—that’s exactly what you want! Don’t worry if it seems too soft to work with; that’s what the chilling step is for. The dough should be uniformly red and smell absolutely amazing, like red velvet cake batter.
Step 2: Chill the Dough (This is Mandatory!)
Cover your bowl with plastic wrap and refrigerate for at least 2 hours, but preferably longer. I often make the dough the night before and let it chill overnight, which makes it even easier to work with. During this time, the dough firms up significantly, making it possible to roll into balls, and—most importantly—it ensures you’ll get those perfect crinkles when baking. Use this time to catch up on your favorite show, wrap some presents, or just relax!
Step 3: Roll the Dough (The 2-Sugar Method)
Once your dough is thoroughly chilled, preheat your oven to 350°F and line baking sheets with parchment paper. Now comes the fun part! Scoop out portions of dough (about 1 tablespoon each—a cookie scoop makes this so much easier) and roll them into balls between your palms.
Here’s the crucial two-step rolling process:
- First roll: Roll each ball in granulated sugar until lightly coated.
- Second roll: Immediately roll the same ball in powdered sugar until completely and thickly covered. It should look like a little snowball!
Place the coated balls on your prepared baking sheets, spacing them about 2 inches apart.
Step 4: Bake and Watch the Crinkles Appear!
Bake for 10-12 minutes. Here’s what you should see: the cookies will spread slightly, puff up, and then those gorgeous cracks will start appearing in the powdered sugar coating as the red cookie underneath pushes through. The cookies are done when they look set around the edges but still slightly soft in the center—they’ll continue to firm up as they cool. Don’t overbake! You want them to stay soft and chewy.
Let the cookies cool on the baking sheet for about 5 minutes (they’re fragile when hot), then transfer to a cooling rack. As they cool, those crinkles will become even more dramatic and beautiful.
Storing, Gifting, & Variations
These cookies are not only delicious—they’re also incredibly practical for all your holiday needs!
Storing: How to Keep Them Soft
Store your Red Velvet Crinkle Cookies in an airtight container at room temperature for up to 5 days. They’ll stay beautifully soft and chewy! If you want to keep them even longer, you can refrigerate them for up to 2 weeks—just let them come to room temperature before serving for the best texture. You can also freeze baked cookies for up to 3 months in a freezer-safe container with parchment paper between layers.
Pro tip: If your cookies start to firm up after a few days, pop a slice of bread in the container with them overnight. The cookies will absorb moisture from the bread and soften right back up!
Gifting: Perfect for Cookie Boxes
These cookies are gift-giving gold! They’re sturdy enough that they won’t crumble when you pack them, they look absolutely stunning in clear cellophane bags or cookie boxes, and they photograph beautifully if you’re giving them to someone who loves to share on social media. The red and white color scheme is so festive and eye-catching. Layer them in a decorative tin with parchment paper between layers, tie it with a ribbon, and you’ve got a gift that looks like it cost a fortune but took you almost no time to make.
Variations: Make It Your Own
While the classic version is perfection, here are some fun ways to change things up:
Can you make these from scratch? Yes, you absolutely can make red velvet crinkle cookies without a cake mix! You’d need flour, cocoa powder, red food coloring, buttermilk, and several other ingredients. It’s totally doable and also delicious, but the whole point of this recipe is how easy and foolproof the cake mix version is. If you want a from-scratch option for a special occasion, go for it—but for quick, stress-free holiday baking, the box mix is the way to go!
Add chocolate chips: For extra decadence, fold in ½ to ¾ cup of white chocolate chips or regular chocolate chips into your dough before chilling. The chocolate adds another layer of flavor and makes them even more indulgent.
Try different cake mix flavors: Once you master these, you can apply the same technique to other cake mix flavors! Chocolate cake mix makes amazing double chocolate crinkle cookies, funfetti cake mix creates fun birthday-style cookies, and lemon cake mix makes beautiful spring cookies.
Frequently Asked Questions
Why didn’t my cookies crinkle?
If your cookies didn’t crinkle, the most common reason is that the dough wasn’t chilled long enough (or at all). Cold dough is absolutely essential for getting those dramatic cracks—it needs to be firm when it goes into the oven. Another possible issue is not coating the cookies generously enough in powdered sugar. Make sure each ball is completely covered in a thick layer of powdered sugar. Finally, make sure you’re using the double-roll method (granulated sugar first, then powdered sugar), which really helps create those gorgeous cracks. If you tried all of this and still had trouble, your oven might be running too cool—use an oven thermometer to check!
Do I have to chill the dough? (Yes!)
Yes, yes, a thousand times yes! I can’t emphasize this enough: chilling is NOT optional for this recipe. I know it’s tempting to skip it because you want cookies NOW, but un-chilled dough will spread into flat pancakes in the oven, and you won’t get those beautiful crinkles. The dough needs to be cold and firm so it holds its shape initially and then cracks as it bakes. Plan ahead and chill for at least 2 hours, but overnight is even better. Think of it as an opportunity to prep ahead—you can make the dough one day and bake the next, which actually makes holiday baking less stressful!
What brand of cake mix is best?
Honestly, most major brands work great for this recipe! I’ve had success with Duncan Hines, Betty Crocker, and Pillsbury. The key is to use a standard-size box (usually 15-16 ounces). Some store brands work fine too, though occasionally their coloring isn’t quite as vibrant. If you want the deepest, most dramatic red color, Duncan Hines tends to have the richest red hue. Whatever brand you choose, just make sure it’s specifically “Red Velvet” cake mix, not chocolate cake mix with red food coloring—red velvet has that distinctive slight tang and specific flavor profile that makes these cookies special.
Let’s Make Some Showstopping Cookies!
These beautiful, chewy Red Velvet Crinkle Cookies are the easiest way to “wow” everyone this Christmas. That vibrant red and pristine white contrast just screams holiday cheer, and the soft, fudgy texture will have everyone asking for the recipe. The best part? You can smile and tell them your secret—or keep them guessing!
Give this easy recipe a try—you won’t believe they came from a box mix! Let me know how they turn out in the comments below. I love seeing your beautiful crinkle cookies, so tag me in your photos! And be sure to save this to your “Christmas Cookie” board on Pinterest so you can find it whenever you need an impressive, last-minute holiday treat. Happy baking!
Red Velvet Crinkle Cookies
Ingredients
Equipment
Method
- Beat butter and sugar until fluffy.
- Add eggs, vanilla, and vinegar, mixing until smooth.
- In a separate bowl, whisk flour, cocoa powder, baking powder, and salt.
- Mix dry ingredients into wet ingredients along with red food coloring until just combined.
- Cover dough and chill for at least 1 hour.
- Preheat oven to 350°F and line baking sheets with parchment paper.
- Scoop dough into 1-inch balls, roll in powdered sugar, and arrange on baking sheets.
- Bake 10–12 minutes until cookies are set and tops are crackled.
- Cool on a rack before serving.