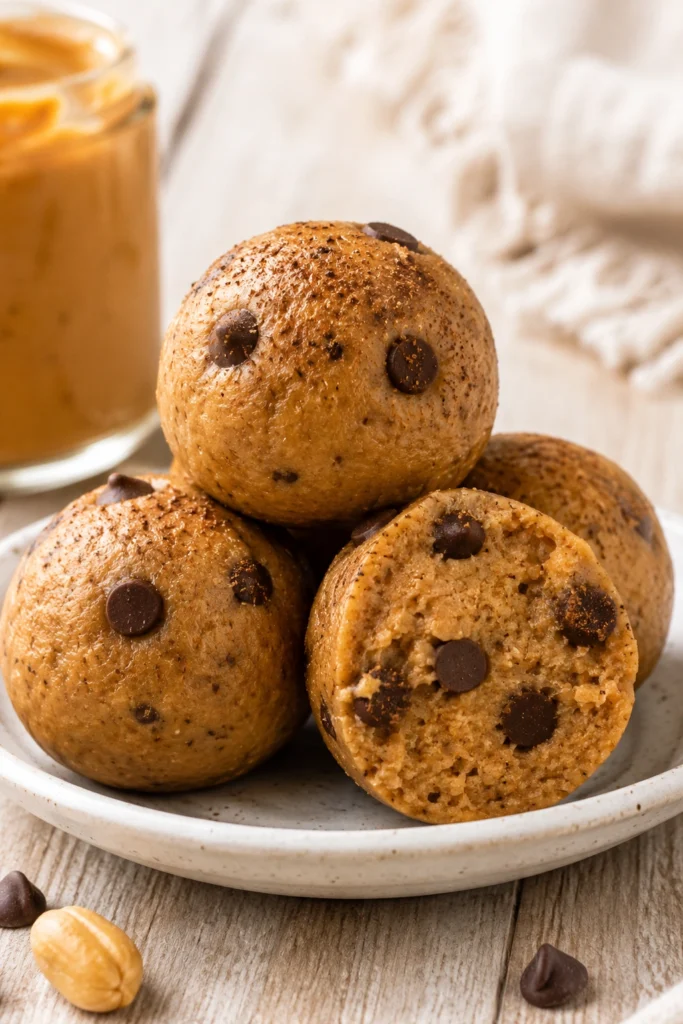
When it comes to healthy snacks that actually taste good, most people think they have to choose between nutritious and delicious. These no bake peanut butter chocolate chip protein balls prove that idea completely wrong.
Creamy peanut butter, rich dark chocolate chips, and a touch of honey come together in one simple bowl — no oven required. The result is a batch of soft, chewy, protein-packed bites that disappear fast no matter who you make them for.
Why You’ll Love These High Protein Healthy Snacks
These protein balls check every box for a go-to homemade snack recipe. They are quick to prep, require no baking, and store beautifully in the fridge all week long.
They’re the kind of simple, easy recipes that work for everyone — kids, toddlers, adults heading to work, and anyone who needs a sweet but good-for-you bite. Each ball delivers around 10 grams of protein, making them one of the most satisfying snack ideas you can keep on hand.
They are also naturally gluten-free, easy to make vegan, and endlessly customizable. Whether you are building a snack plate, filling a school lunchbox, or fueling a post-workout recovery, these protein bites are always the right call.
Common Mistakes (And How to Avoid Them)
Using the wrong peanut butter. Conventional peanut butter with added oils and sugar will make the dough greasy and too sweet. Always use natural creamy peanut butter with no added ingredients for the best texture and flavor.
Adding too much liquid too fast. Different protein powders absorb moisture differently. Start with the lower amount of almond milk called for in the recipe and add more gradually, half a tablespoon at a time, until the dough holds together when pressed.
Skipping the chill step. Rolling the balls straight away can lead to sticky, uneven shapes. Pop the mixture in the freezer for 25 minutes first. It firms up the dough and makes rolling much easier and neater.
Not testing the dough consistency. Before rolling all your balls, press a spoonful together in your hand. It should hold its shape without being too wet or too crumbly. Adjust with a little more almond milk or a touch more almond flour as needed.
Key Ingredients for the Best Protein Balls
Almond Flour
Finely ground almond flour forms the base of these protein balls. It creates a soft, slightly chewy texture while keeping the recipe naturally gluten-free. Avoid coarse almond meal here — the finer grind makes all the difference.
Vanilla Protein Powder
This is where the high protein punch comes from. Any brand of vanilla protein powder works well in this recipe. Keep in mind that different powders vary in how much liquid they absorb, so adjust your almond milk accordingly.
Natural Creamy Peanut Butter
The star ingredient. Peanut butter adds rich, nutty flavor, healthy fats, and helps bind the whole mixture together. Natural peanut butter (just peanuts and salt) blends smoothly and keeps the bites from turning greasy.
Dark Chocolate Chips
Mini dark chocolate chips are ideal here. They distribute evenly through the dough and add just the right amount of sweetness in every bite. Sugar-free chips sweetened with stevia are a great low-sugar option.
Honey
Honey brings natural sweetness and acts as a binding agent. Maple syrup works equally well for a vegan version. If using a dry alternative sweetener, you may need to increase the almond milk slightly to keep the dough moist enough to roll.
Almond Milk
This is the liquid that pulls everything together. Start with four tablespoons and work up from there. The goal is a dough that holds its shape when pressed — not too dry, not too sticky.
How to Make Peanut Butter Chocolate Chip Protein Balls
- Combine the dry ingredients. Add the almond flour, vanilla protein powder, and ground cinnamon to a medium mixing bowl. Whisk together until there are no clumps.
- Add the wet ingredients. Stir in the natural peanut butter, honey (or maple syrup), almond milk, and vanilla extract using a spoon or spatula. Mix until a dough forms.
- Fold in the chocolate chips. Add the dark chocolate chips and mix gently to distribute them evenly throughout the dough.
- Season and test the dough. Add fine sea salt to taste. Press a spoonful of dough between your hands — it should hold together. If it crumbles, add a little more almond milk. If it is too wet, add a small amount of almond flour.
- Freeze the mixture. Transfer the bowl to the freezer for 25 minutes. This step is important — it makes the dough much easier to shape cleanly.
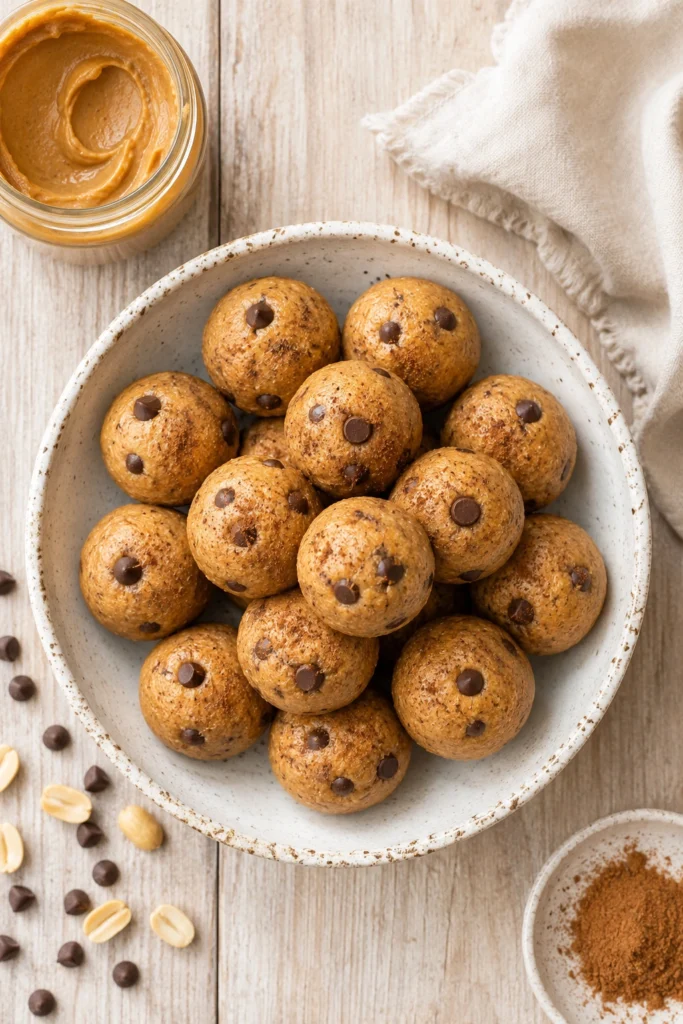
- Roll into balls. Remove from the freezer and scoop the dough into 12 to 24 equal portions. Dampen your hands slightly and roll each portion into a smooth ball about one inch in diameter.
- Store and enjoy. Place the finished protein balls in an airtight container and refrigerate for up to one week. They can also be frozen for up to three months.
Variations and Tips for Every Diet
Make Them Vegan
Swap the honey for maple syrup and use dairy-free dark chocolate chips. Every other ingredient is already plant-based.
Make Them Nut-Free
Use sunflower seed butter in place of peanut butter and finely ground oat flour in place of almond flour. This makes them safe for school lunchboxes in nut-free environments.
Add Extra Nutrition Boosts
Stir in a tablespoon of chia seeds or ground flaxseed for added fiber and omega-3s. A tablespoon of unsweetened cocoa powder turns them into double-chocolate protein bites. Old-fashioned oats can replace part of the almond flour for a chewier, heartier texture.
Pro Tips
- Use a small cookie scoop for perfectly even balls every time.
- Roll finished balls in shredded coconut or crushed peanuts for a fun, aesthetic presentation on a snack plate.
- These freeze beautifully — make a double batch and keep extras in the freezer for easy grab-and-go snacks all month.
- For kids and toddlers, use mini chocolate chips so the pieces are smaller and easier to eat.
FAQs About These Healthy Snack Protein Balls
Q: How long do peanut butter protein balls last in the fridge? Stored in an airtight container, they keep well in the refrigerator for up to one week. They are ideal for meal prep because you can make a whole batch on Sunday and have homemade healthy snacks ready all week.
Q: Can I freeze these protein balls? Yes, they freeze perfectly for up to three months. Lay them in a single layer on a baking sheet to freeze solid first, then transfer to a freezer bag or container. Thaw in the fridge overnight before eating.
Q: Can I use chocolate protein powder instead of vanilla? Absolutely. Chocolate protein powder gives these a rich double-chocolate flavor that is totally delicious. The rest of the recipe stays the same — just adjust sweetness to taste.
Q: Are these protein balls good for kids and toddlers? They are one of the best lunchbox and after-school snack ideas for kids. They are naturally sweet, free from refined sugar when made with honey, and easy for small hands to hold. For toddlers, use mini chocolate chips and make slightly smaller balls for appropriate portion sizes.
No Bake Peanut Butter Chocolate Chip Protein Balls
Equipment
- mixing bowl
- whisk
- rubber spatula
- measuring cups
- measuring spoons
- small cookie scoop optional
- airtight storage container
Ingredients
- 1 cup almond flour
- 1 cup vanilla protein powder
- 1/2 tsp ground cinnamon
- 1/2 cup natural creamy peanut butter
- 3 tbsp honey
- 4-6 tbsp unsweetened almond milk
- 1 tsp vanilla extract
- 1/3 cup mini dark chocolate chips
- 1/4 tsp fine sea salt
Instructions
- Add the almond flour, vanilla protein powder, and ground cinnamon to a medium mixing bowl. Whisk together until evenly combined and free of lumps.
- Add the peanut butter, honey, almond milk, and vanilla extract. Stir with a spoon or spatula until a soft dough forms.
- Fold the dark chocolate chips evenly throughout the dough.
- Add sea salt and test the dough consistency. If too dry, add a little more almond milk. If too wet, add a small amount of almond flour.
- Place the bowl in the freezer for 25 minutes to firm up the mixture.
- Remove from the freezer and divide the dough into 12 equal portions. Roll each portion into a smooth ball about 1 inch in diameter.
- Transfer to an airtight container and refrigerate until ready to serve.